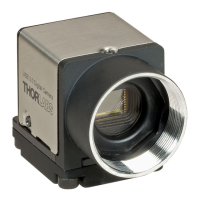
84 DCx camera
© 2010 Thorlabs
7
SDK (Software development Kit)
7.1
Quick-Start
The DCx camera API offers you over 150 commands with which you can access all the parameters
and functions of your DCx camera camera. As complicated as that may sound, it is really quite easy
to get your first own DCx camera program up and running in a short time. Just follow the six main
steps outlined in this quick start guide.
Open (initialize) the camera
Connect your DCx camera camera with the PC. The is_InitCamera() function initializes the
DCx camera camera. The camera is assigned a unique handle through which it is accessed in
subsequent function calls.
Select a display mode
The DCx camera API provides two different modes you can use to display the camera's images on
the PC. To quickly show a live image under Windows, it is easiest to use the Direct3D mode .
This mode has the advantage that no image memory has to be allocated, and that image capture is
handled by the driver. Call is_SetDisplayMode() to select the display mode. You can then
customize the Direct3D mode by using is_DirectRenderer() .
For advanced users:
You can also access the image data directly by selecting the Bitmap (DIB) mode. To use DIB
mode, you first have to allocate one or more memories by using is_AllocImageMem() , add them
to a memory sequence , if required, and then activate a memory with is_SetImageMem()
before each image capture. To show the image on-screen, call the is_RenderBitmap() function
after each completed image capture. From the events or messages you can see when an image
is available for display.
Under Linux:
The display functions of the DCx camera API are not available under Linux. You need to allocate and
activate the relevant image memory as described above. The application then displays the image
data via the Linux function library used.
Capture images
Recording live images with the DCx camera is very simple. Just call the is_CaptureVideo()
function and the camera captures the live images at the default frame rate. To capture single frames,
use the is_FreezeVideo() function. Every DCx camera camera of course also provides different
trigger modes for image capture. Use is_SetExternalTrigger() to activate the desired mode
before starting the image capture.
Adjust the frame rate, brightness and colors
All function calls with which you can change camera settings start with is_Set. To change the
frame rate, for example, you call is_SetFrameRate() . Image brightness is adjusted through the
exposure time set with is_SetExposureTime() . You can also implement automatic control
of image brightness and other parameters by using is_SetAutoParameter() .
If you are using a color camera, you should activate color correction in order to achieve rich vibrant
colors for on-screen display (is_SetColorCorrection() ). To adapt a color camera to the
ambient light conditions, it is essential to carry out white balancing. This is also done using the
192
55
246
130
119
89 270
205
100
124
148
253
259
251 112
221
239

 Loading...