Model: CD-36D 8.2 Installation of Transmitter
-
35
-
8.2 Installation of Transmitter
(1) Selection of Installation Site for the Transmitter
Select the installation site for the Transmitter taking into account the following conditions.
(a) The place should be free from mechanical vibration.
(b) The surrounding temperature should be within the range indicated in the specifications and the
temperature should not suddenly change or should not locally rise.
(c) The Transmitter should be readily accessible for operation and maintenance, and there should be
ample space for maintenance work.
(d) Explosive gas, corrosive gas, or flammable gas environment.
(e) The Transmitter should not be directly exposed to seawater or chemicals.
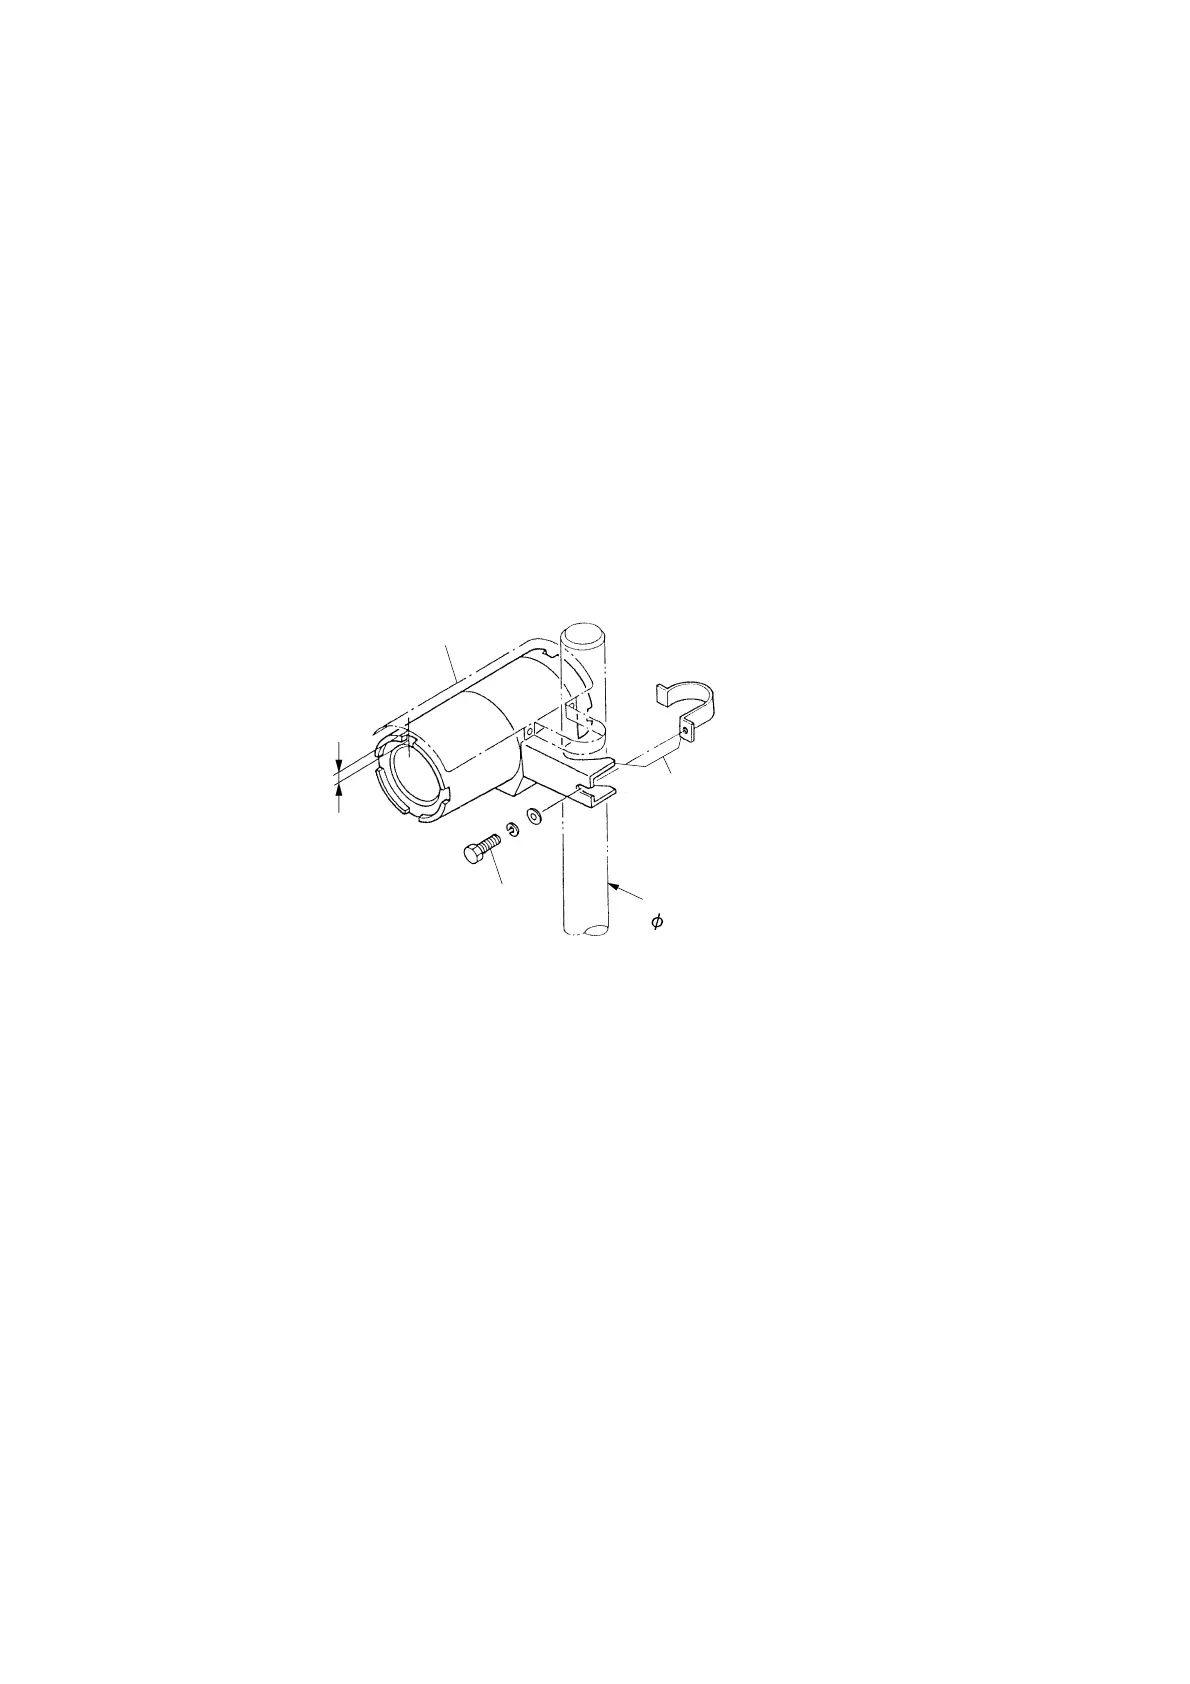
(2) Installation Method
Hood (option)
10 to 20mm
Fixing Bolt
Fittings for Installation
The fittings for installation can be fixed
on the left-hand side of the Transmitter.
50A Pipe or equal
( 60.5)
Installation of the Transmitter
〔NOTE〕 • The same screw hole (M5x4) is provided both in the right and left of the case so that the
fittings can be attached to either the right or left. Attach the fittings for installation to
whichever is easier to carry out maintenance work.
(a) Loosen the fixing bolt and install the fittings to a 50A steel pipe (60.5mm in outer diameter) as
shown in the figure above and set the Transmitter so that the axial direction of the Transmitter
main body will be horizontal then tighten the fixing bolt.
(b) Set the Transmitter at a level of 1.3 to 1.5m above the floor for easy operation and maintenance
work.
(c) Allow some space of at least 30cm around the Transmitter for easy maintenance work.
(d) Allow additional space of 10 to 20cm above the Transmitter in case a hood (option) to protect from
rain is to be fixed on the Transmitter.