EasyManua.ls Logo

Toptech MultiLoad II EXL User Manual

Toptech MultiLoad II EXL
83 pages
To Next Page IconTo Next Page
To Previous Page IconTo Previous Page
Page #65 background image
CHAPTER 6 CONFIGURATIONS
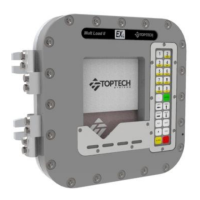
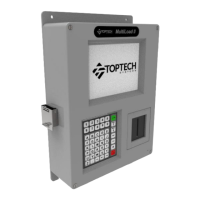
65 MultiLoad II/ RCU II Explosion Proof Lite (EXL) Installation Guide - Part # 6070
Verifying Communications between MultiLoad II/ RCU II and I/O Board
1) Enter program mode by pressing 00000 on the keypad, then press Next key.
2) Select diagnostics from main menu:
MultiLoad II
RCU II
3) For MultiLoad II, select FCM COM. For RCU II, select RCU:
MultiLoad II
RCU II
4) If screen displays “00-OK” (or “I/O Board Com: OK” for the RCU II), the I/O board is communicating
with the MultiLoad II or RCU II.
5) If the I/O board is not communicating the message “00-ERR” appears (or “I/O Board Com: ERR” for
the RCU II).
6) If 00-ERR (or “I/O Board Com: ERR”) appears, verify the communication parameters for Com0
within the Communication Setup Menu. This menu is located under the Configuration Menu. The
Com0 communication settings required for the I/O board are .57.6 (K Baud), None (Parity), 8 Data
(bits), 1 Stop (bit), Single, and I/O Board (type of serial device). This is correctly set in the factory
when an RCU II is assembled, but it is possible for the settings to be updated by the installer.
D I A G N O S T I C S M E N U
Card Reader Preset
COM Loopback Meters
Serial Ports Components
PTB Serial Test Additives
Network Test Sampler
Keypad Custom Logic
Display Modbus Device
Unicode Thread Info
FCM Com SD Card
PCM Com
FCM Health
PCM Health
RCU
Bay
Next Prev Exit Enter
D I A G N O S T I C S M E N U
Card Reader
COM Loopback
Serial Ports
Network Test
Keypad
Display
Unicode
RCU
Next Prev Exit Enter
000 FCM COM DIAGNOSTICS
00-Ok
Exit
RCU I/O DIAGNOSTICS
I/O Board Com: Ok F/W Rev: 033
Timeouts: 000000003 Com Lost: 000000001
[1]AC Output 0 - OFF DC Input 4 OFF
[2]AC Output 1 - OFF DC Input 5 OFF
[3]AC Output 2 - OFF DC Input 6 OFF
[4]AC Output 3 - OFF DC Input 7 OFF
[5]AC Output 8 - OFF DC Input 9 OFF
[6]DC Output 10 OFF Counter 4 - 00000
[7]DC Output 11 OFF Counter 5 - 00000
[8]DC Output 12 OFF Program Key OFF
W&M Key OFF
Battery @ 36C 3.24V
Battery 100%
Exit Clear

Table of Contents

Question and Answer IconNeed help?

Do you have a question about the Toptech MultiLoad II EXL and is the answer not in the manual?

Toptech MultiLoad II EXL Specifications

General IconGeneral
BrandToptech
ModelMultiLoad II EXL
CategoryController
LanguageEnglish

Summary

Chapter 1 General Information & Warnings

Safety Warnings

Critical safety precautions for North American and ATEX/IECEX hazardous locations.

Electrostatic Discharge (ESD) Protection

Guidelines for handling components to prevent damage from electrostatic discharge.

Chapter 2 Operating Conditions and Components

Operating Characteristics

Key operational specifications and electrical ratings for internal I/O options.

Chapter 3 Installing the MultiLoad II/RCUII EXL

Mounting the DIV-2 Enclosure

Guidelines and suggestions for mounting the EXL enclosure on various surfaces.

Electrical Supply Connections

Instructions for connecting AC and DC power supplies, including cable gland details.

Chapter 4 Data Communications Interface

Communications Protocols and Wire Specs

Details on RS-422/485 and RS-232 protocols, including wire requirements.

Communication Connection Wiring

Wiring connections for specific communication protocols like FCM.

Host/TMS Communications

Methods for connecting host/TMS computer systems via various communication ports.

Host Ticket Printer/Data Logger Connections

Connection options for ticket printers and data loggers via RS232 or Ethernet.

Chapter 5 Connecting Field Devices to the I/O Board

Available I/O Points per Board

Quantities and electrical ratings of I/O points for Digital/Analog and 2 Meter I/O boards.

Terminal Arrangements per Board

Terminal block assignments for the Digital/Analog I/O Board (IO_DA).

How to Connect and Wire Field Devices

Examples of wiring common field devices to the I/O boards.

Flow Meter and Control Valve Wiring

Wiring diagrams for connecting flow meters and control valves.

Additive Wiring: Outputs

Diagrams for connecting additive injection outputs to the I/O board.

Chapter 6 Configurations

Switch Access Control

Details on switches that limit access to program mode and W&M parameters.

Verifying Communications

Steps to verify communication between MultiLoad II/RCU II and the I/O board.

Chapter 7 Service and Repair

CPU Subassembly Removal and Replacement

Procedure for removing and replacing the CPU chassis, boards, and optional I/O board.

Display Subassembly Removal and Replacement

Procedure for removing and replacing the display module and its associated cables.

Keypad Removal and Replacement

Procedure for removing and installing the unit keypad and bezel.

Keypad Barrier Removal and Replacement

Procedures for removing and replacing keypad barrier versions 1.1 and 2.0.

Card Reader Removal and Replacement

Procedure for removing and installing the EXL Prox Card Reader.

W&M Switch Assembly Removal and Replacement

Procedure for replacing the W&M switch assembly.

Chapter 8 Hardware Revision History & Compatibility

Chapter 9 Revision History

Related product manuals