54-EN
No. Terminal Description
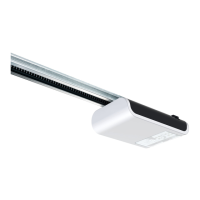
1 Overview of terminal assignment at the drive head
1 J Plug base for radio receiver
2 E Connector for antenna. When using an external antenna, the shield must be
placed on the left adjacent terminal (F).
3 F Connector for external pulse generator (accessories, e.g. key switch or code
keypad)
4 G Connection for wicket door contact (accessory) or emergency stop. The drive
is stopped or the start-up is suppressed via this input. (see also chapter
Special settings, menuH: STOP-A settings)
5 G / H Connection for photoelectric sensor LS2 (please refer to the connection
points of the photoelectric sensor manual for use of other photoelectric
sensors)
6 I / H Connection for 4-wire photoelectric sensor (e.g. LS5). This input activates the
automatic reversal of the drive during closing.
7 I Connection for e.g.24V signal light (accessory). Power supply 24VDC,
max. 100mA (switched)
Caution! Do not connect a push button!
8 K Connection for external, protectively insulated lighting or signal lamp
(protection classII, max.500W) (accessory)
9 F / I Power supply 24VDC max. 100mA (permanent)
10 P Connection for Mobility Module (accessory)
11 L Connection for staircase control device, potential-free relay contact,
250VAC/ 5A
12 M Status message doorOPEN
Connection for traffic light control, potential-free relay contact 120VAC/
0.5A or 24VDC/ 1A
13 N Status message doorCLOSED
Connection for traffic light control, potential-free relay contact 120VAC/
0.5A or 24VDC/ 1A
14 O Input for optical closing edge safety deviceOSE or electrical contact strip8k2
4.6.2 Pulse generator and external safety devices
In situations of increased requirements in terms of personal protec-
tion, we recommend, in addition to the internal power limitation of
the drive, the installation of a 2-wire photoelectric sensor. The in-
stallation of a 4-wire photoelectric sensor serves purely for the pro-
tection of property. For further information on our range of ac-
cessories, please refer to our sales literature or consult your spe-
cialist dealer.
NOTICE
Before using the drive for the first time, test it to make sure that it is
working properly and safely (see chapter Maintenance/ Checks)