Workman 1100/1110/2100/2110 Page 7 -- 39 Chassis, Wheels, and Brakes (Rev. B)
Assembly (Fig. 25)
1. Coat round piston with a small amount of silicone
grease and coat square s eal with clean brake fluid.
2. Install square seal and round piston into cover.
3. Insert o--ring into bore of caliper housing.
4. Coat housing bore with a small amount of silicone
grease. Insert oval piston into housing with logo on pis-
ton face orientated to the r ubber spring side of the hous-
ing.
5. Rotate round piston so the piston slot will mate with
oval piston boss.
6. Position gasket and cover to housing. Secure cover
to housing with four cover screws. Torque screws from
72 to 94 in--lb (8.1 to 10.8 N--m).
7. If removed, press piston plugs into oval piston and
place rubber springs to housing.
8. Apply light coat of grease to rubber springs.
9. Place outer and inner brake pads to caliper assem-
bly.
10.Push caliper on to bracket rails being careful not to
damage rubber springs.
Front Brake Caliper Service (Workman 1110 and 2110) (Serial Number Above 240000000)
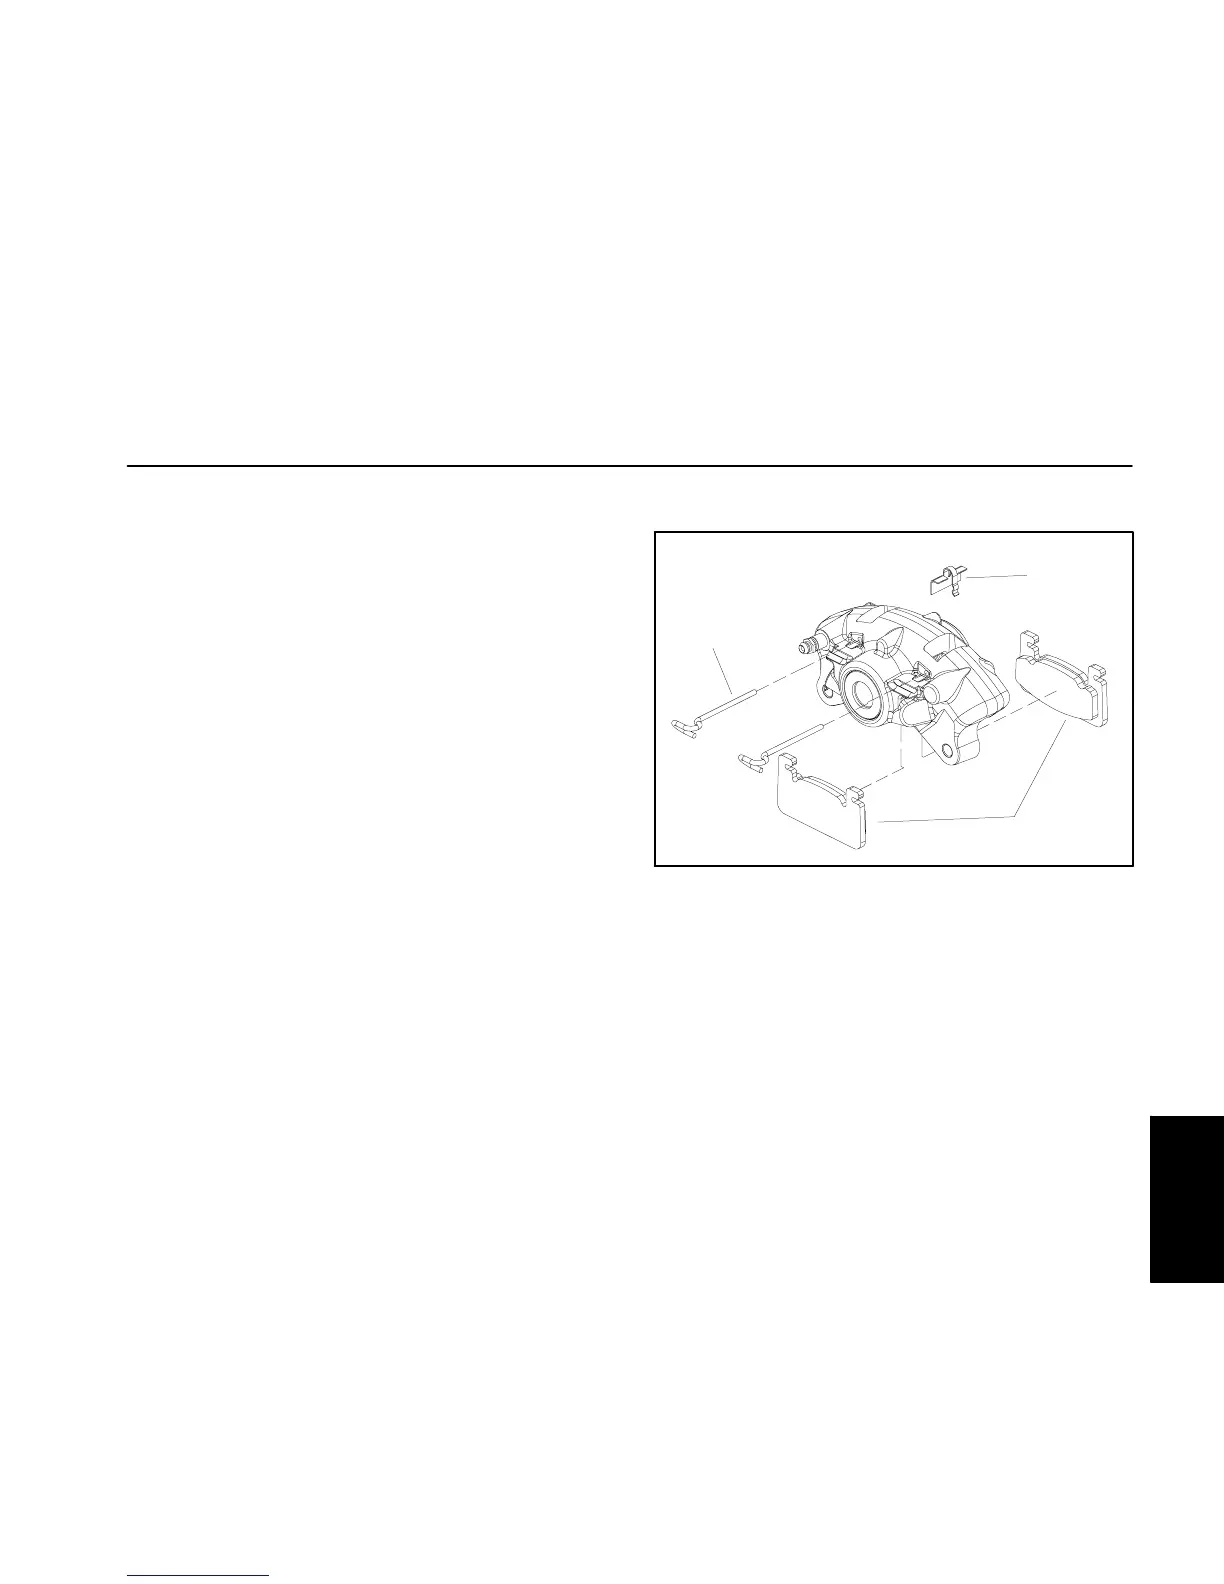
Disassembly (Fig. 26)
1. If caliper is equipped with anti--rattle clip, r emove clip
from caliper, pins and brake pads.
2. Remove pins from caliper by prying with a flat blade
screwdriver through loop in pins.
3. Slide brake pads from caliper. For assembly pur-
poses, note orientation of inner and outer pads as the
pads are not the same.
4. Replace the brake pads if the friction material is worn
to less than 1/32” (0.8 mm).
Assembly (Fig. 26)
1. If brake pads are being replaced, it will be necessary
to push caliper pistons back into the caliper bore before
installing new pads.
2. Slide brake pads into caliper. Make sure that lining
material on pads is toward brake rotor position.
3. Secure pads into caliper with two (2) pins. Make sure
that pins snap into caliper slots.
4. If caliper is equipped with anti--rattle clip, install clip
to caliper, pins and brake pads.
1. Brake pad
2. Pin (2 used)
3. Clip (if equipped)
Figure 26
1
2
3
and Brakes
Chassis, Wheels,
Rev. C
 Loading...