EngineMaintenance
CheckingtheAirCleaner
1.Checktheair-cleanerbodyfordamage,which
couldpossiblycauseanairleak.Replacea
damagedaircleanerbody.
2.Checkthewholecleanairintakesystemfor
leaks,damage,orloosehoseclamps.
3.Servicetheair-cleanerlterwhentheair-cleaner
indicator(Figure64)showsredorevery400
hours(morefrequentlyinextremelydustyor
dirtyconditions).
Important:Donotoverservicetheairlter.
g004501
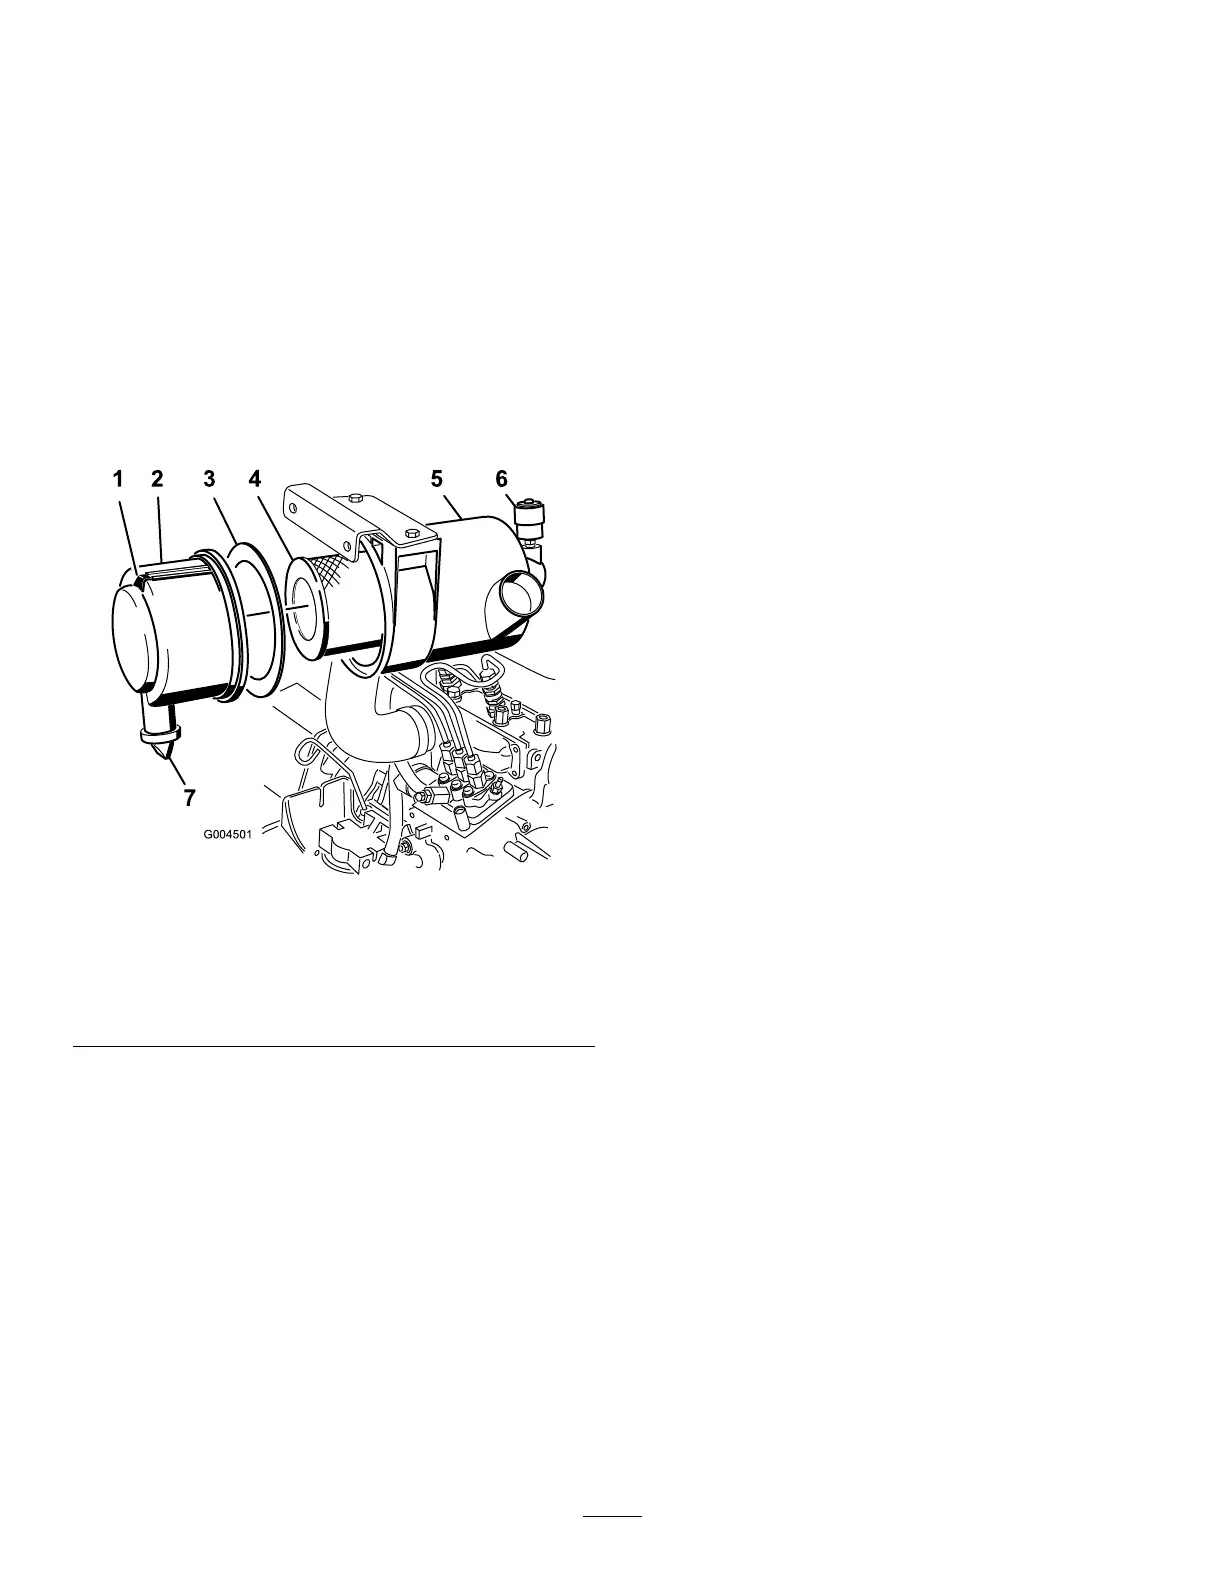
Figure64
1.Air-cleanercover5.Air-cleanerbody
2.Air-cleanerlatch6.Air-cleanerindicator
3.Gasket
7.Rubberoutletvalve
4.Filter
4.Besurethatthecoverisseatedcorrectlyand
sealswiththeair-cleanerbody.
ServicingtheAirCleaner
ServiceInterval:Every400hours
1.Pullthelatchoutwardandrotatetheair-cleaner
covercounter-clockwise(Figure64).
2.Removethecoverfromtheair-cleanerbody
(Figure64).
3.Beforeremovingthelter,uselowpressureair
(40psi,cleananddry)tohelpremovelarge
accumulationsofdebrispackedbetweenoutside
ofprimarylterandthecanister.
Note:Thiscleaningprocesspreventsdebris
frommigratingintotheintakewhenyouremove
theprimarylter.
Important:Avoidusinghigh-pressureair
whichcouldforcedirtthroughthelterinto
theintaketract.
4.Removeandreplacetheprimarylter(Figure
64).
Important:Donotcleantheusedelementto
avoiddamagetotheltermedia.
5.Inspectthenewlterforshippingdamage,
checkingthesealingendofthelterandthe
body.
Important:Donotuseadamagedelement.
6.Ensurethatthefoamgasketisinplaceinthe
coverandthatitisnottornordamaged(Figure
64).
Note:Ifitisdamaged,replaceit.
7.Insertthenewlterbyapplyingpressuretothe
outerrimoftheelementtoseatitinthecanister.
Important:Donotapplypressuretothe
exiblecenterofthelter.
8.Cleanthedirt-ejectionport(locatedinthe
removablecover)asfollows:
A.Removetherubberoutletvalvefromthe
cover(Figure64).
B.Cleanthecavity.
C.Replacetheoutletvalve.
9.Installthecoverorientingtherubberoutletvalve
inadownwardposition—betweenapproximately
5:00to7:00whenviewedfromtheend.
10.Resettheindicator(Figure64)ifitisshowing
red.
52