AdjustingtheBladePitch
Bladepitchisthedifferenceinheight-of-cutfromthe
frontofthebladeplanetothebackofthebladeplane.
Useabladepitchofapproximately8mm(5/16inch).
Thebackofthebladeplaneshouldbe8mm(5/16
inch)higherthanthefront.
1.Positionthemachineonalevelsurface.
2.Setthecuttingunittothedesiredheight-of-cut,
movethethrottlelevertotheSLOWposition,stop
theengine,settheparkingbrake,andremove
theignitionkey.
3.Rotatethecenterbladesothatitpointsstraight
forward.
4.Usingashortruler,measurefromtheoorto
thefronttipoftheblade.
5.Rotatethesamebladetiptotherearand
measurefromtheoortothetipofthebladeat
therearofthedeck.
6.Subtractthefrontdimensionfromtherear
dimensiontocalculatethebladepitch.
7.Adjustthejamnutssecuringthereardeck
yokes/chainstoraisetherearofthedeckso
thatthebladepitchissetto8mm(5/16inch)
(Figure99).
g004497
Figure99
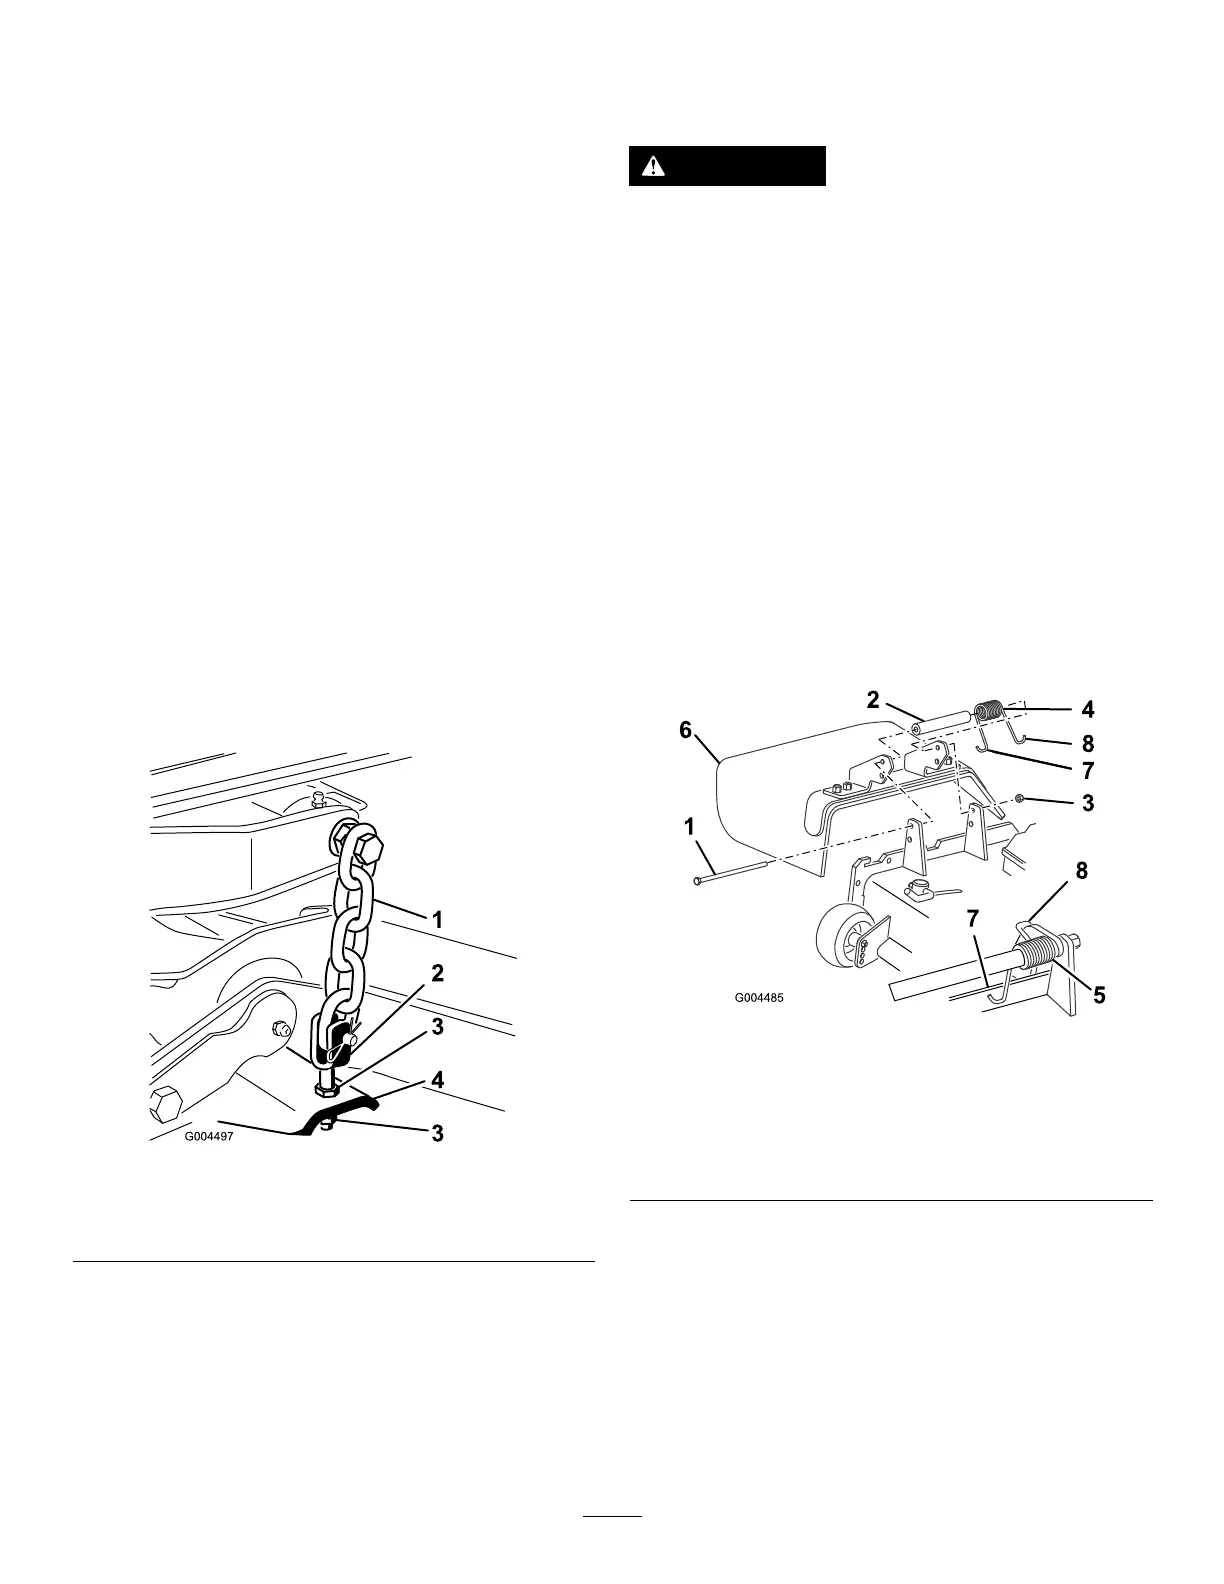
1.Chain
3.Jamnut
2.Yoke4.Mowerdeck
ReplacingtheGrass
Deector
WARNING
Anuncovereddischargeopeningcouldallow
thelawnmowertothrowobjectsatyouor
bystandersandresultinseriousinjury.Also,
contactwiththebladecouldoccur.
•Neveroperatethemachinewithoutamulch
kitorgrassdeectorinstalled.
•Makesurethatthegrassdeectorisinthe
downposition.
1.Lowerthecuttingunittotheshopoor,move
thethrottlelevertotheSLOWposition,stopthe
engine,settheparkingbrake,andremovethe
ignitionkey.
2.Removethelocknut,bolt,spring,andspacer
holdingthedeectortothepivotbrackets
(Figure100).
Note:Removedamagedorworngrass
deector.
g004485
Figure100
1.Bolt
5.Spring
2.Spacer6.Grassdeector
3.Locknut
7.Lefthookendofspring
4.Spring8.Righthookendofspring
3.Placethespacerandspringbetweenthe
replacementgrass-deectorbrackets(Figure
100).
Note:PlacetheleftJ-hookendofthespring
behindthedeckedge.
Note:MakesurethattheleftJ-hookendofthe
springisinstalledbehindthedeckedgebefore
installingtheboltasshowninFigure100.
4.Installtheboltandnut.
72