Installing the Full Bed
Note: If you are installing the bed sides on the at
bed, it is easier to install them before installing the
bed on the machine.
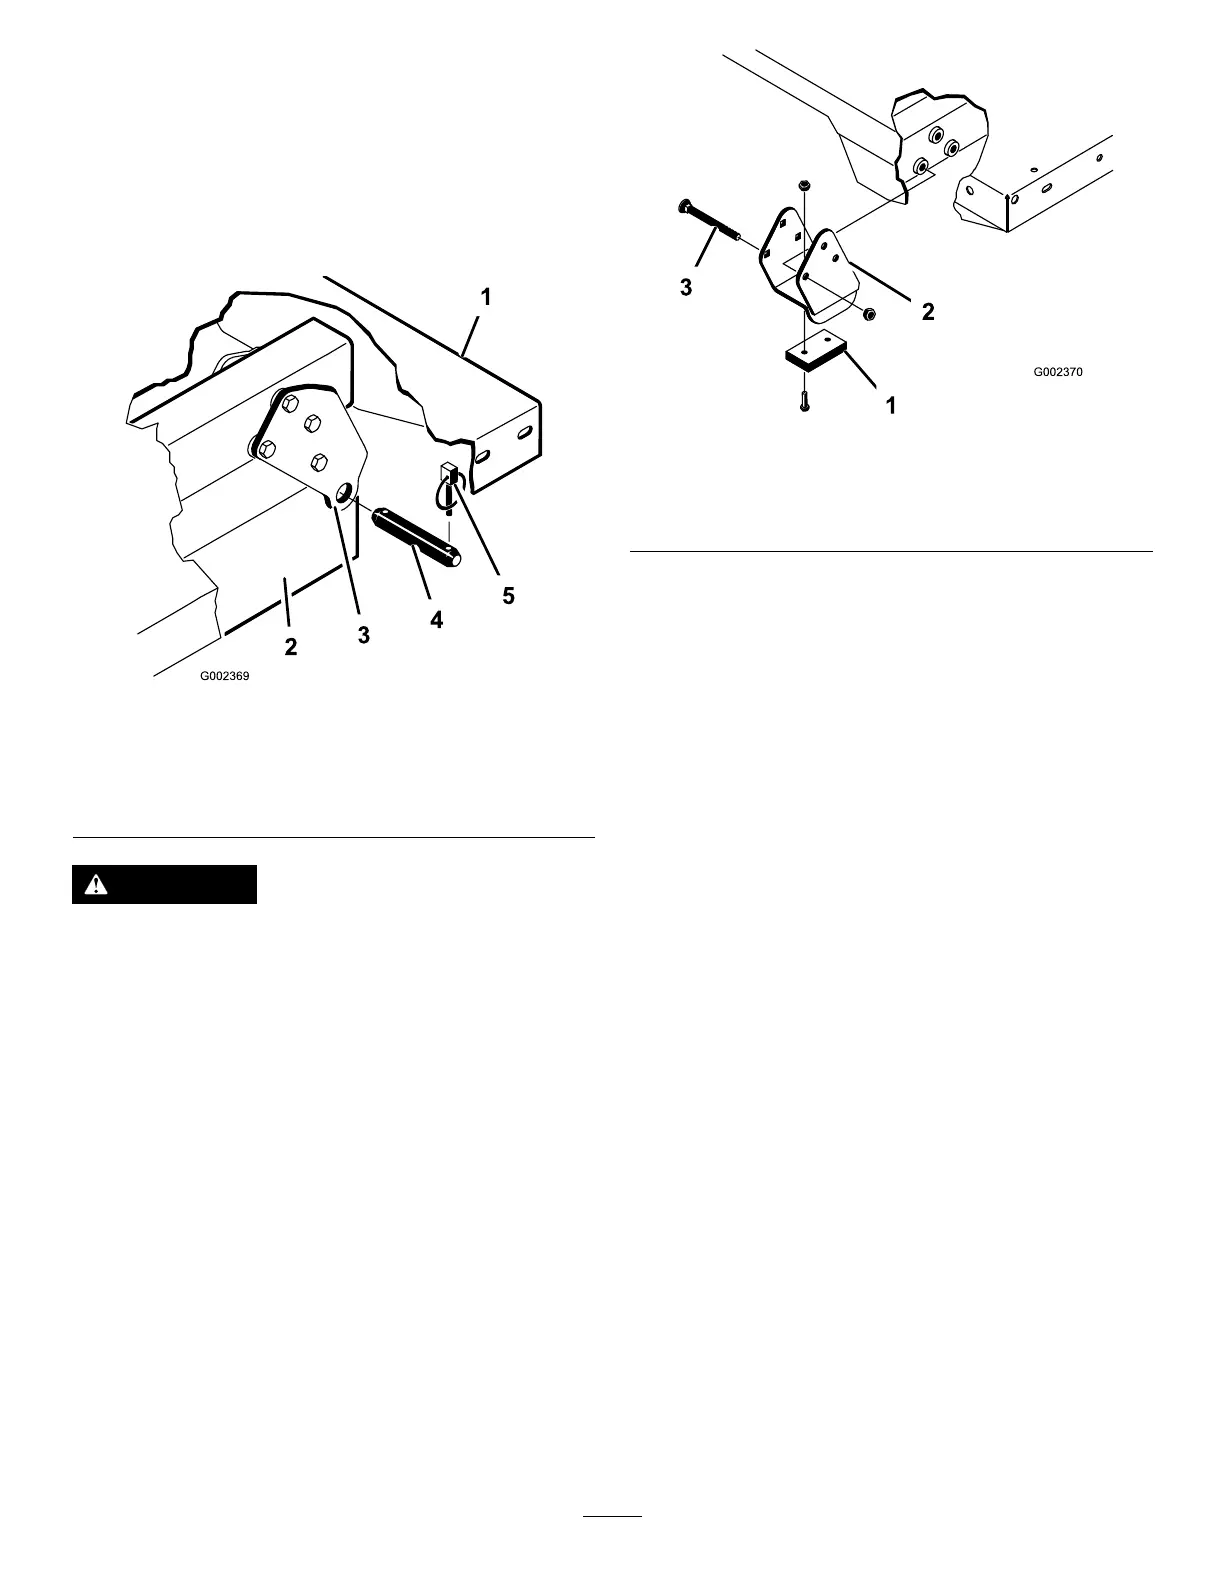
Ensure that the rear pivot plates are bolted to the bed
frame/channel so that the lower end angles to the rear
( Figure 24 ).
g002369
Figure 24
1. Left, rear corner of bed 4. Clevis pin
2. Machine frame channel
5. L ynch pin
3. Pivot plate
CAUTION
The full bed weighs approximately 148 kg
(325 lb), so do not try to install or remove it
by yourself.
Use an overhead hoist or get the help of 2 or 3
other people.
Ensure that the spacer brackets and wear blocks
( Figure 25 ) are installed with the carriage-bolt heads
positioned inside the machine.
g002370
Figure 25
1. W ear block
3. Carriage bolt
2. Spacer bracket
1. Ensure that the lift cylinders are fully retracted.
2. Carefully set the bed onto the machine frame,
aligning the rear bed pivot-plate holes with the
holes in the rear frame channel, and install the 2
clevis pins and lynch pins ( Figure 25 ).
3. With the bed lowered, secure each cylinder rod
end to the appropriate slots in the bed-mounting
plates with a clevis pin and lynch pin.
4. Insert the clevis pin from outside of the bed with
the lynch pin oriented toward the outside ( Figure
25 ).
Note: The rear slots are for a full bed
installation; the front slots are for a 2/3-full bed
installation.
Note: Y ou may need to start the engine to
extend or retract the cylinders for alignment with
the holes.
Note: Y ou can plug the unused slot with a bolt
and nut to prevent assembly errors.
5. Start the engine and engage the hydraulic-lift
lever to raise the bed.
6. Release the lift lever and shut of f the engine.
7. Install the bed-safety support to prevent
accidentally lowering the bed; refer to Using the
Bed Support ( page 35 ) .
8. Install the lynch pins to the inside ends of the
clevis pins.
Note: If the automatic tailgate release is
installed on the bed, ensure that the front dump
link rod is placed on the inside of the left clevis
pin before you install the lynch pin.
37