20
1. While in the User Menu mode, scroll to "A 14", and then scroll down once using the ZERO
key to the A14 U1 level.
2. Use the right arrow key (PRINT) to select the A 14 U1 or A14 U2 menu.
3. At the A14 Ux screen, scroll down once using the ZERO key to enter the edit output string
menu. The display will show the programming format, e.g., 00 49 where “00” is address 0 and
“49” is the current programming value in hex.
4. Use the right arrow key (PRINT) to increase the address by one. Use the left arrow key
(TARE) to decrease the address by one.
5. After selecting the address you wish to change, press the MODE key. The programming value
will start flashing. Increase the flashing digit by pressing the UNITS key. Decrease the flashing
digit by pressing the ZERO key. Pressing the PRINT key or the TARE key will change the
position of the flashing digit.
6. After setting the exact programming value, press the MODE key to save. The indicator will
automatically increment to the next address.
7. Repeat Steps 4 through 6 until the entire output string has been programmed.
8. Press the UNITS key to exit A14 menu mode.
You can find more information about this function in the Serial Port Information section of the
manual.
Entering the Batching (“B”) Menu
To access this menu, please follow these directions:
1. Unplug the indicator from the AC wall outlet.
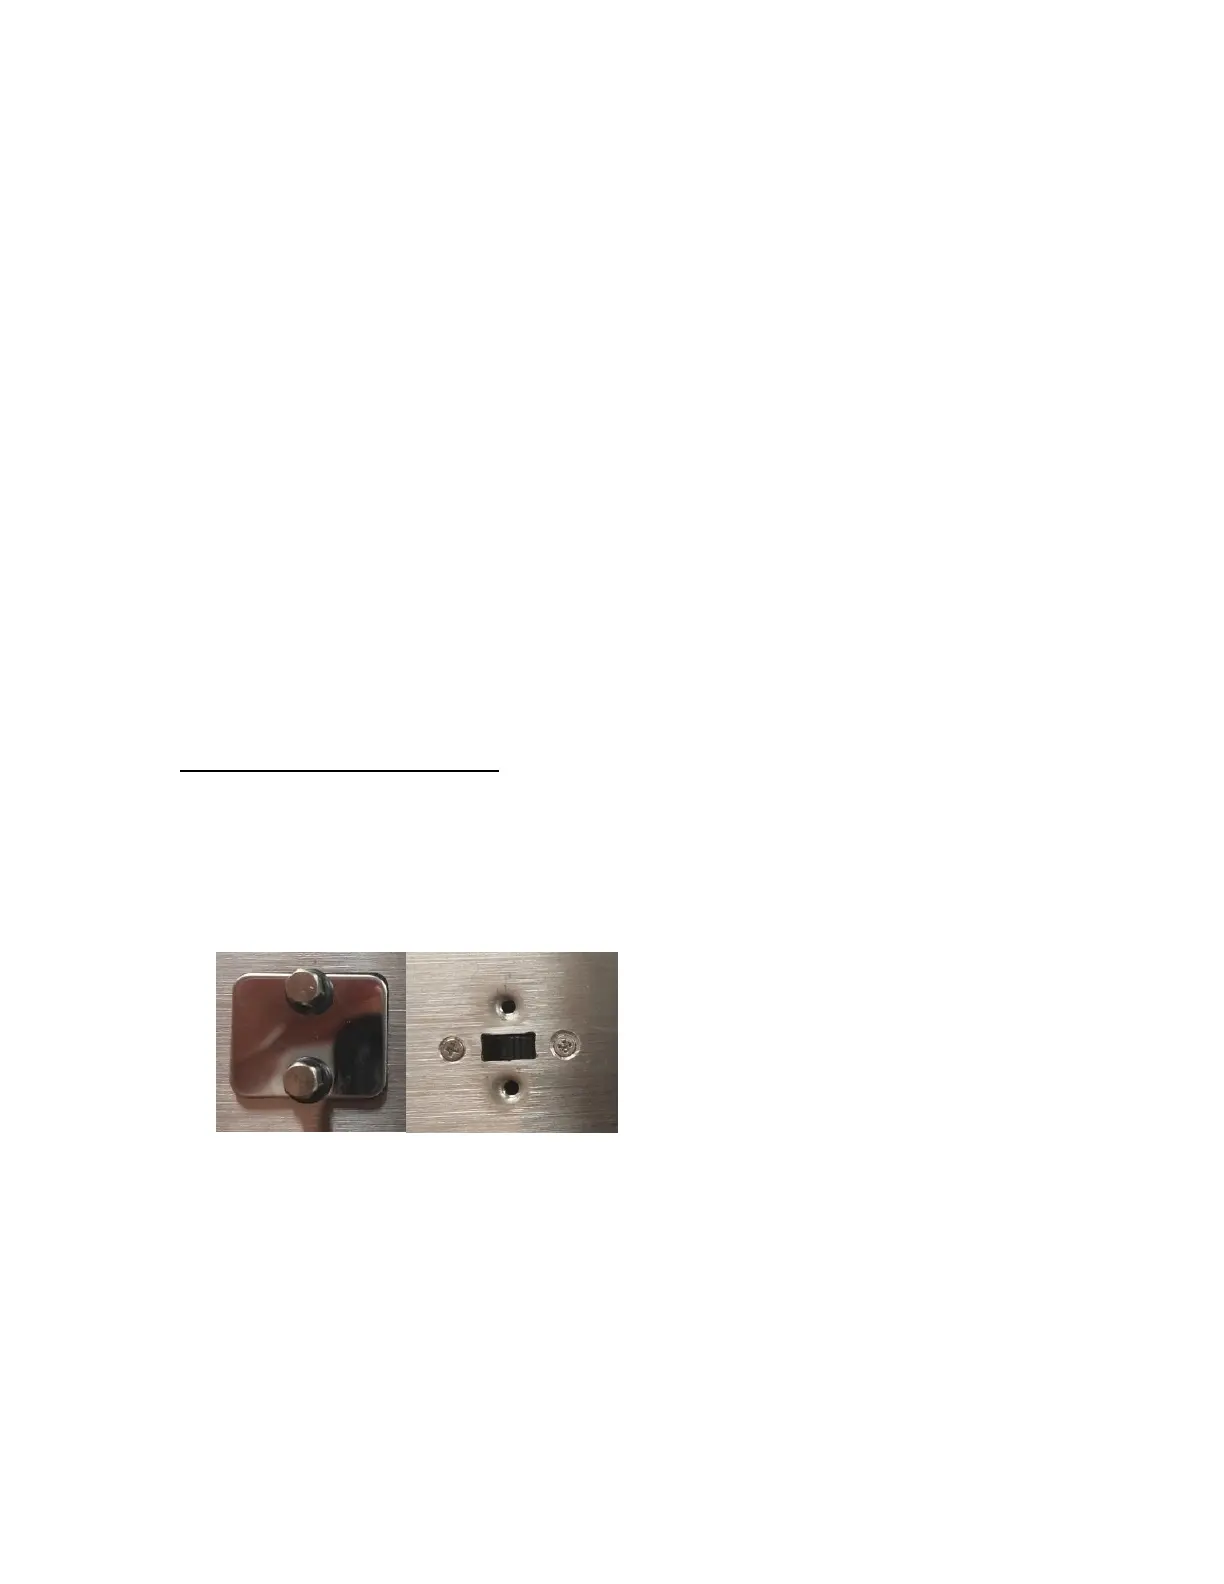
2. Locate the slide switch on the rear cover and move it to the opposite position.
NOTE: A metal plate conceals the slide switch; remove the two drilled-head fasteners and
cover plate to access the slide switch:
3. Plug in the indicator to the AC wall outlet. The display shows “PASS_”.
4. Key-in the password (1234) and then press Enter key. The display shows “b 1”.
5. Move from one “B” menu parameter to the next by using the TARE (left) or PRINT (right) keys.
For example, to go from B1 to B2, press the PRINT key. To go from B2 back to B1, press the
TARE key.
6. Once you have arrived at the proper “B” menu parameter, e.g., “B1”, press the
ZERO (down) key once to arrive at the selection level. The scale displays the current param-
eter setting.
7. If there is a selection list, scroll thru the available parameter settings, use the TARE (left) or
PRINT (right) keys. Otherwise, use the front panel numeric keys to key-in the new value.
 Loading...