16
Entering the User (“A”) Menu
To access this menu, please follow these directions:
1. Unplug the indicator from the AC wall outlet.
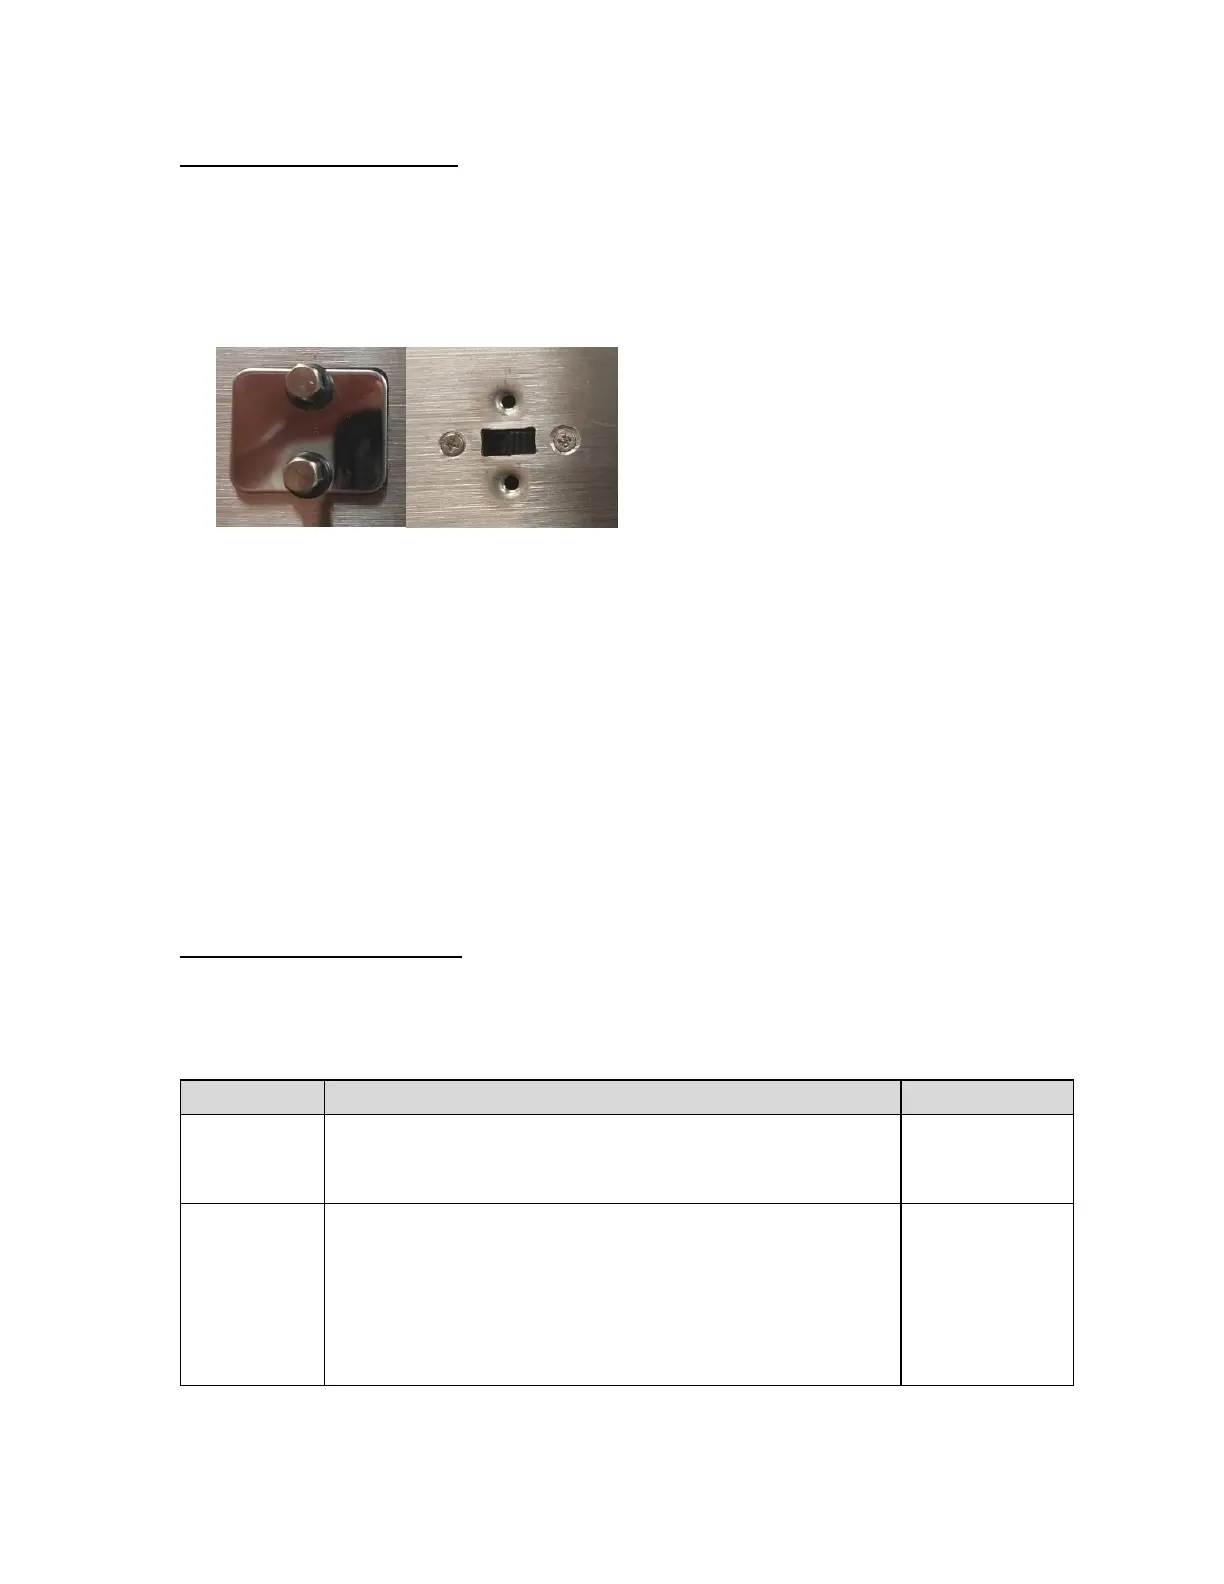
2. Locate the slide switch on the rear cover and move it to the opposite position.
NOTE: A metal plate conceals the slide switch; remove the two drilled-head fasteners and
cover plate to access the slide switch:
3. Plug in the indicator to the AC wall outlet. The display shows “PASS_”.
4. Key-in the password (1793) and then press Enter key. The display shows “A 1”.
5. Move from one “A” menu parameter to the next by using the TARE (left) or PRINT (right) keys.
For example, to go from A1 to A2, press the PRINT key. To go from A2 back to A1, press the
TARE key.
6. Once you have arrived at the proper “A” menu parameter, e.g., “A1”, press the
ZERO (down) key once to arrive at the selection level. The scale displays the current param-
eter setting.
7. If there is a selection list, scroll thru the available parameter settings, use the TARE (left) or
PRINT (right) keys. Otherwise, use the front panel numeric keys to key-in the new value.
8. Once the setting you want is displayed on the screen, press the MODE (set) key to save this
value and revert up to the parameter level, e.g.,” A1”.
User (“A”) Menu Descriptions
This section provides more detailed descriptions of the selections found in the User Menu Chart.
Factory-set defaults are shown in bold with a checkmark; (√).
Selects the number of data bits and parity of serial transmission. This
menu selection has two sub-menus: “A2U1” (COM1) and “A2U2”
(COM2), both with identical selections.
"8 n" = 8 data bits with no parity bit and one stop bit
"7 o" = 7 data bits with odd parity bit and one stop bit
"7 E" = 7 data bits with even parity bit and one stop bit
"7 n" = 7 data bits with no parity bit and two stop bits
 Loading...