1.1.5 Camera Controls
If equipped with multiple cameras, clicking on the camera button at the bottom of the video
window will switch cameras. The following camera controls are currently supported:
• Focus: for certain cameras, the focus bar can be used to manually adjust the focus
• FFC (short for Flat Field Correction): IR cameras commonly need a single point calibration to
deliver optimum image quality which is achieved by having the gimbal point inside itself and
calibrating the camera. The FFC button should be pressed each time the gimbal is powered
up and occasionally thereafter since IR imagery will deteriorate in quality over time or as the
camera temperature changes.
1.1.6 Recording & Playback
By clicking Record on the top menu bar, SkyLink will display a red circle in the top of the video
window and begin recording both video and telemetry to a subdirectory located in
C:\Trillium\Recordings\. Video and telemetry are embedded into a single .ts (transport stream)
file, the video portion of which can be replayed with common video players such as Windows Media
Player. SkyLink can be used to playback both video and all telemetry by clicking on Connection…
then Replay and selecting the desired file. Replay controls are displayed at the bottom of the video
window and all telemetry are populated including the map, allowing for detailed review after a
mission.
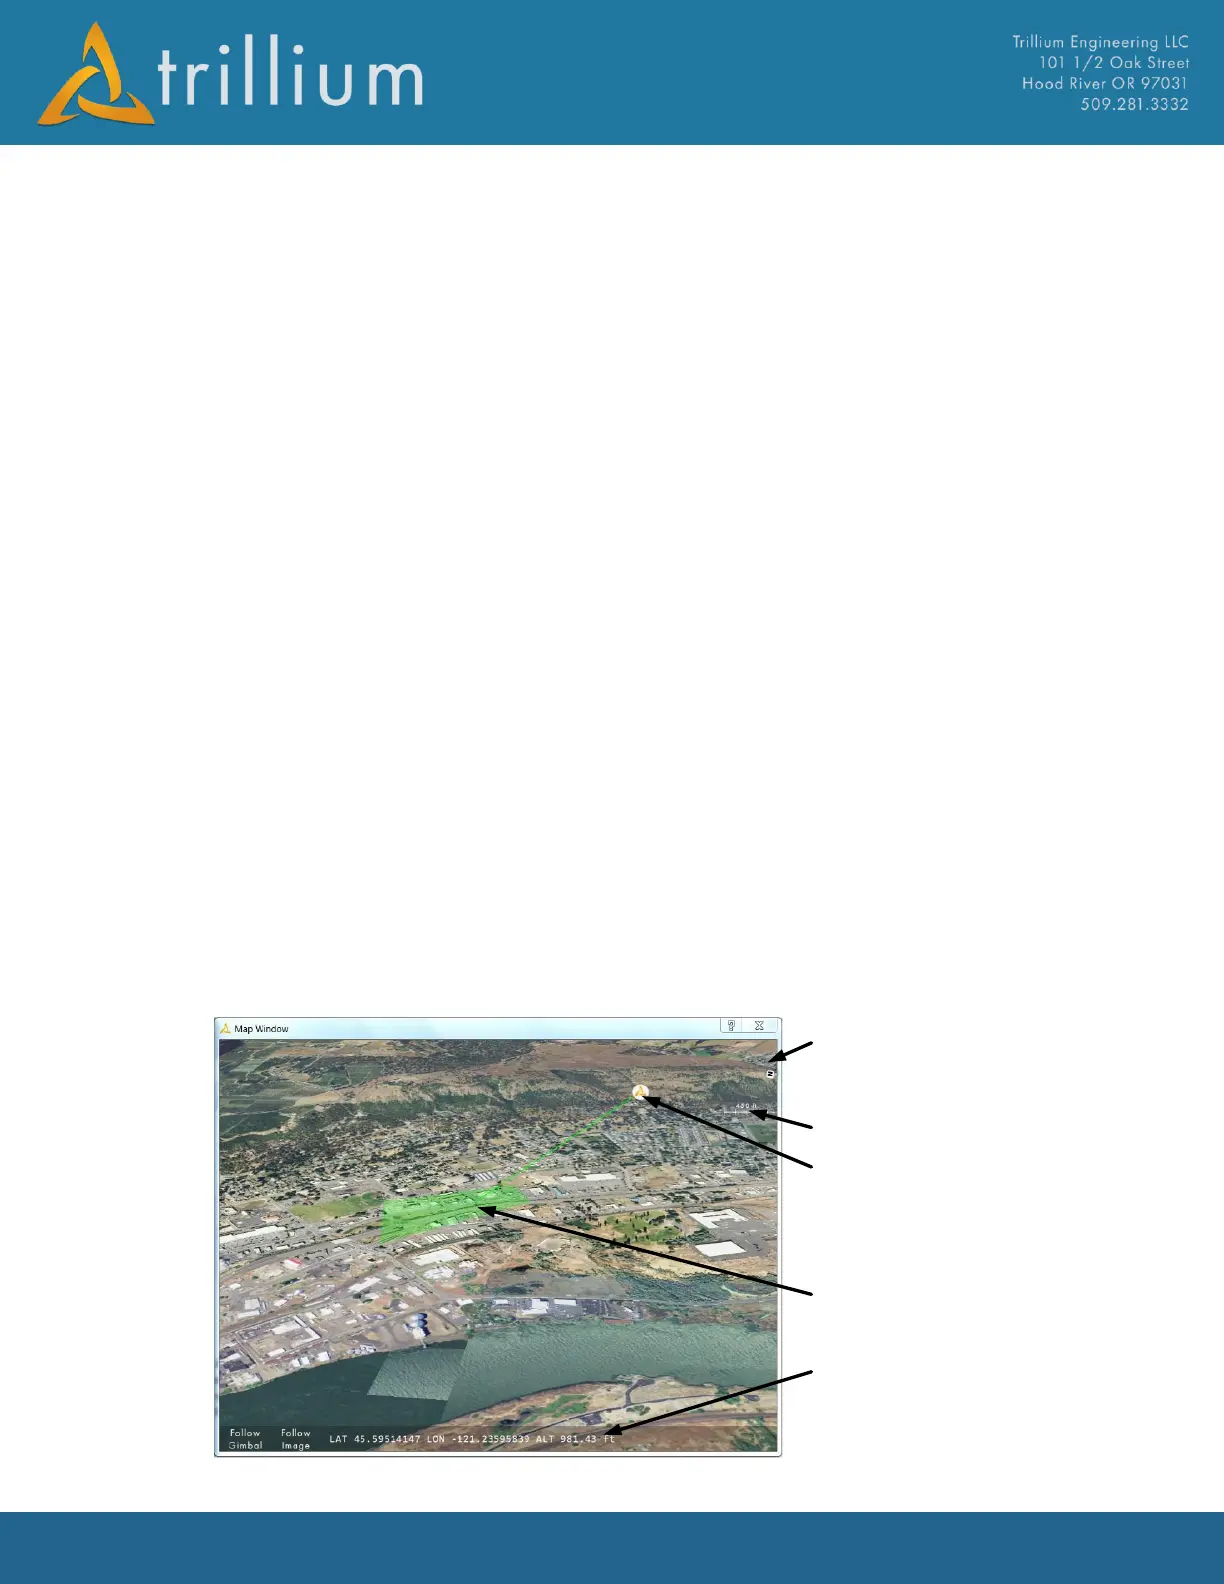
1.1.7 SkyLink Map
SkyLink’s full 3D map displays both the gimbal location and image position. The gimbal can be
directed to look at a given location by double clicking anywhere on the map. The map contains a
scale and compass rose in the upper right corner of the map window. The compass rose can be
used to rotate the map or orient North upwards by clicking on the N. By clicking on “Follow Gimbal”
or “Follow Image” at the bottom of the map, the map will be centered at either the gimbal location
or image location respectively. Latitude, longitude, and altitude (LLA) of the cursor are displayed at
the bottom of the map.