1 Quick Start Guide
This quick start section is intended for new users that either have a development kit or access to a
gimbal that has already been installed and tested in an aircraft. If a gimbal needs to be integrated
into an aircraft, please read the Gimbal Integration Guide section.
1.1.1 Installing SkyLink
SkyLink is Trillium’s user interface for Orion gimbals which can be downloaded from Trillium’s
website (http://w3.trilliumeng.com/downloads.html). The SkyLink application will install to
C:\Program Files (x86)\Trillium\SkyLink\ and will create a directory C:\Trillium\ where recorded
video, map imagery, and map elevation data are stored.
1.1.2 Connecting Communications and Video
Apply power to the gimbal. HD25, HD40 and HD45 gimbals require regulated 24VDC while HD50
and HD80 gimbals can accept 10V-30V power. Upon applying power, the gimbal will go through an
initialization sequence after which it will be ready to connect. The gimbal’s Ethernet connection
provides both video and communications, so the connection requires one of these network
configurations:
1. Direct Connect. Trillium gimbals have a default IP address of 169.254.87.45 if no IP
address is assigned by a DHCP server. For direct connect, plug the gimbal into a computer
and ensure a static IP address is not set; the computer will default to an address of
169.254.XXX.XXX after approximately a minute.
2. Dynamic IP. Trillium gimbals can accept an IP address by a DHCP server and SkyLink will
connect as long as it is on the same subnet as the gimbal.
3. Static IP. Trillium gimbals can be configured with a static IP address and SkyLink will
connect as long as it is on the same subnet as the gimbal.
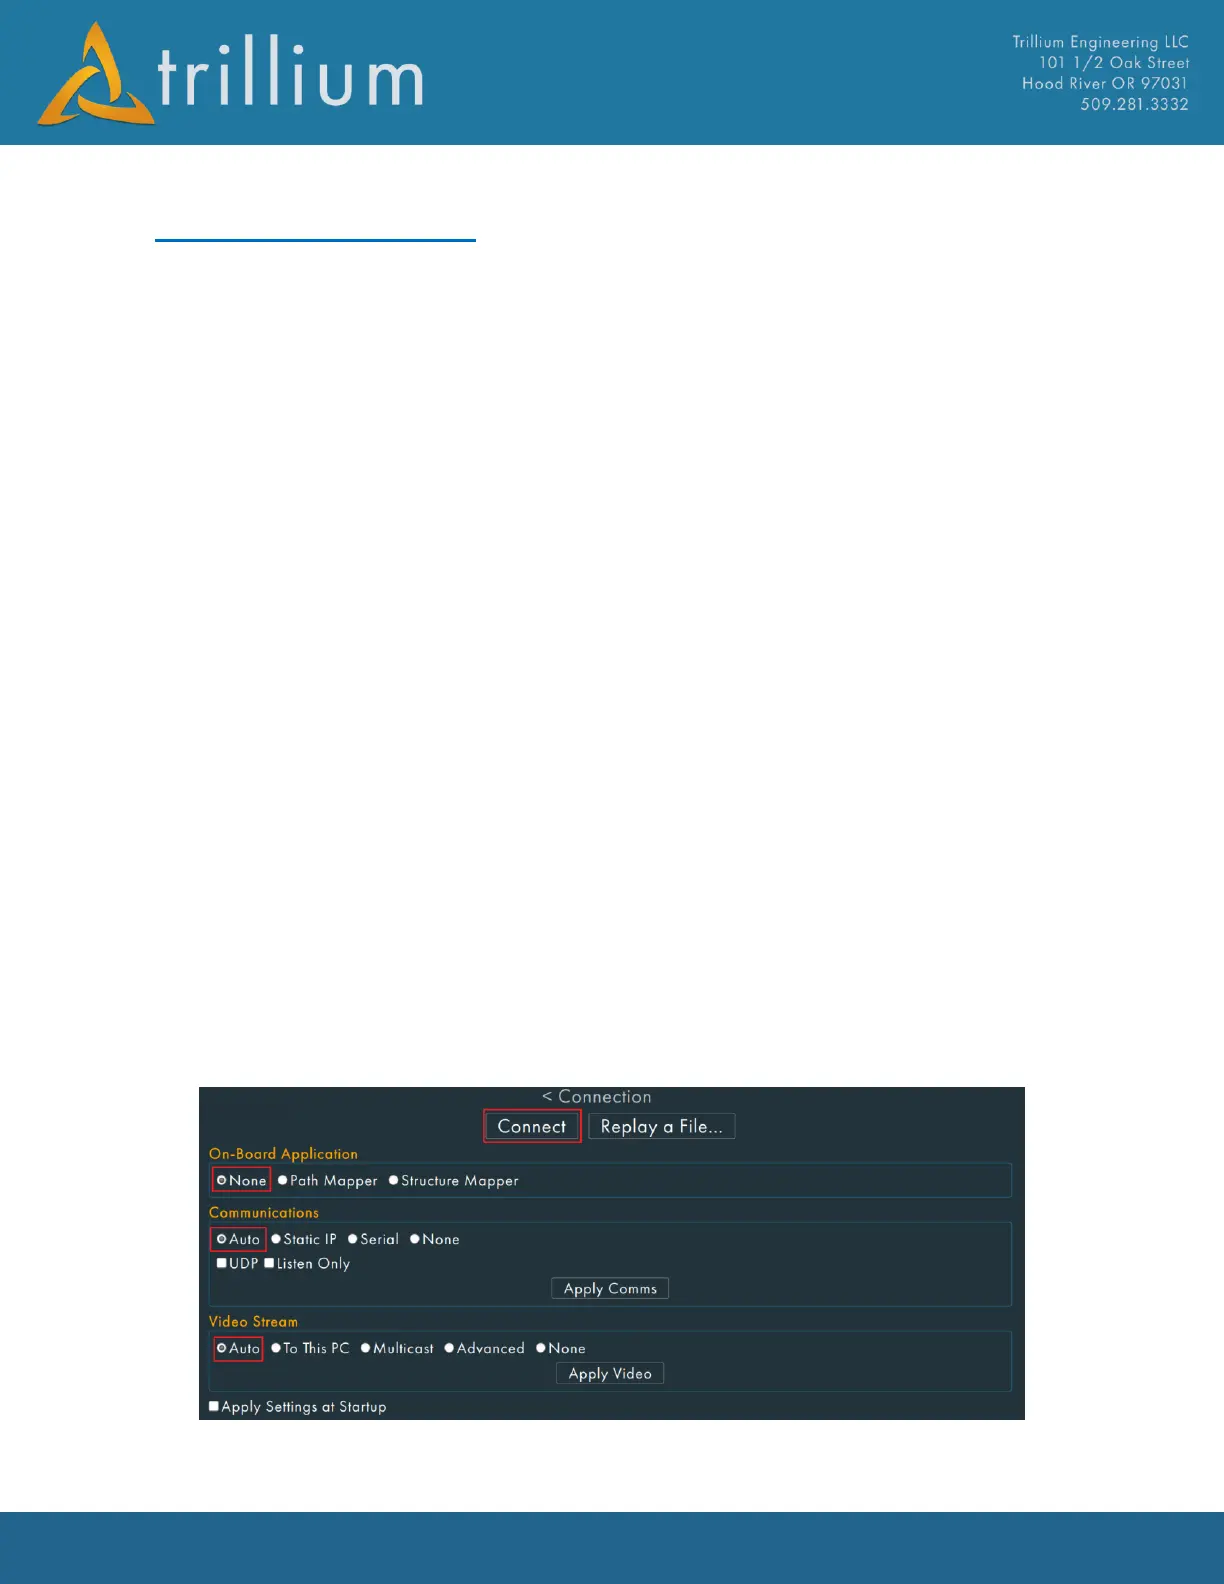
Launch SkyLink, ensure communications and video connections are set to Auto, On-Board
Application is set to None, then press Connect: