29
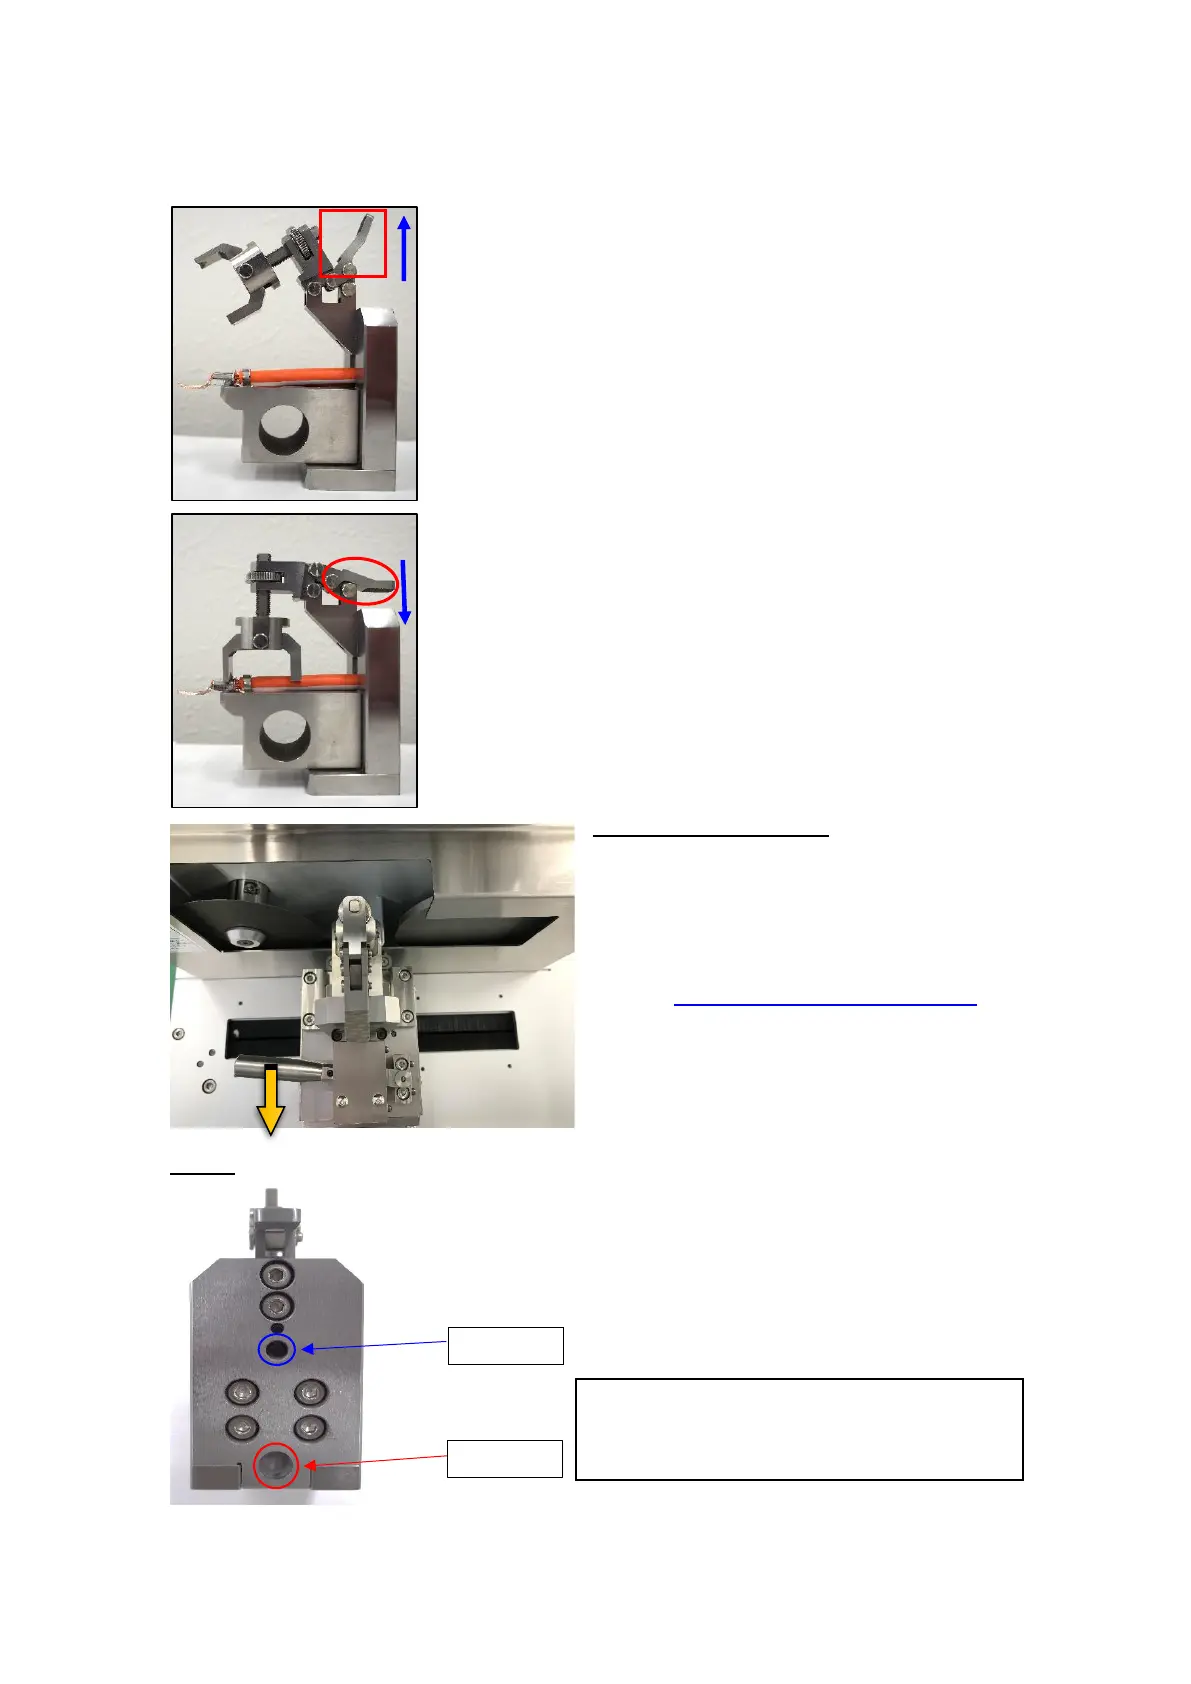
4. Next, pull the lever up again.
Rotate the screw clockwise one more time - about half of a
round (Max: 1 round only).
4. Finally, press the lever down again.
You will hear a slightly “tick”. This means the crimp is
completely tightened. Check the terminal again to see if it is
stable or not.
※When pressing the lever down, it may require a little force.
The more you rotate the screw at step 4, the more force you
have to use to push it down.
Therefore, do not rotate the screw too much.
At Clamp Transfer Unit:
Pull the lever down
→ Place the clamp on the transfer unit.
→ Release the lever.
6. Change the cutting position if necessary.
Refer to 4.2 Adjusting the cutting position
(page 12) for details.
7. Close the safety cover.
NOTE:
※Each type of clamp is designed to have 2
holes on its body:
● Fixing hole: Used when placing the clamp on
the transfer unit.
● Fitting hole: Used when placing the clamp on
the clamp holding stand.
Applicable wire AWG10 ~ AWG1/0
Wire max. protruding length from the clamp surface: Less
than 30mm
(Cut off the wire tip if it is more than 30mm)