56
9.8 Replacing the Printer
Caution!
Before starting, disconnect the instrument from the power source.
1. Take off the autoclave cover (see para. 9.2 “Removing the
Autoclave’s Outer Covers”).
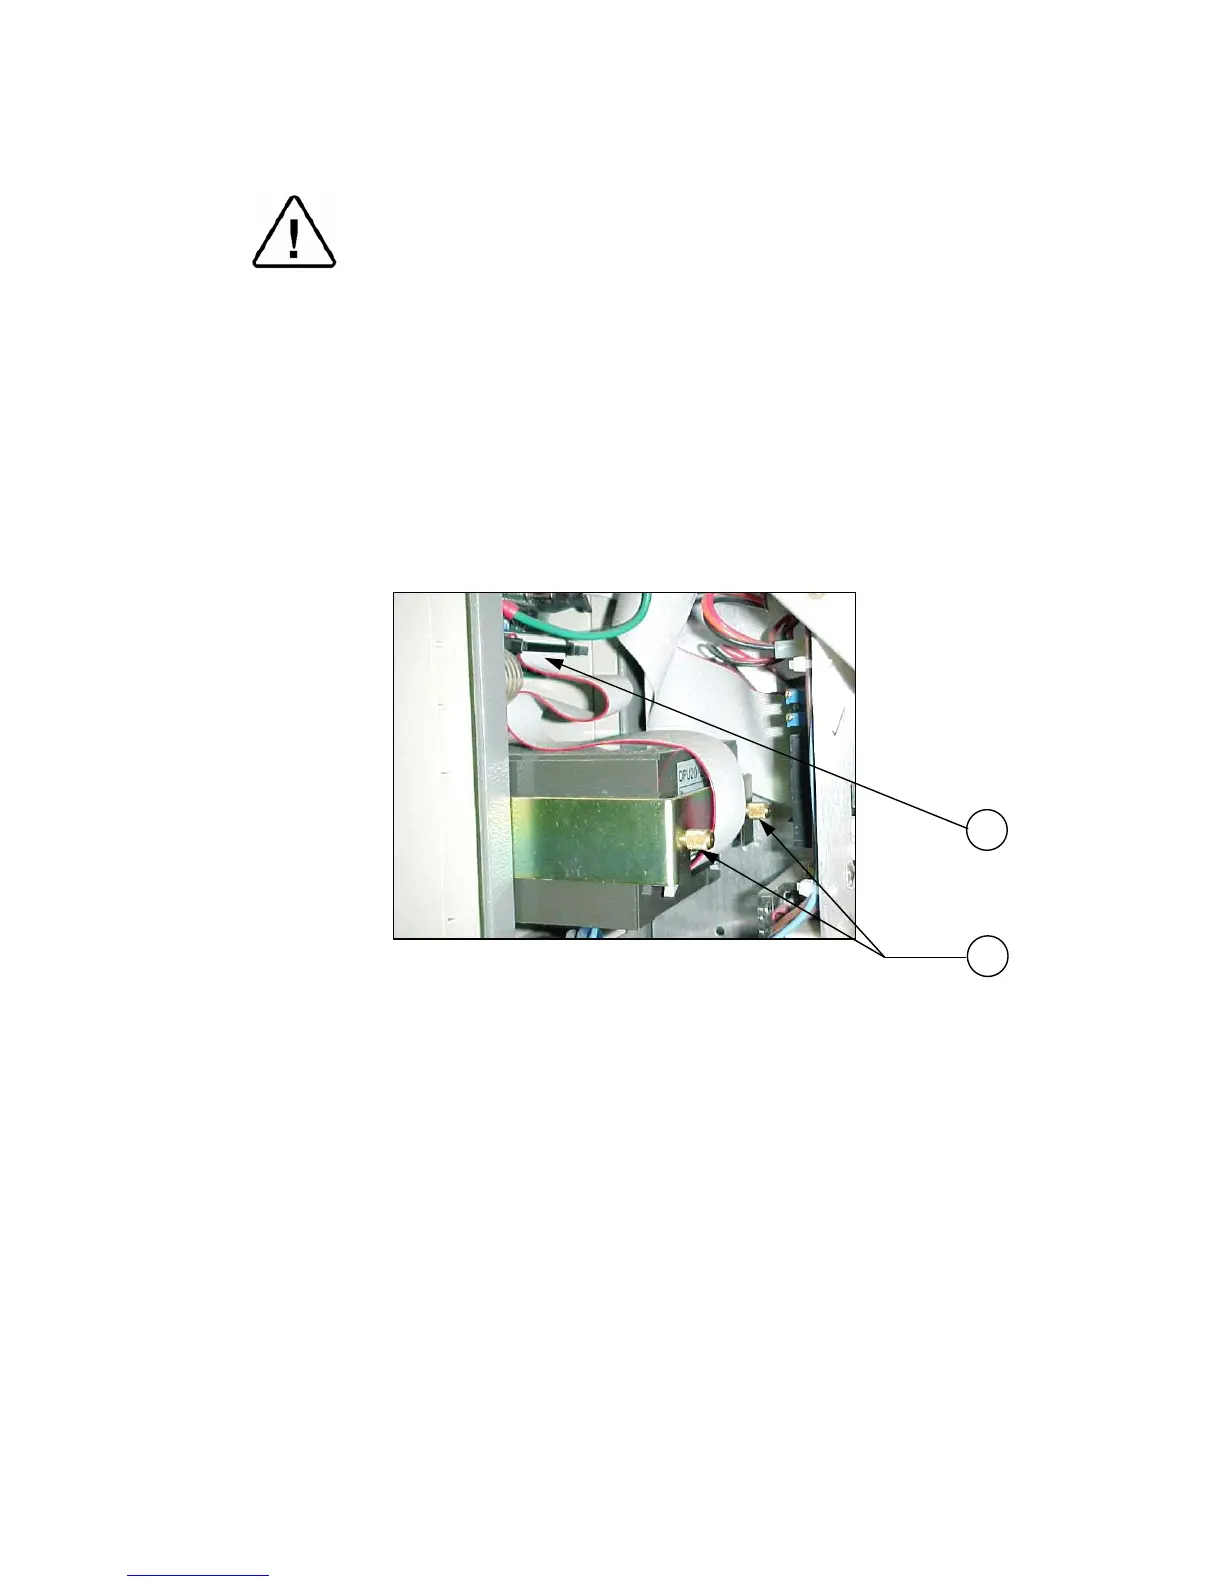
3. Disconnect the flat cable (1) connecting the printer to the DIG-T2
board.
4. Unscrew the two screws (2) fastening the printer to the panel.
5. Remove the printer and install the new one.
6. Verify that the printer is working by performing a self-test. This is
done by pressing and holding the printer feed button and turning on
the autoclave.
7. Run a cycle and verify that the printer operates correctly.
1
2