36
9.15 Replacing the Printer
9.15.1 DPU20 Printer
Caution!
Before starting, disconnect the instrument from the power
source.
1. Remove the autoclave cover (see para. 9.2 “Dismantling
the Outer Covers of the Autoclave”).
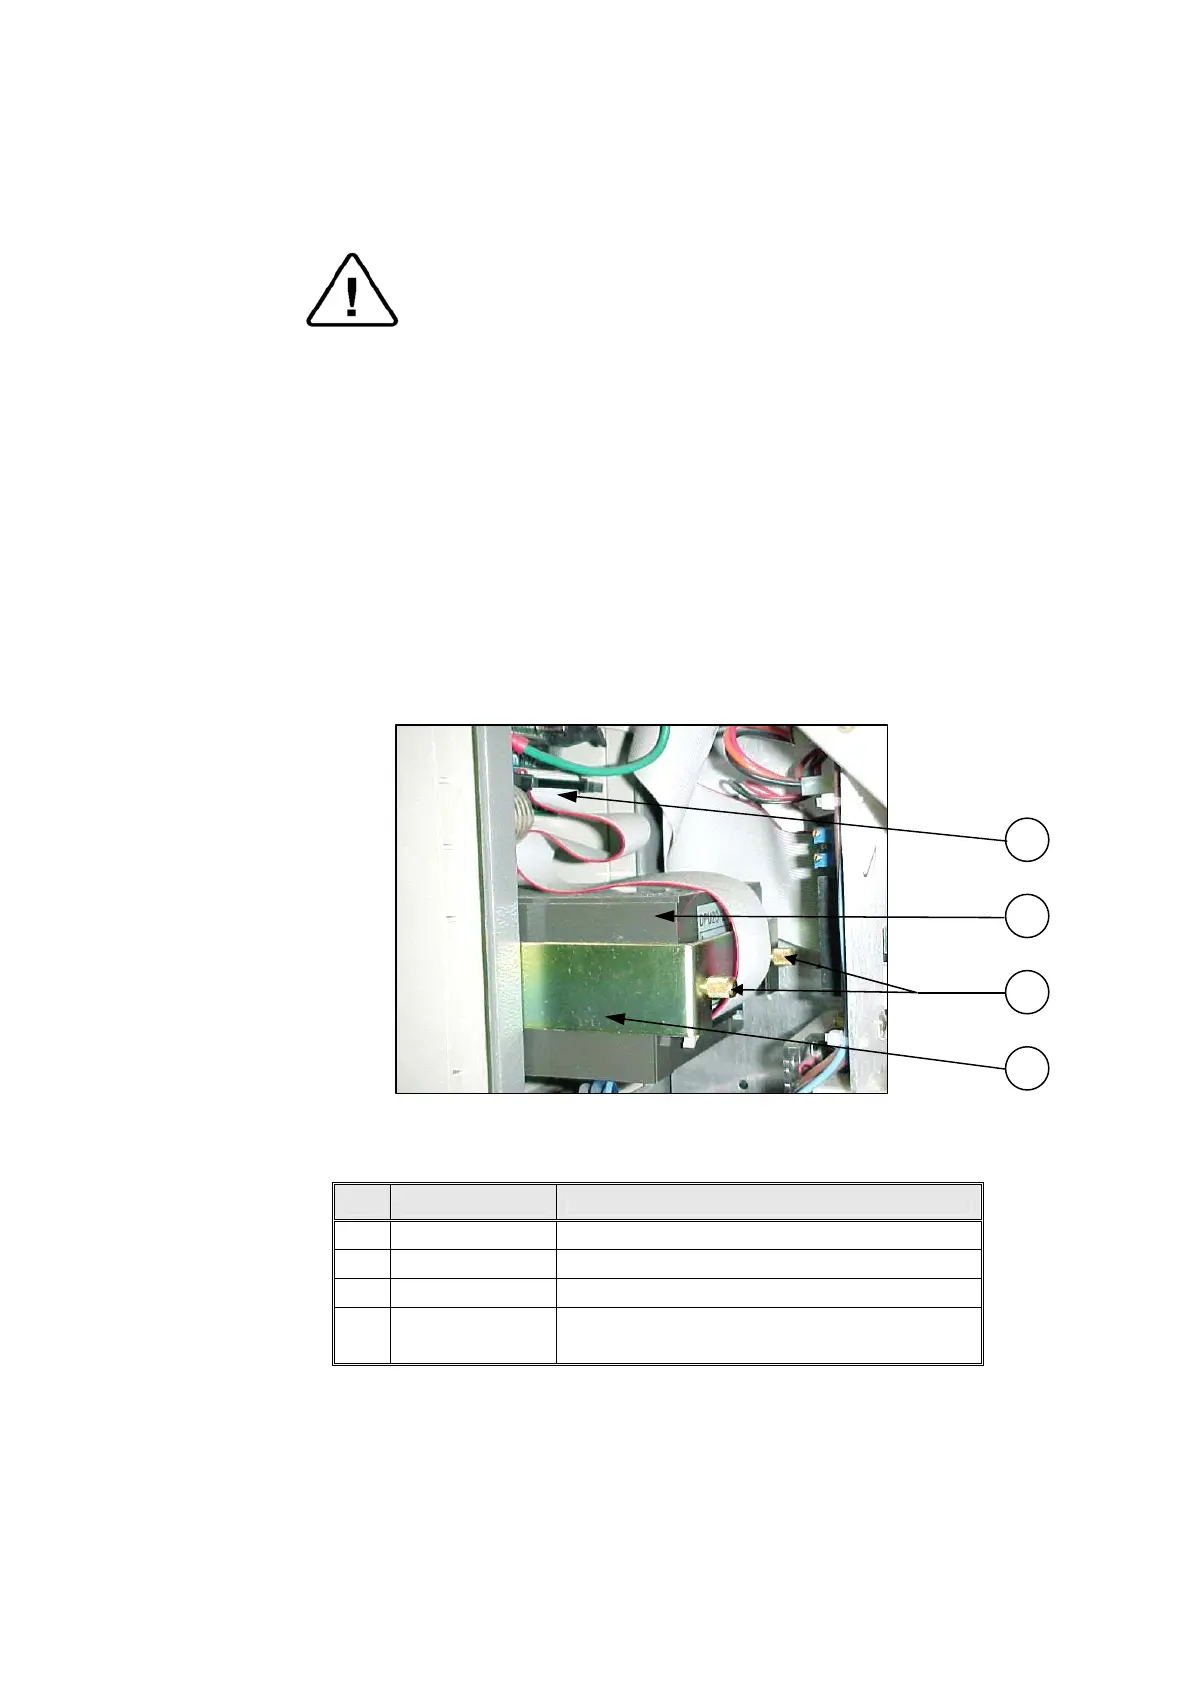
2. Disconnect the connector of the flat cable (1) connecting
the electronic box to the printer (2).
3. Unscrew the two screws (3) attaching the fastening
bracket (4) to the printer.
4. Remove the printer and insert the new one.
5. Assemble the fastening bracket to the printer with the two
screws (2) and verify that it "sits" firmly in its seat.
6. Connect the flat cable (1) to the printer.
7. Verify connection of power by performing a self-test.
8. Run a cycle and verify that the printer operates correctly.
1
3
2
4
No. Cat. No. Description
1 WIR040-0070 Cable, Flat, Printer, DPU20, 25CM, 34P
2 THE002-0005 Printer, DPU-20, Seiko
3 BOL190-0144 Screw, printer tightening
4
Supplied with
the printer
Fastening bracket