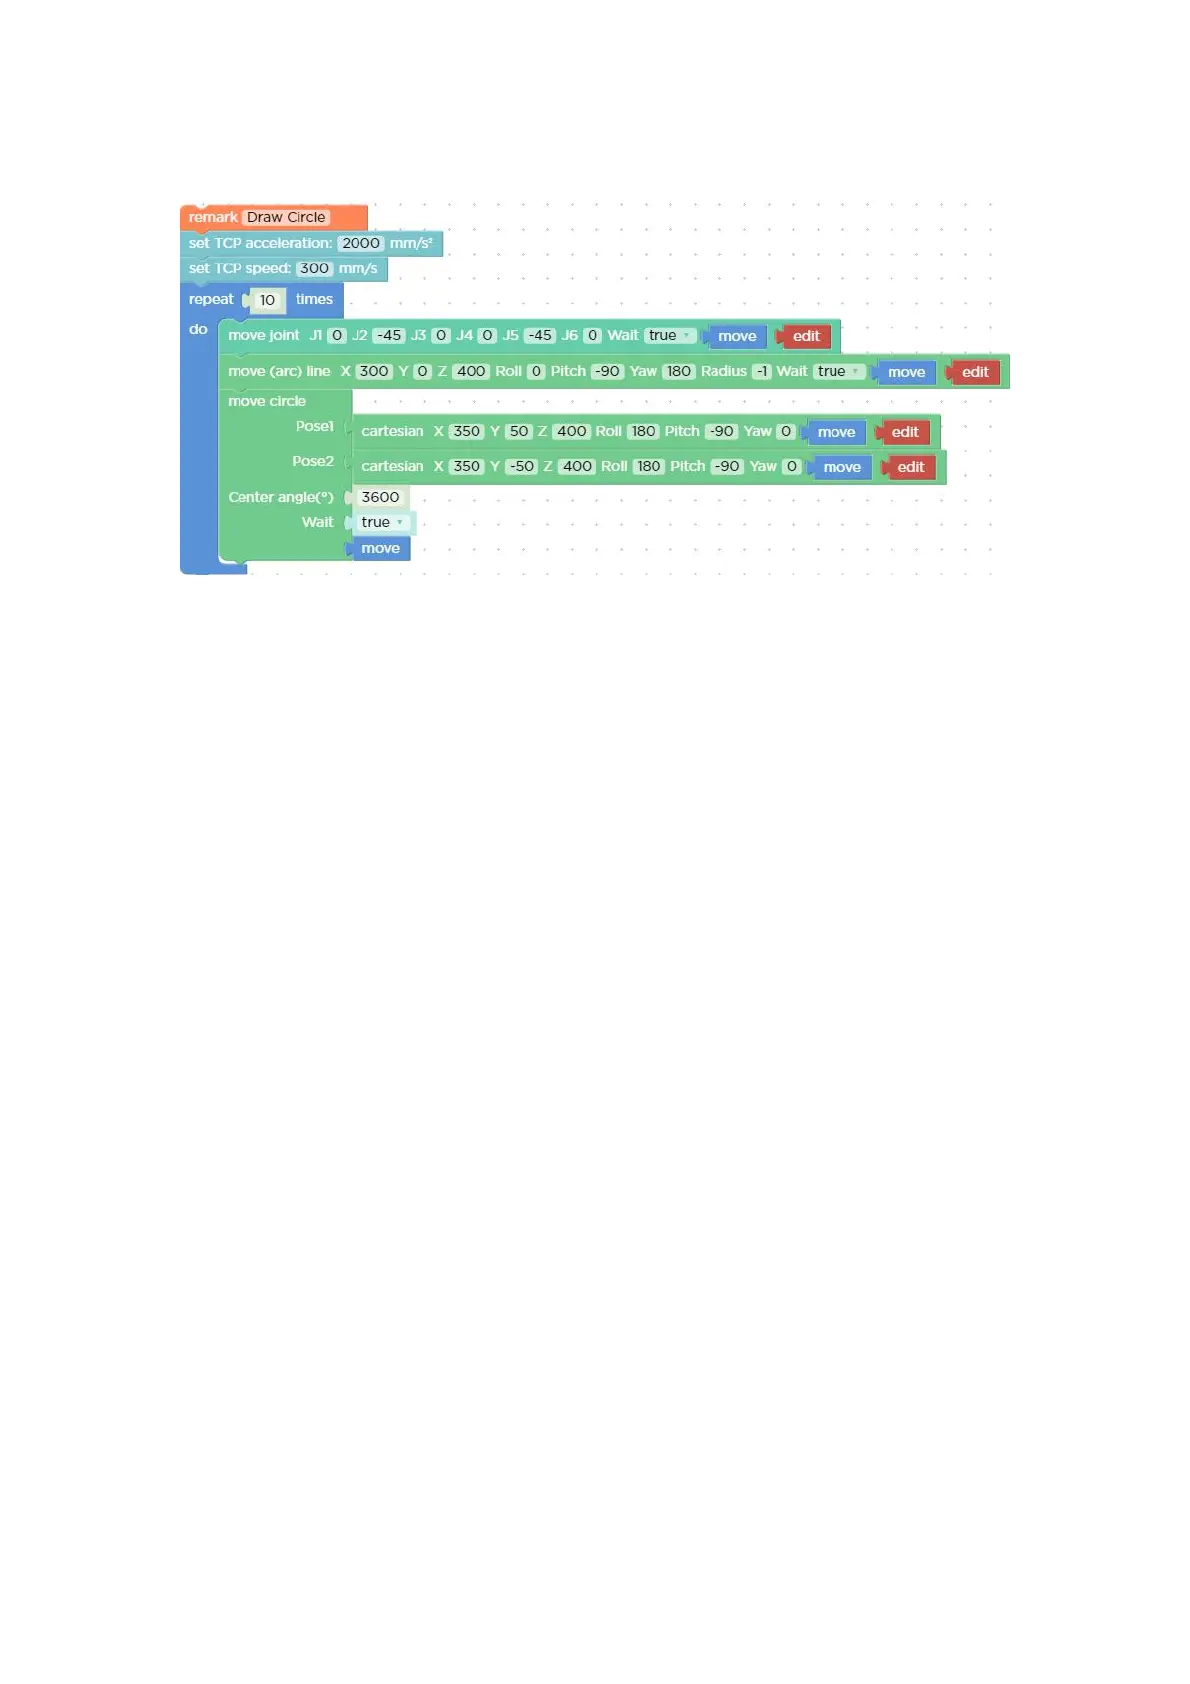
154
Blockly example:
【move circle position 1 to position 2】: From current position, the whole circle is
determined by current position and position1
and positon2, “center angle” specifies how
much of the circle to execute.
Note: (1) The starting point, pose 1 and pose 2 determine the three reference points of a complete circle. If the
motion path of the robotic arm is a circular arc, then pose 1 and pose 2 are not necessarily end points or passing
points;
(2) If you want the robot arm to change its posture during the movement, set the roll, pitch, and yaw of pose 2 to
the desired posture when completing the trajectory;
【center angle (°) () 】: Indicates the degree of the circle. When it is set to 360, a
whole circle can be completed, and it can be greater than or
less than 360;
Note: To achieve smooth motion, you need to set Wait = false.
Example explanation:
In this example, the central angle is set to 3600°, which means that the robotic arm
can draw ten circles at a time, and the robotic arm still stays at the starting point after
drawing a circle.
Judgment of the direction of the robotic arm motion
In the above example, the starting point, pose 1 and pose 2 are:
A (300,0,400,180,0,0) B (350,50,400,180,0,0) C (350,-50,400,180,0,0)
The robotic arm draws a circle in a clockwise direction, and The trajectory of the
robotic arm is as follows: