Press “▲▼◄►” to create and define the required motion detection zone. Use “A” to cancel the operation.
Press “PTZ” to select all boxes in one step.
Press “EDIT” to confirm detection zone and create others. Press “ENTER” to confirm and quit selection mode.
Remarks on motion detection zones
It is advisable to define motion detection zone which are slightly larger than the area where you want to
detect motion.
Motion detection zones can only be rectangular but several rectangles can be placed to mask the area as
required.
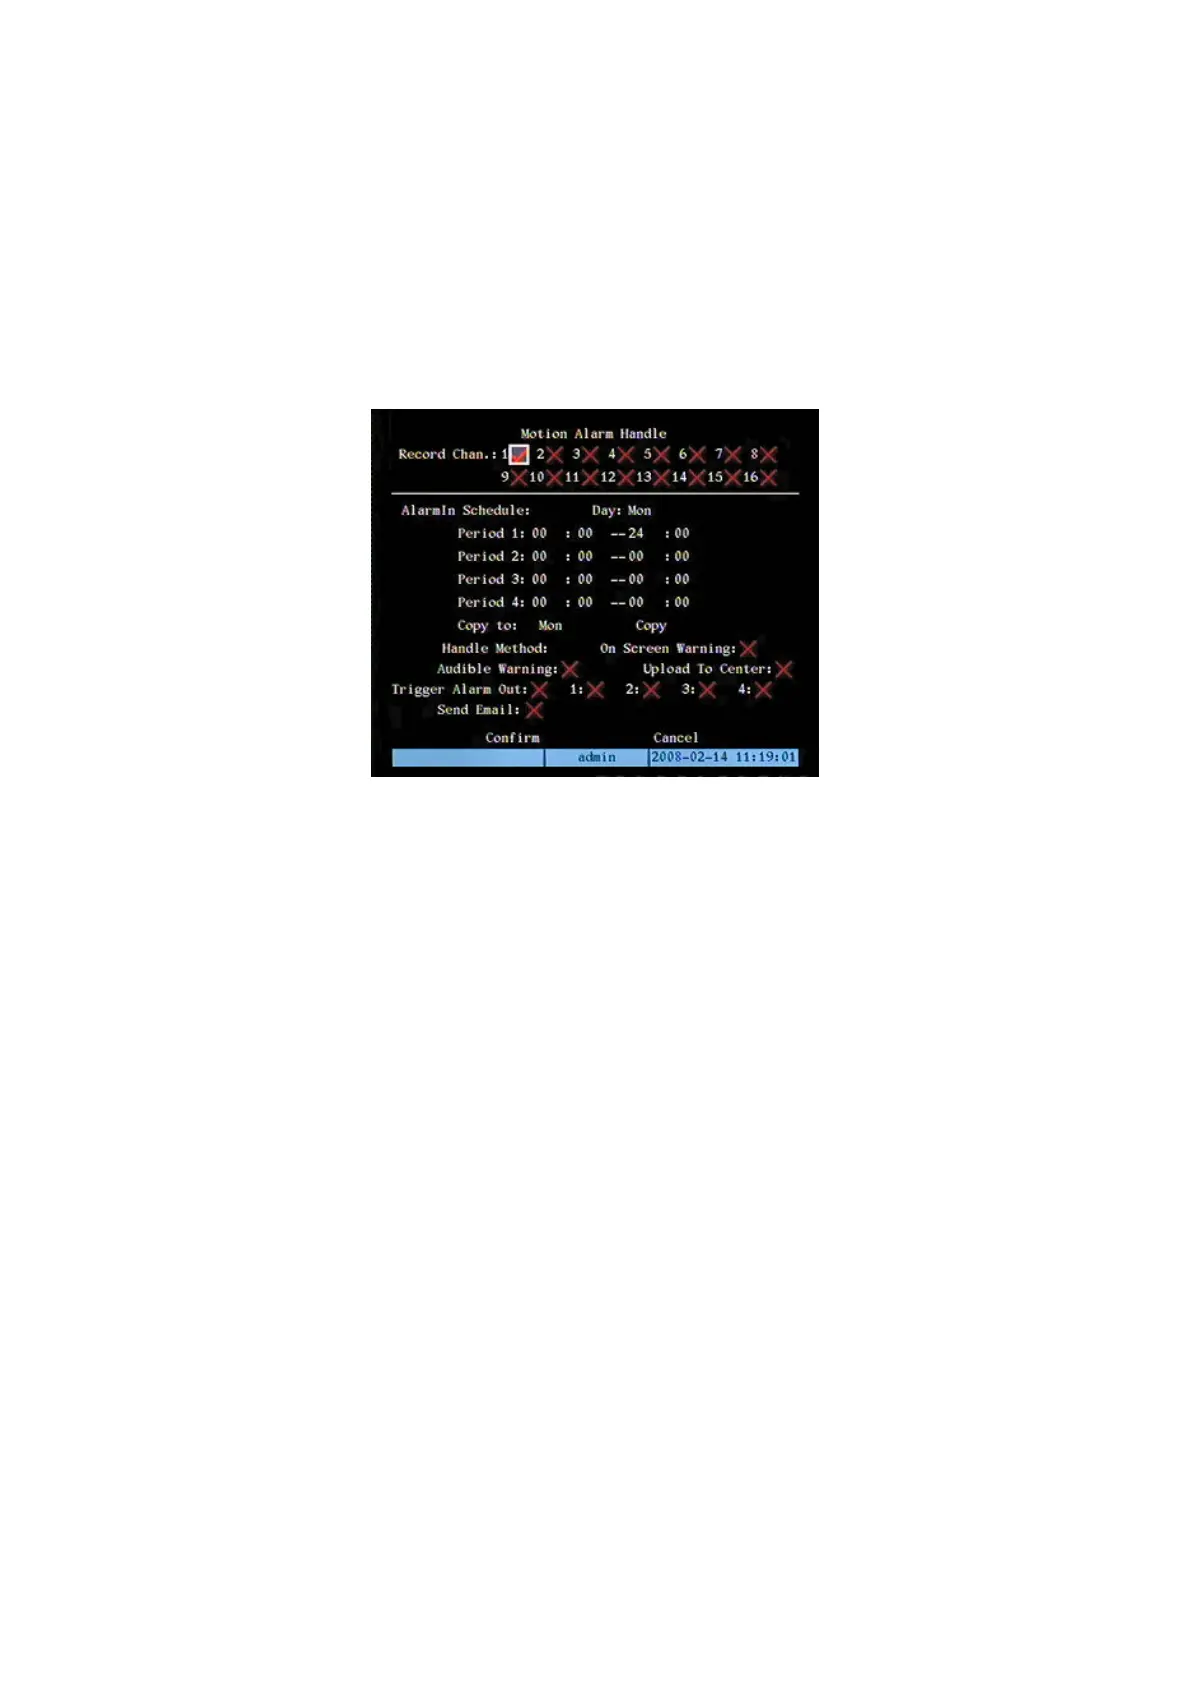
Select “ALARM HANDLING” and press “ENTER” to access the video tampering alarm notification menu shown below.
Figure 18: motion alarm notification menu with 1093/043 (16 channel) device
The selected item is highlighted.
Press arrows “◄►” to point the cursor to the various menu items.
Select “CONFIRM” and press “ENTER” to make the changes effective.
Select “CANCEL” and press “ENTER” to cancel the changes.
Press “ESC” to go back by one step.
Press “ESC” several times until the configuration window closes to quit the configuration menu.
5.2.1.3.1 Alarm
This option is used to select which video channels to associate to the respective motion alarm.
To associate, select the respective check box using “◄►” and press “ENTER” or “EDIT”.
Symbol “” indicates that the association option is enabled; symbol “×” indicates that it is not.
Motion detection alarm status is shown with a blue icon if the “On screen warning” option is checked.
5.2.1.3.2 Motion alarm handle
This option can be used to set up to 4 alarm indicating periods for each day of the week with respective event start and
end times.
Use “▲▼” to select the day.
Use “◄►” to point the cursor to the hours/minutes of the period to be set.
Press “◄►” to select hours/minutes. Specific messages will appear if times overlap.
Select “Copy to” to select the day of the week where to copy notification programming. Select “All” to copy the settings
on all days of the week. Select “Copy” and press “ENTER” to copy the settings. Confirmation of the operation will be
required: press “ENTER” again to confirm.
DS1093-005C 33
 Loading...