OTDR Series e-Manual, D07-00-076P-RevC00 Page 57 of 107
6.10.1 Accessing and setting up the Optical Light Source
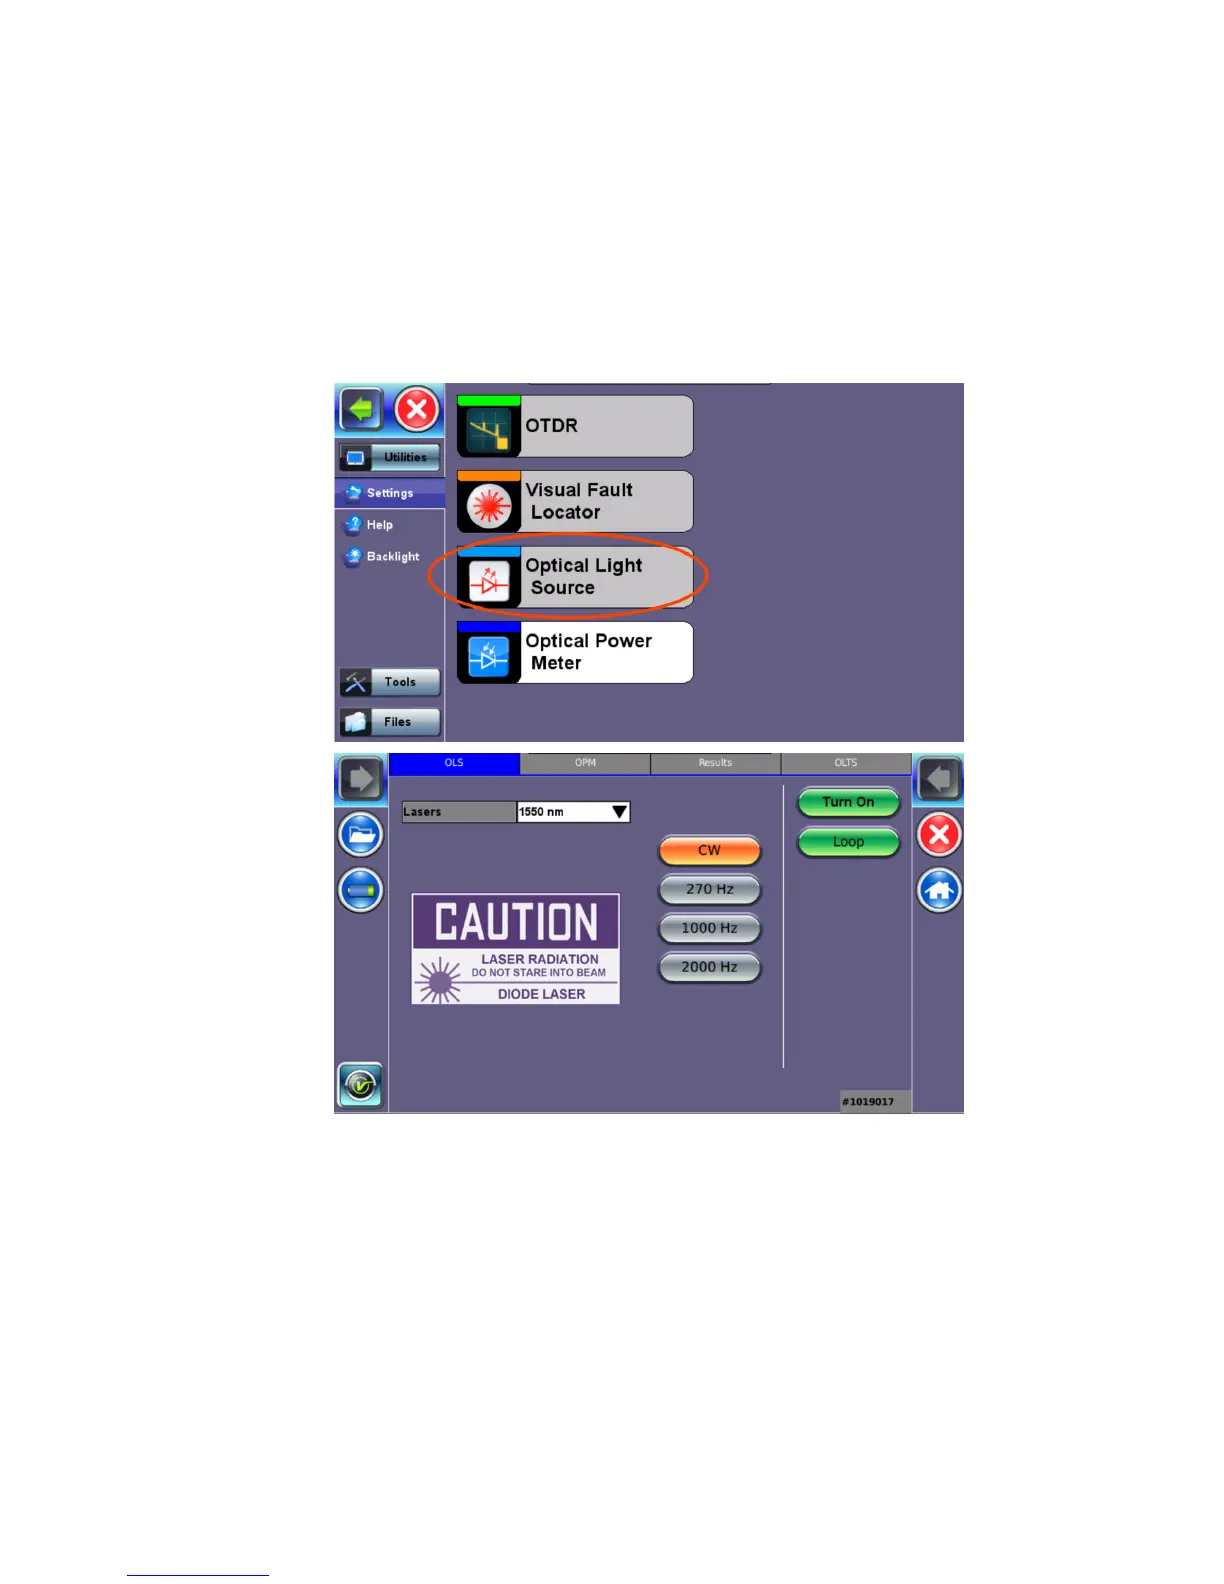
To access and set up the OLS option:
1. Make sure that the Optical Light Source option is installed on the test unit.
2. Power on the unit. Test App 1 – Test Mode Selection is loaded by default. Select Fiber
testing, and then press OK.
3. Press Optical Light Source on the main menu. The OLS screen appears with the Caution
warning.
4. In the Lasers drop-down list box, select the calibrated wavelength (1550nm/1310nm) to
match the signal being measured.
5. Select the operation mode (CW, 270 Hz, 1000 Hz, or 2000 Hz) for the test.
CW (Continuous Wave): Select to continually measure level, loss, and reflectance
in optical components.
270 Hz, 1000 Hz, 2000 Hz (Pulse). Select this option to send intermittent light
pulses. In some cases, this makes it easier to identify faults (than continuous light). It
can also be used with audible detectors (toners) that can identify faint light or in well-
lit (bright) environments.