Using LabQuest
®
3 as a Data Sharing Source
42 Vernier Software & Technology
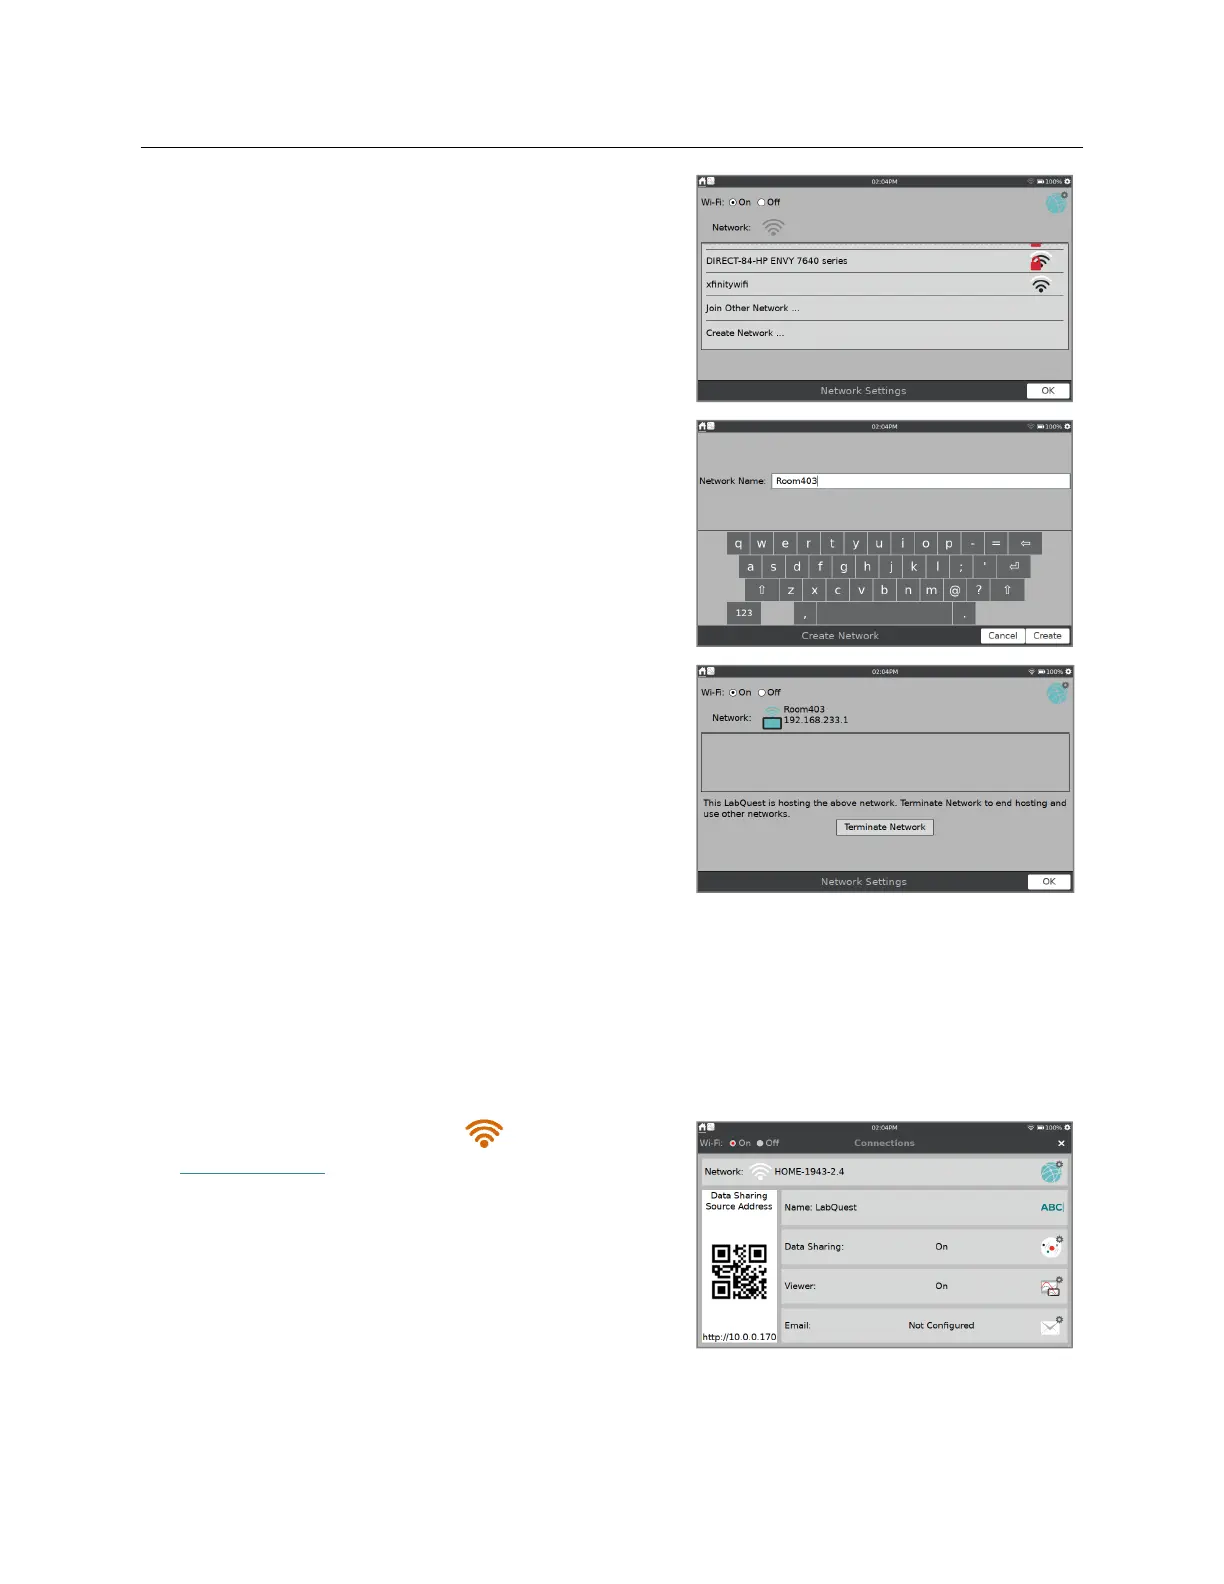
1. Scroll to the bottom of the available network list
and select Create Network.
2. Tap the Network Name field and assign a name to
this new network (e.g., LabGroup4 or Room403).
Tap Create.
3. Verify LabQuest has successfully created a
network. The network status should change to a
numeric IP address and a message noting that
LabQuest is hosting a network is shown on the
screen. Tap OK to return to the Connections app.
TIP! Some Android implementations have trouble
viewing and connecting to this type of ad-hoc
network. These devices require the use of an
infrastructure network.
Enabling Data Sharing on LabQuest 3
In addition to connecting to a Wi-Fi network, you need to set up LabQuest as a Data Sharing
Source using the following instructions.
1. Launch the Connections app, , from the
Settings screen.