102
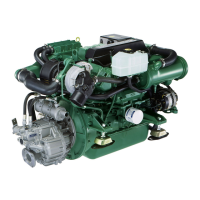
Cooling system
2
Remove the end cover (B13) and the gasket (B14).
3
Remove the rubber plug (B12) from the end of the
impeller (B11).
4
Carefully remove the impeller from the shaft (B6)
using a suitable lever or long nose pliers.
5
Press out the shaft and the bearing unit from the
drive side of the housing using a suitable drift. If the
bearing (B5) and spacer (B7) do not come out with
the shaft, these can be pressed out later when the
seal (B3) has been removed. Do not lose the O-ring
(B8) when the shaft is removed.
6
Slacken off the cam plate screw (B1) two or three
turns and tap gently on the screw head to detach
the cam plate (B2) from the housing. Remove the
screw and the cam plate.
7
Remove the wear ring (B10), the seal (B3) and the
spacer (B9) from the impeller housing.
8
Remove the seal (B4) from the bearing housing.
9
Check the components for wear or other damage
and replace as necessary. Replace the seals and
gaskets.
10
Check that all the components are clean.
11
Press one of the bearings (B5) on to the shaft (B6),
install the spacer (B7) and press on the other bear-
ing. Use a suitable drift which presses on the inner
ring of the bearing.
The bearings are permanently lubricated.
12
Press stuffing box (B4) into position in the bearing
housing with the lip against the side of the bearing.
Lubricate the sealing lip a little.
13
Support the pump by the end of the cover and press
the shaft and bearing unit into the bearing housing.
If the shaft and bearing unit is pressed in correctly,
the outer bearing should protrude 2.13-2.73 mm
from the mating surface (see illustration B).
14
Slide the O-ring (B8) up on the shaft until it is locat-
ed in the middle of the space between the bearing
housing and the impeller housing.
15
Install the seal spacer (B9) in the impeller housing.
Lubricate the seal lip a little and press the seal (B3)
into position in the impeller housing with the lip fac-
ing the impeller.
16
Install the wear ring (B10) in the impeller housing
with the locating pin in the ring cut out. If the ring is
worn on one side, turn the ring so that the side with-
out wear faces the impeller.
17
Apply a suitable sealant on the top and side of the
cam plate (B2). Also apply sealant on the thread of
the cam plate screw (B1). Install the cam plate and
tighten the screw.
18
Grease the blades of the impeller (B11) and install it
on the shaft using a clockwise movement. If the
blades are slightly worn, the impeller may be in-
stalled with its original front side facing to the rear.
Install the rubber plug (B12) in the end of the impel-
ler.
19
Use a new gasket (B14). Install the gasket, end
cover (B13) and screws. Tighten the screws evenly
in stages.
 Loading...