52
Crankshaft assembly
11
Check that all the big end caps are marked with the
number of the relevant cylinder. Remove the caps
and the lower big end shells, operation 13A-01.
12
16
Clean the main bearing housing and the bearing
shells. Install the bearing shells with the lugs well
into the cut outs. The upper main bearing shells
have oil holes and grooves and the center bearing is
wider than the others. Lubricate the bearings with
fresh engine oil.
17
Check that the crankshaft bearing journals are
clean and lubricate them with fresh engine oil. Care-
fully lower the crankshaft into position above the
bearings.
18
Clean and lubricate the upper halves of the thrust
washer and slide them in on their grooves on both
sides of the bearing housing. Ensure that the thrust
washer lubricating grooves are turned towards the
crankshaft.
19
Clean the bearing caps and the lower bearing
shells. Install the bearings in the caps with the lugs
correctly installed in their cut outs. Lubricate the
bearings with fresh engine oil.
20
Check that the guide sleeves for the main bearing
caps are correctly installed in the bearing cap or in
the cylinder block.
21
Clean the lower halves of the thrust washers and lu-
bricate them with fresh engine oil. Install the thrust
washers against the central main bearing cap with
the oil grooves turned away from the cap. Check
that the guide sleeves of the cap are in the correct
position. Install the cap on the cylinder block with
the word “FRONT” turned towards the timing cover
end of the engine. Tighten the screws for the cap in
stages and evenly to 112 Nm.
22
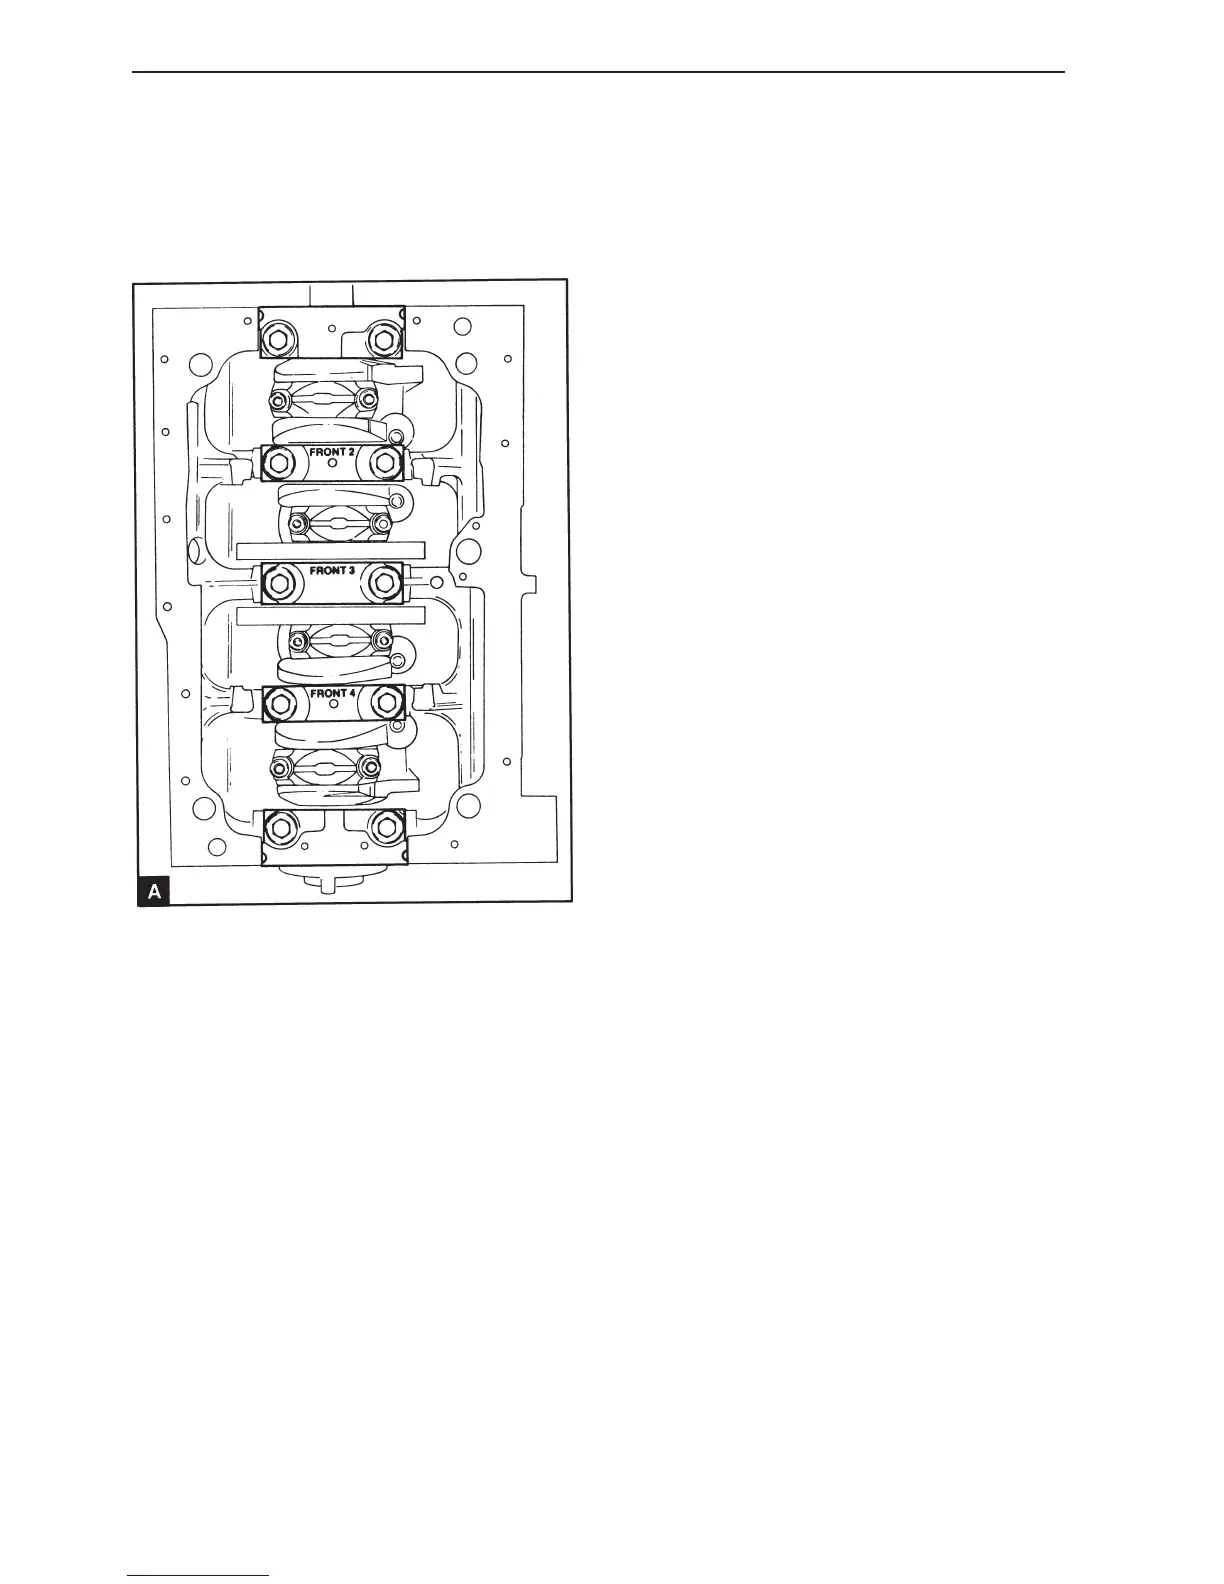
Install the other caps in their correct positions.
Caps number 2 and 4 are stamped with the position
number and the word “FRONT”. The word “FRONT”
must be turned towards the timing cover end of the
engine. The front and rear caps have no stamped
number. The front cap has a threaded hole in the
underside, the rear cap has two threaded holes on
the underside. Tighten the screws for the cap in
stages and evenly to 112 Nm.
The inner main bearing caps are marked with 2, 3
and 4 and the word “FRONT” to mark the correct in-
stallation position (A). Remove the main bearing
caps, the lower main bearing shells and the thrust
washers. Keep the bearings with their respective
caps. Press out the upper halves of the thrust
washers.
13
Remove the crankshaft.
14
Remove the upper bearing shells of the main bear-
ings and big ends and keep them together with their
respective caps.
15
Ensure that the oilways are clean and unobstructed.
Clean the sealing grooves in the sides of the front
and rear main bearing caps.