Installation and Connection
3
CFW-11 | 3-11
3.1.5 Installation of the Inverter with Nema1 Kit (Option, CFW11....T...ON1...) on a Wall -
Frame Size E
Fixing holes position and diameter according to the Figure 3.2 on page 3-4 for frame size E models.
External dimensions of the inverter with Nema1 kit according to Section 8.6 NEMA 1 KITs on page 8-16.
Fasten the inverter.
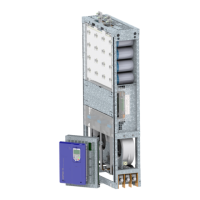
Install the Nema1 kit on the inverter as shown in Figure 3.8 on page 3-11 using the two M8 screws supplied
with the product.
Figure 3.8 - Installation of the Nema1 kit in frame size E model
3.1.6 Access to the Control and Power Terminal Strips
Frame Sizes B and C:
It is necessary to remove the keypad and the front cover in order to get access to the control and power terminal
strips.
321
Figure 3.9 - Removal of keypad and front cover - frame sizes B and C
 Loading...