User Guide
3. Support
3.7 CMA Replacement
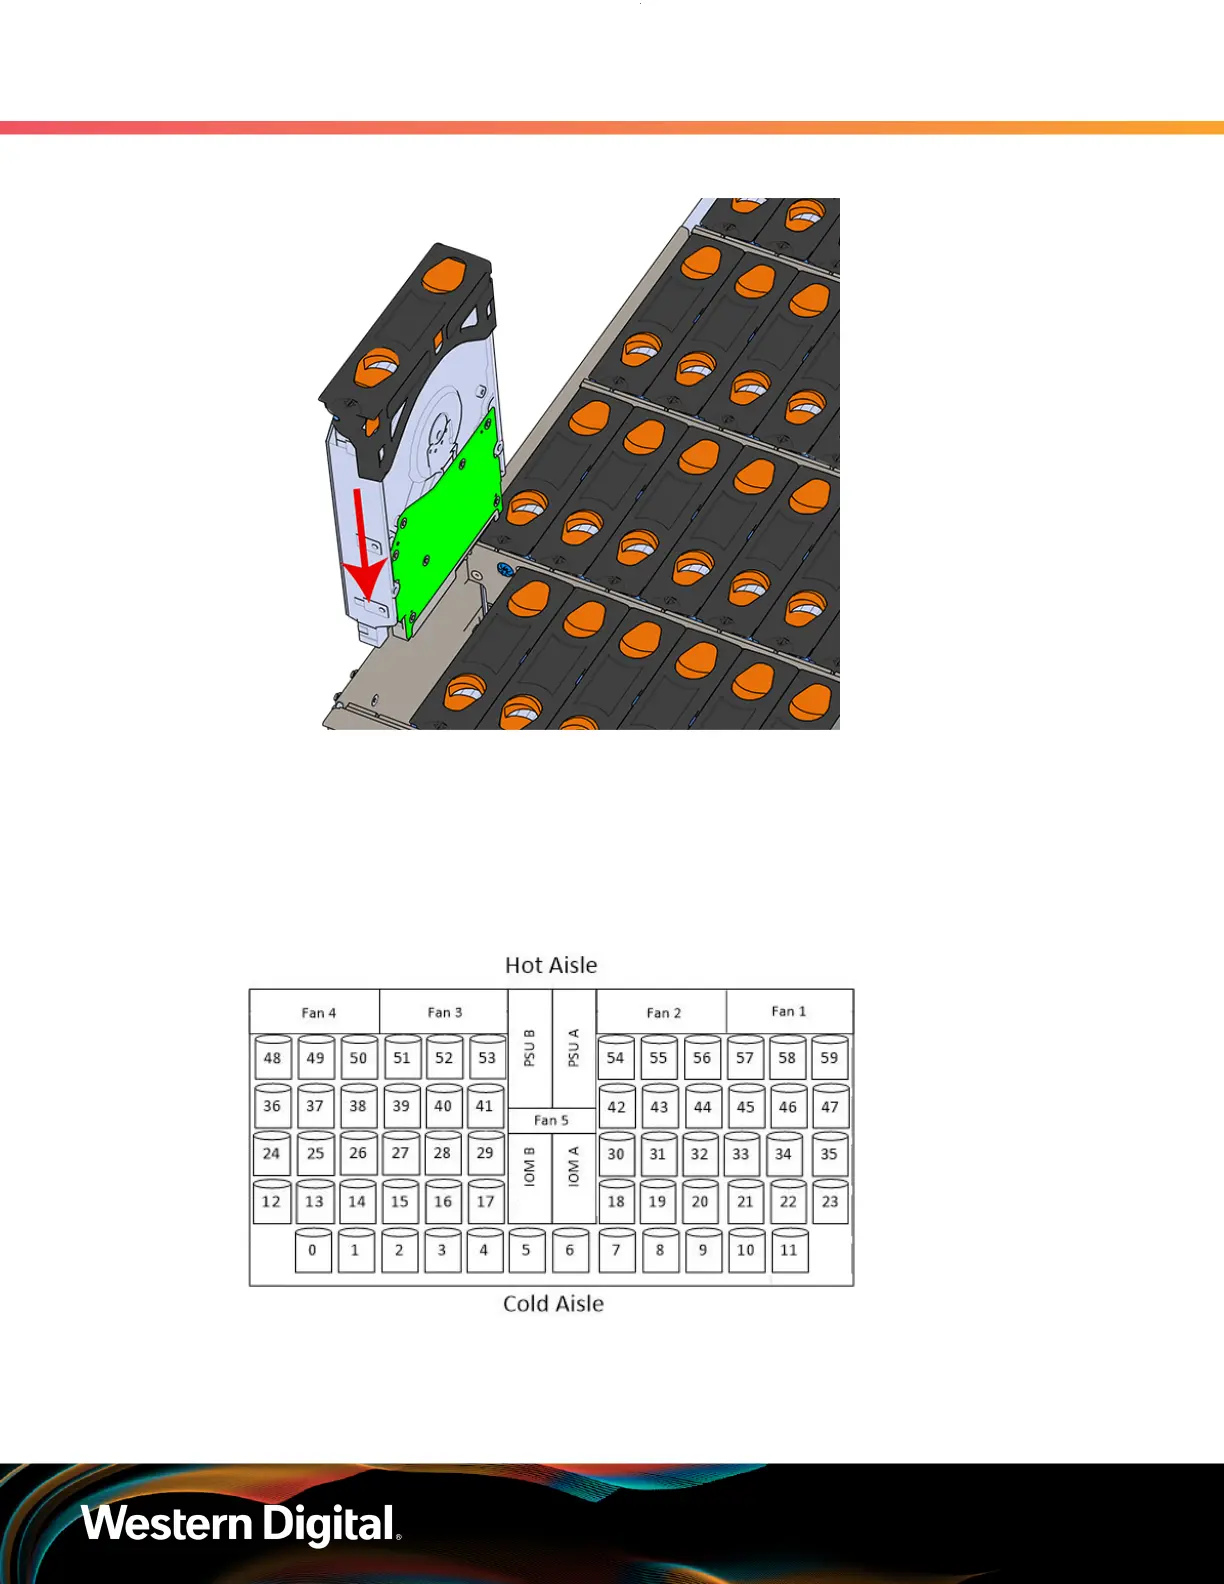
Figure 82: Installing a 3.5in HDD Assembly
d. Pinch the latch release and carefully press downward to seat the 3.5in HDD Assembly the
rest of the way.
Step 21 : Install each drive in the same way the first was installed. Make sure to follow the drive layout in
numerical sequence as shown in the following image.
Figure 83: Drive Layout
Step 22 :
Now that the drives are installed into the chassis, test the installation by sliding the enclosure
in and out of the rack a minimum of three times. If the enclosure binds, catches, or displays any
incorrect motion or behavior retry the installation of the drives and chassis.
89







 To Next Page