4-13
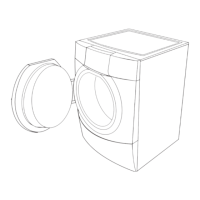
7. To remove the bellows:
a) Remove the two T-20 Torx screws from
the door switch assembly.
b) Remove the front panel from the washer.
REMOVING THE DOOR SWITCH ASSEMBLY FRONT PANEL AND BELLOWS
(continued)
c) Turn the bellows retaining clamp screw
counterclockwise until the clamp is loose
enough to remove it from around the
bellows (see figure 1).
NOTE: It may be necessary to completely
remove the screw from one end of the
clamp.
Work the bellows off of the flanges.
Reassembly Note: Be sure that both the inside
andoutsidemounngangesarefullyengaged
beforeghteningtheretainingwire.Alsomake
surethatthe"weepholes"atthecenterboom
ofthebellowsareintheproperposion.
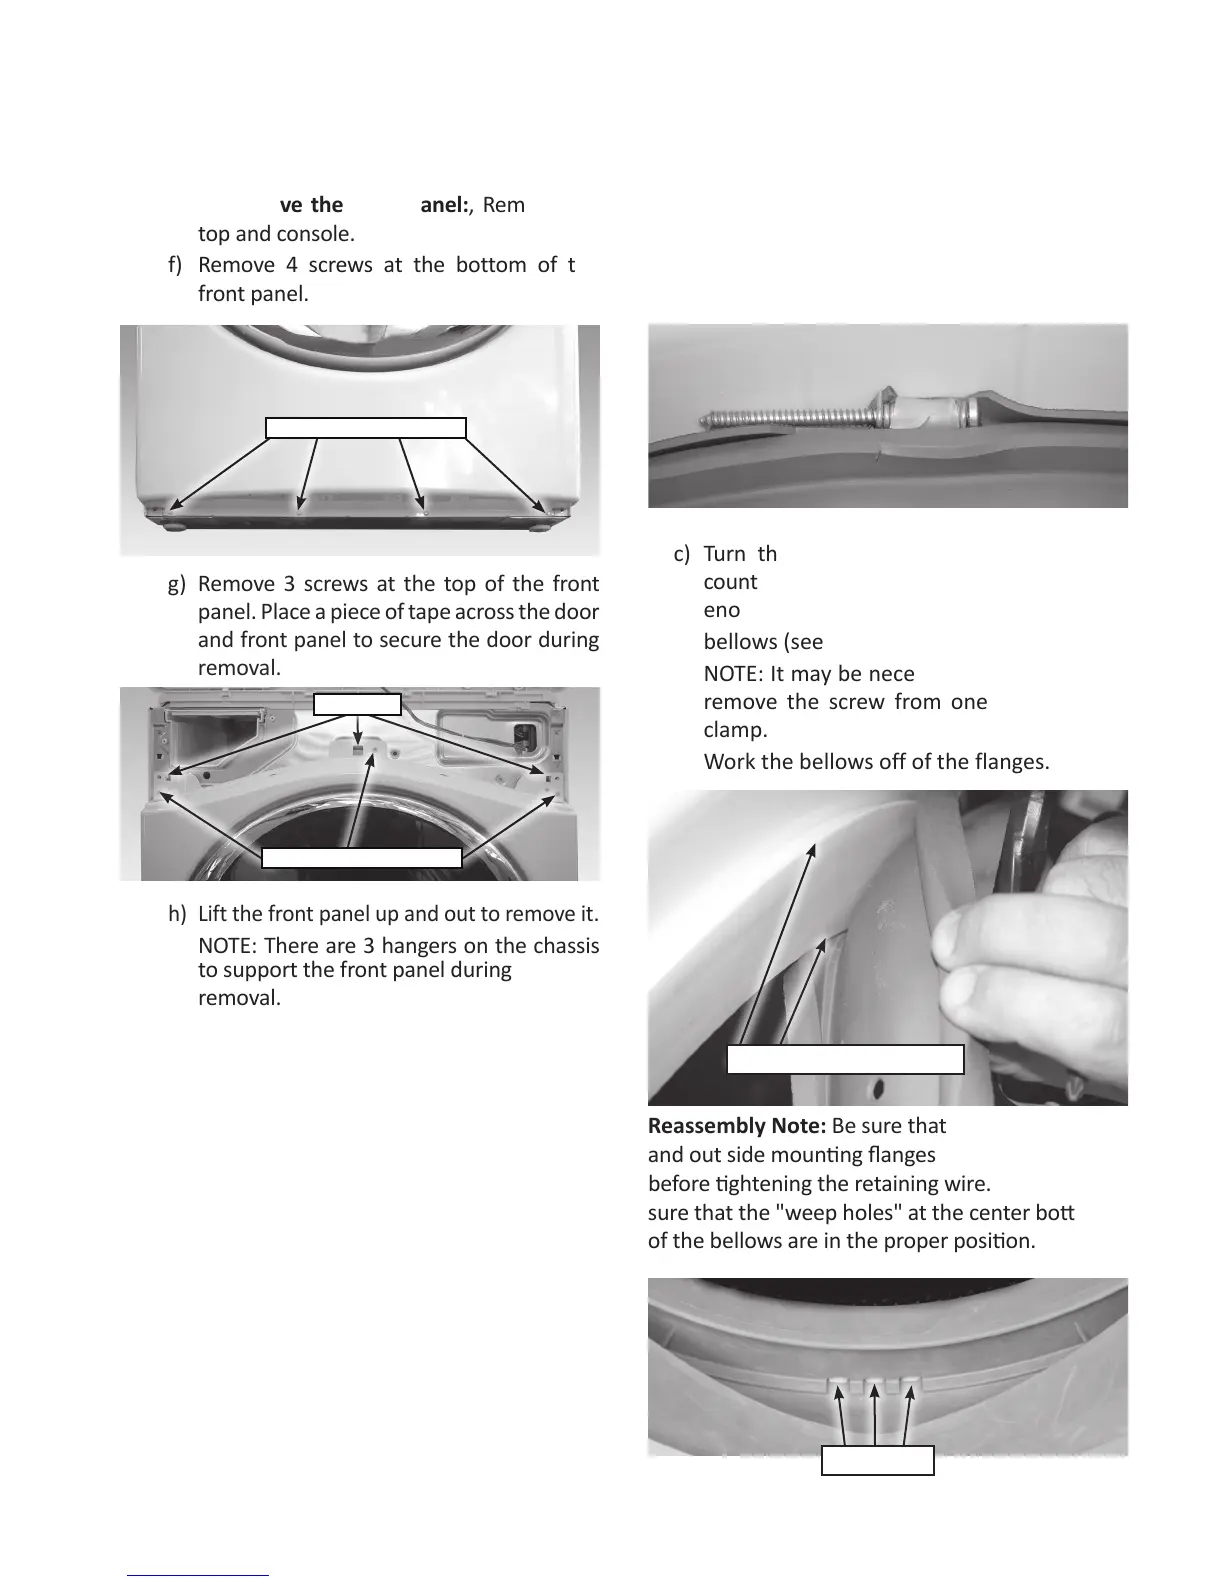
g) Remove 3 screws at the top of the front
panel. Place a piece of tape across the door
and front panel to secure the door during
removal.
h) Lift the front panel up and out to remove it
.
NOTE: There are 3 hangers on the chassis
to support the front panel during
removal.
e) To remove the front panel:, Remove the
top and console.
f) Remove 4 screws at the bottom of the
front panel.
2 Mounng Flanges on Tub
Weep Holes
Remove these screws
Hangers
Remove these screws
REMOVING THE DOOR SWITCH ASSEMBLY FRONT PANEL AND BELLOWS
Figure 1