POSITIONIT POSITIONERS
PM-01011-A 2-9
October 2023
Powered with 12 VDC:
The positioner runs on 24 VDC and power other than 24 VDC must be converted to 24 VDC
for the positioner.
If the input power supply is 12 VDC, the system will require:
• A step up converter from 12 VDC to 24 VDC to power the positioner
• A connector (P/N: 5195601) to connect 12 VDC to the controller
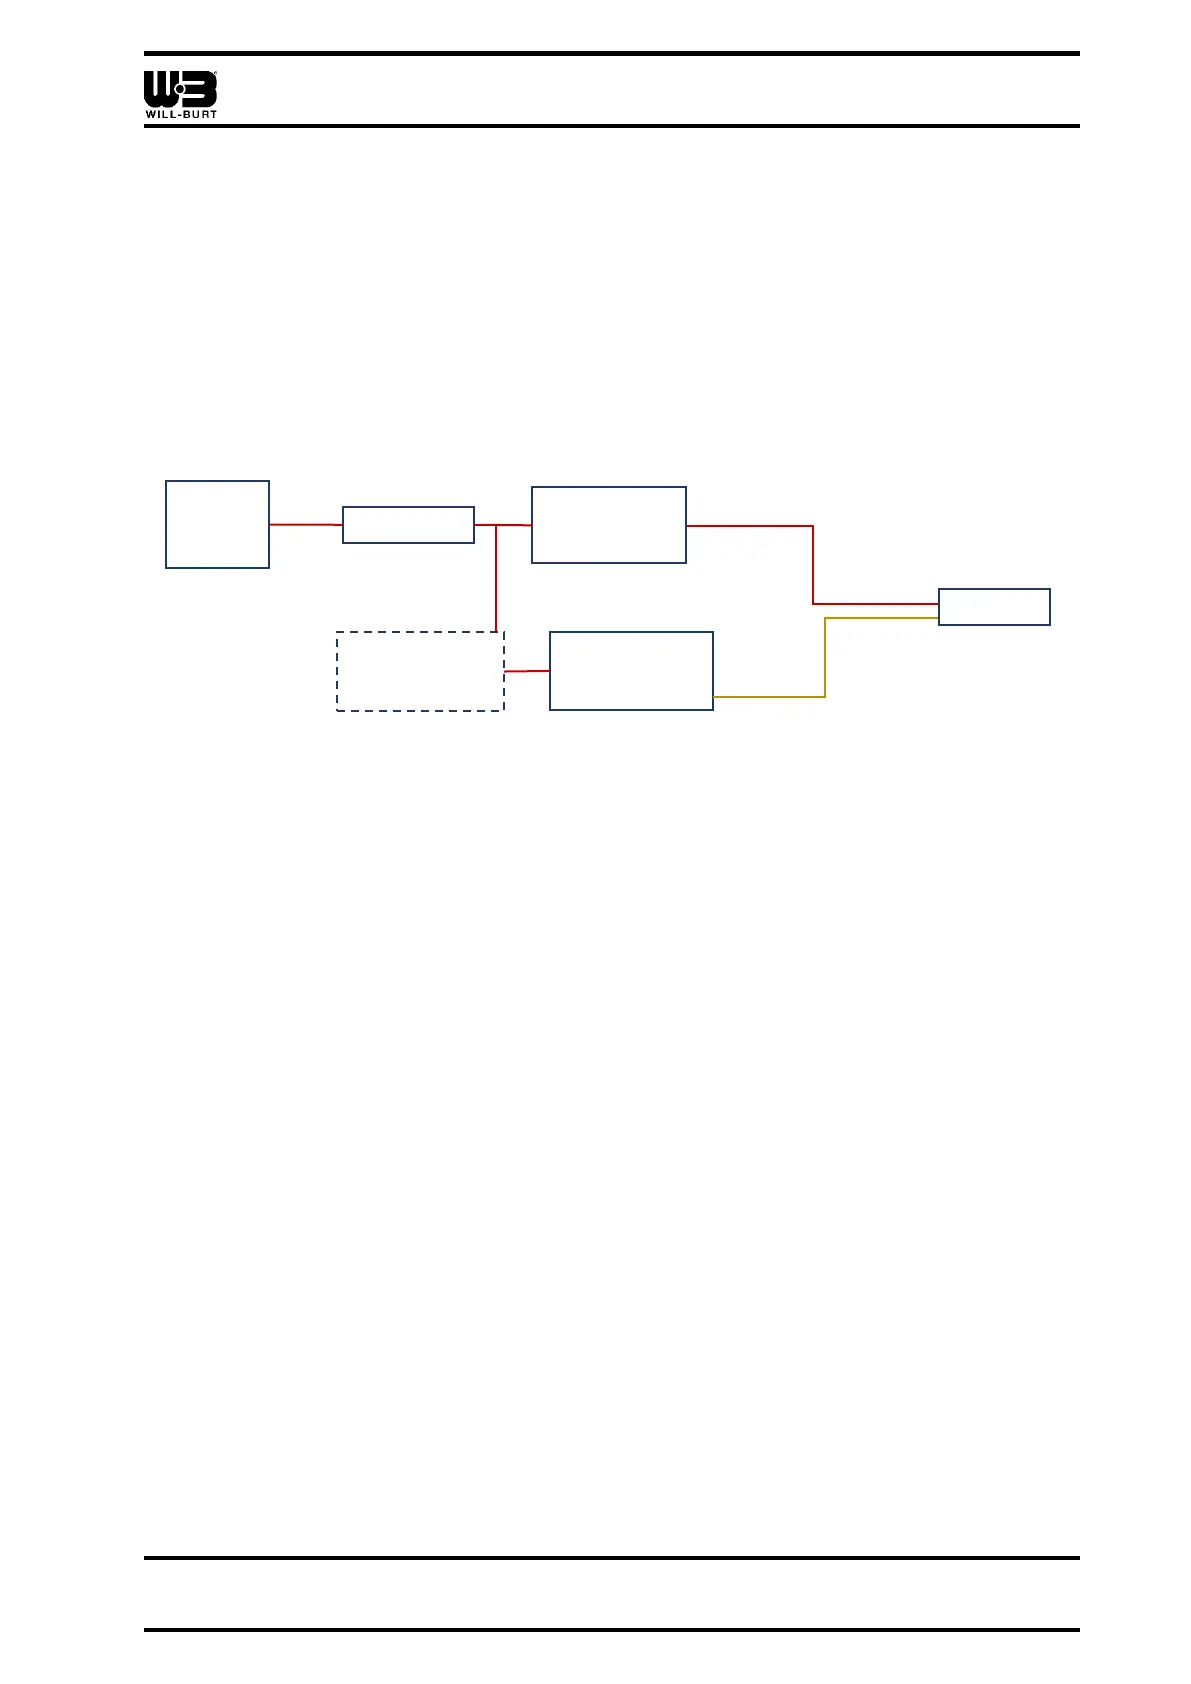
Figure 2-11 provides a quick overview of the wiring for a system powered with 12 VDC input.
Figure 2-11 Powered with 12 VDC
To wire the positioner using 12 VDC:
1. Connect the 5-pin plug (attached to the power/data cable) to the positioner.
2. Twist the plug to the right to secure the connection.
3. Run the 22 AWG green (data A, +) and white (data B, -) wires from the power/data
cable to the controller.
4. Run the 16 AWG red (power) and black (ground) wires from the power/data cable to
the step up converter.
5. Run the 12 VDC power to the controller and the step up converter. Run a (5) amp
slow blow fuse (customer supplied) inline between the power supply and the
controller and step up converter. An optional DC cable connector may be used to
connect the controller and the power supply.