Ci7 XX0 BENCHTOP S P ECTROPHOTOMETER
39
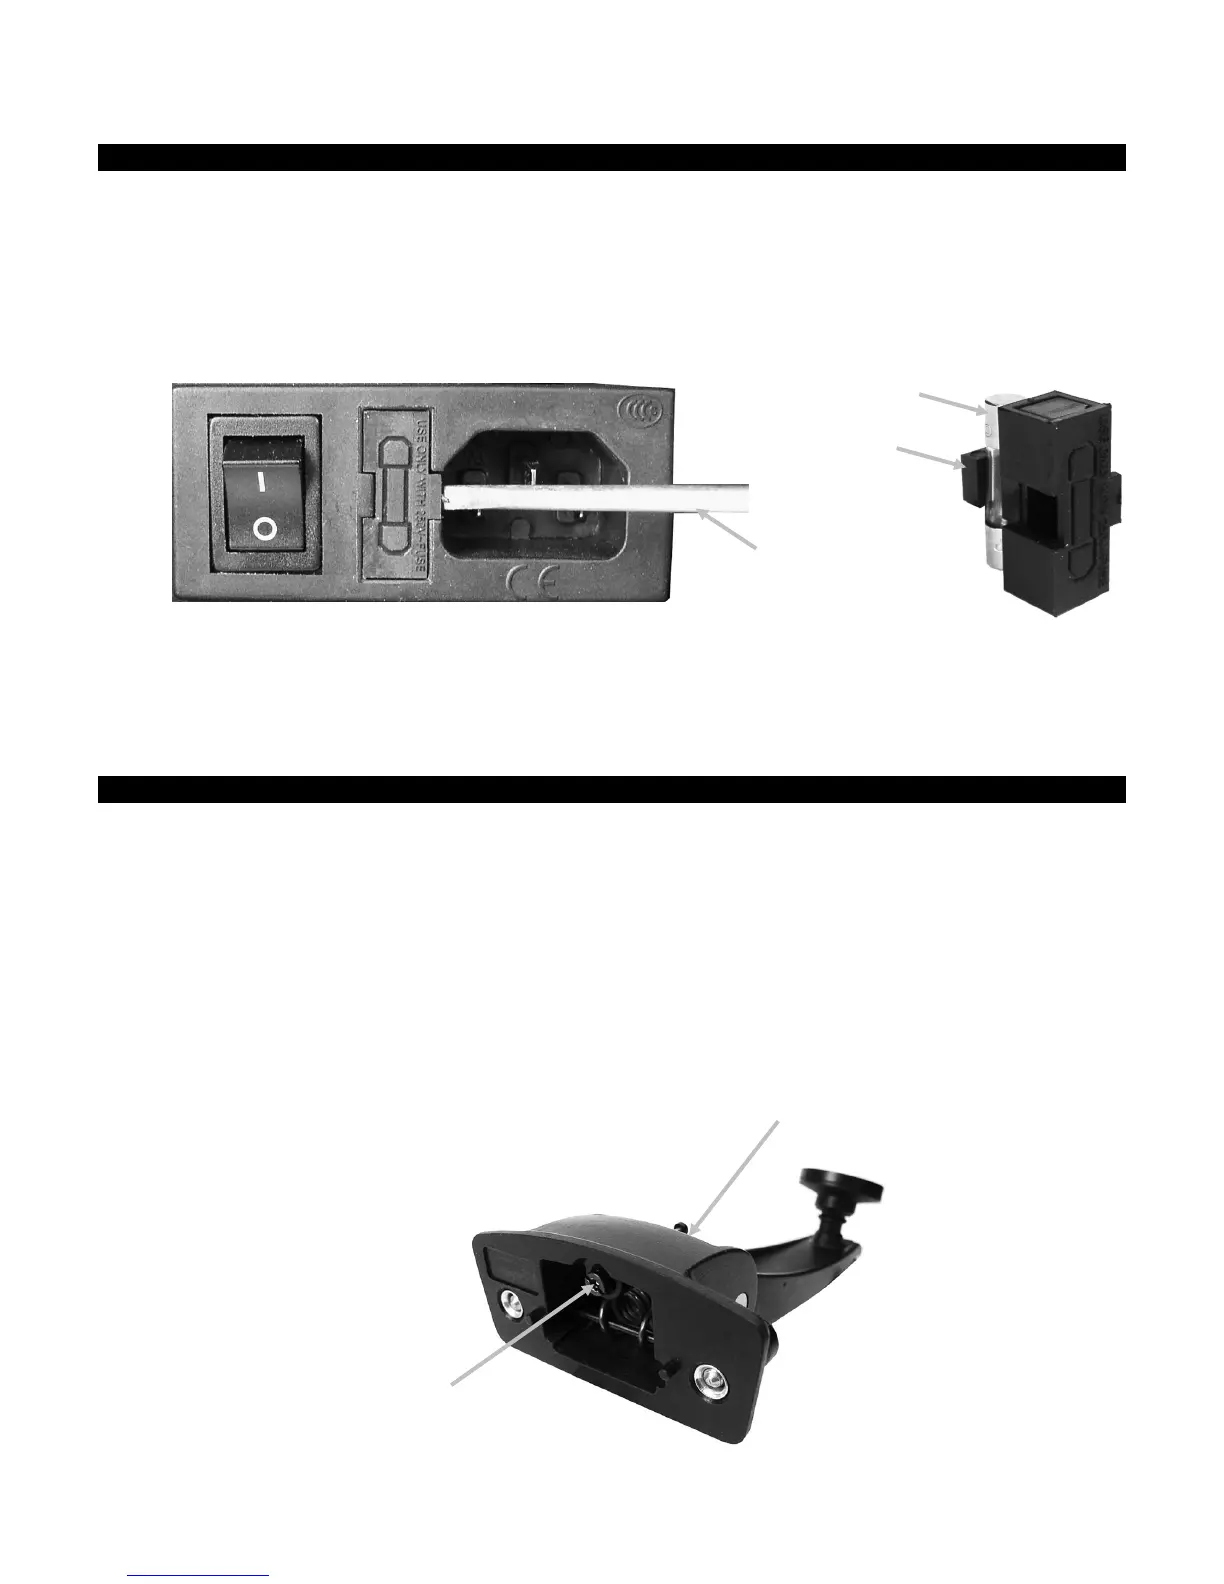
Replacing the Fuse
In the event the instrument does not turn ON when power is applied, make certain that power is
available at the plug. If power is available, replace the instrument fuse as follows.
Replacement fuse (5mm x 20mm 2.5A, 250V time-delay fuse type).
1. Turn the power off and unplug the detachable line cord.
2. Insert a flat-blade screwdriver into the right edge of the fuse carrier and pry out.
3. Remove the blown fuse from the carrier clip and discard.
4. Place the new fuse in the clip and reinsert fuse carrier into the fuse cavity. Make sure the
carrier is firmly seated.
5. Reinstall the detachable line cord.
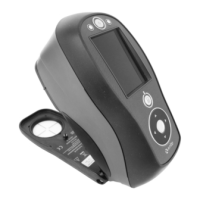
Adjusting the Sample Holder Dampening
If required, the sample holder dampening effect can be changed when closing the sample holder.
Simply adjust the pin in the sample holder to increase or decrease dampening.
1. Remove the sample holder from the front of the instrument by loosening the two screws.
Refer to the Ci7XX0 Installation Instructions for details.
2. Loosen the locking nut on the front side of the dampening pin.
3. Adjust the dampening pin located on the back of the holder using a flat-blade screwdriver to
change the dampening effect.
4. Tighten the dampening pin locking nut after the adjustment is completed and reinstall the
sample holder.
screwdriver
adjustment pin
Dampening pin locking
nut location