CAMERA SYSTEM (LooksCAM2) 17 www.xenosys.co.kr
Other files like NTFS/EXT, etc. will not be supported to play. Voice message of ”Memory card is
not detected” will come out when there is defective in Micro SD card.
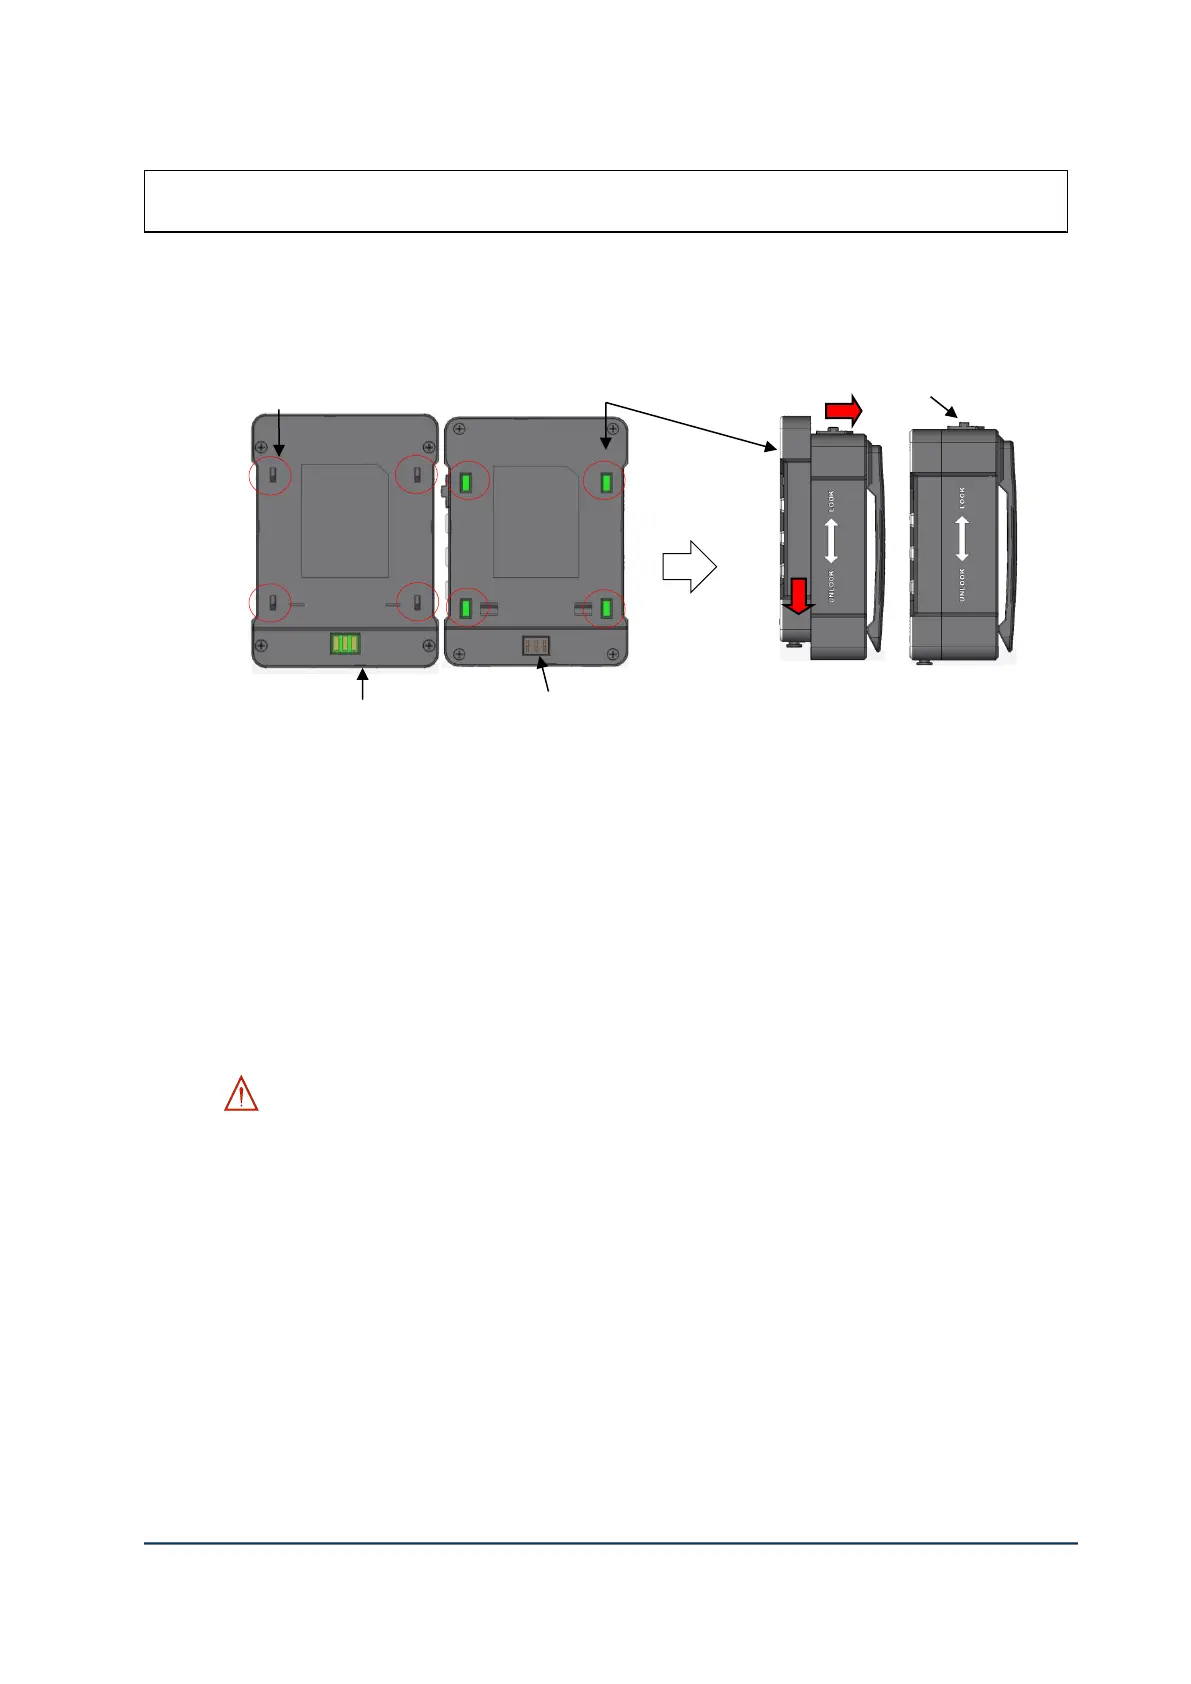
2. Assemble Main Body & Battery Pack
1) Match 4 holes of ③Main Body to same 4 hooks of ②Battery Pack and insert.
2) Push ③Main Body to the direction of red arrow and assemble ②Battery Pack.
3) Push ②Battery Release Knob to the direction of RED arrow and push the ①Main Body to
the direction of printed arrow on battery pack to disassemble.
4) ⑤ The charging points of the main body is very weak at the external shock, so be careful
in handling.
5) To charge the battery, remove the battery from the main body ⑤Connect the USB slot and
DC power supply with USB power cable, an then connect wall AC power (100/240 VAC,
50/60 Hz, to plug the power supply.
WARNING:
- Battery power input pin is VERY weak at the external shock, so be careful in assembling the
battery pack. If the charging port is broken, the operation of LooksCAM II may NOT be
possible.
- Store the main body and battery pack with separated to prevent the battery discharging.
④ Battery power input pin