Welcome Xerox
®
N60w Scanner
User Guide 2-3
Xerox
®
N60w Scanner
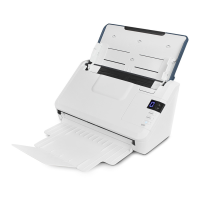
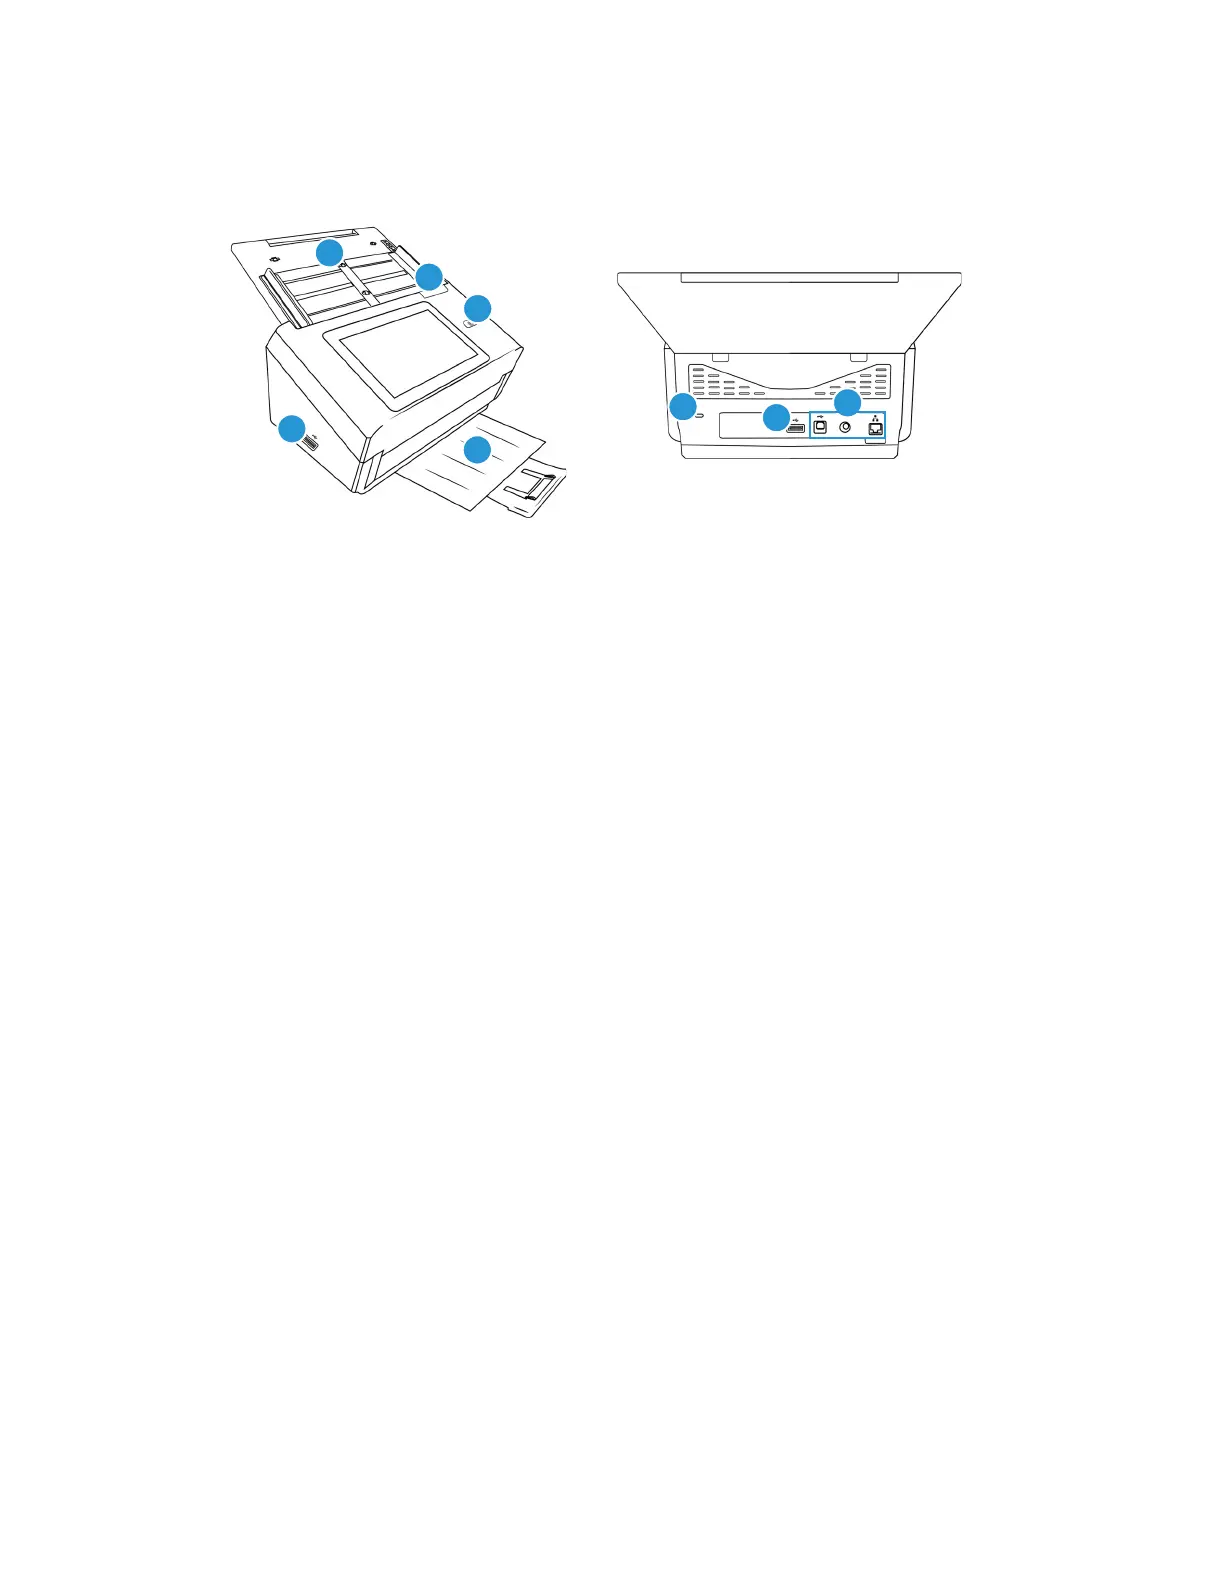
1. Input Tray—Holds the documents in the Automatic Document Feeder for scanning.
– Extension—Pull out to support various document lengths.
– Paper Guides—Slide to adjust to document width.
2. Automatic Document Feeder (ADF) Cover Release—Pull to open the Automatic Document
Feeder.
3. Power Button/ Status Light—Turns the scanner’s power on/off and indicates the scanner’s
status.
4. Output Tray—Holds documents after being scanned.
– Paper Stop—Flip up to keep regular documents stacked neatly in the output tray after
scanning.
– Extension—Flip out to support various document lengths.
5. Connections—Scanner connection ports.
– Universal Serial Bus (USB 3.1) Port—Connect the scanner to the computer via the USB
3.1 cable Gen 1.
–Power Jack—Connect the power cord to the scanner.
–LAN Port—Connect the scanner to network using a LAN cable.
6. USB Ports—Used to store images or scanner settings. Can connect a mouse and/or keyboard
to navigate scanner LCD.
7. Safety Lock Slot—Connect a Kensington® style safety lock.
 Loading...