Security
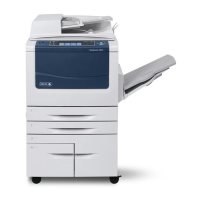
WorkCentre 5300 Series Multifunction Printer
System Administrator Guide
57
Creating a Request
1. In CentreWare IS, click Properties > Security > Machine Digital Certificate Management.
2. Click Create New Certificate.
3. Select Certificate Signing Request (CSR).
4. Fill out the form with your 2-Letter Country Code, State/Province Name, Locality Name,
Organization Name, Organization Unit, and Email Address.
5. Click Apply.
6. Values from the form are used to generate a Certificate Signing Request.
7. When the process is complete, you are prompted to save the Certificate Signing Request.
Right-click the link and save the csr.pem file to your computer.
8. Email the file to a trusted certificate authority to be signed.
Uploading a Certificate
When a signed certificate is received back from a trusted certificate authority, you can upload the
certificate to the printer. You can also upload certificates, root certificates, and intermediate CA
certificates to establish a complete chain of trust.
1. In CentreWare IS, click Properties > Security > Machine Digital Certificate Management.
2. Click Upload Signed Certificate.
3. If the certificate is password protected, type the Password and retype to verify.
4. Click Browse or Choose File, navigate to the signed certificate in .crt format, and click Open
or Choose.
5. Click Import.
Note: The signed certificate must match the CSR created by the printer.
Managing Certificates
To see information about the certificates installed on the printer, or specify the certificate to use for
S/MIME, SSL, and IPSEC:
1. In CentreWare IS, click Properties > Security > Certificate Management.
2. Select a certificate Category, Certificate Purpose, and Certificate Order.
3. Click Display the list.
4. Select a certificate from the list and click Certificate Details.
5. To set the certificate as the primary certificate, click Use this certificate. If Use this certificate is
not available, then the selected certificate has expired, or is not valid. All certificates in the
certification path (chain of trust) must be installed on the printer and be valid.
6. Click Delete to remove the certificate, or Export to save the certificate to your computer.

 Loading...


