Network Configuration
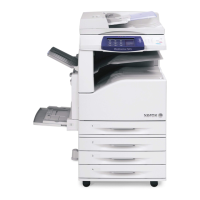
WorkCentre 7120/7125 Multifunction Printer
System Administrator Guide
22
TCP/IP
Transmission Control Protocol (TCP) and Internet Protocol (IP) are a two protocols within the Internet
Protocol Suite. IP manages the transmission of messages from computer to computer while TCP
manages the actual end-to-end connections.
Note: You can configure IPv4 settings at the printer control panel or through CentreWare IS. You
can only configure IPv6 through CentreWare IS.
Enabling TCP/IP
Note: By default, TCP/IP is enabled. If you disable TCP/IP, you must enable it at the printer control
panel before you can access CentreWare IS.
1. At the printer control panel, press the Machine Status button, then touch the Tools tab.
2. Touch Connectivity and Network Setup > Protocol Settings.
3. Touch TCP/IP - IP Mode, then touch Change Settings.
4. Touch IPv4 Mode, IPv6, or Dual Stack to enable both IPv4 and IPv6.
5. Touch Save.
Configuring TCP/IP Settings at the Control Panel
Manually Configuring an IPv4 Network Address
1. At the printer control panel, press the Machine Status button, then touch the Tools tab.
2. Touch Connectivity and Network Setup > Protocol Settings.
3. Touch IPv4 - IP Address Resolution, and touch Change Settings.
4. Touch Static, then touch Save.
5. Touch IPv4 - IP Address, and touch Change Settings.
6. Type the static IP address using the touch-screen keypad, and touch Save.
7. Touch IPv4 - Subnet Mask, and touch Change Settings.
8. Type the subnet mask using the touch-screen keypad, and touch Save.
9. Touch IPv4 - Gateway Mask, and touch Change Settings.
10. Type the gateway mask using the touch-screen keypad, and touch Save.
Manually Configuring an IPv6 Network Address
1. At the printer control panel, press the Machine Status button, then touch the Tools tab.
2. Touch Connectivity and Network Setup > Protocol Settings.
3. Touch IPv6 Address Manual Configuration, then touch Change Settings.
4. Touch Enabled, then touch Save.
5. Touch Manually Configured IPv6 Address, then touch Change Settings.
6. Type the static IP address using the touch-screen keypad, and touch Save.
7. Touch Manually Configured IPv6 Address Prefix, and touch Change Settings.

 Loading...


