7-72
7
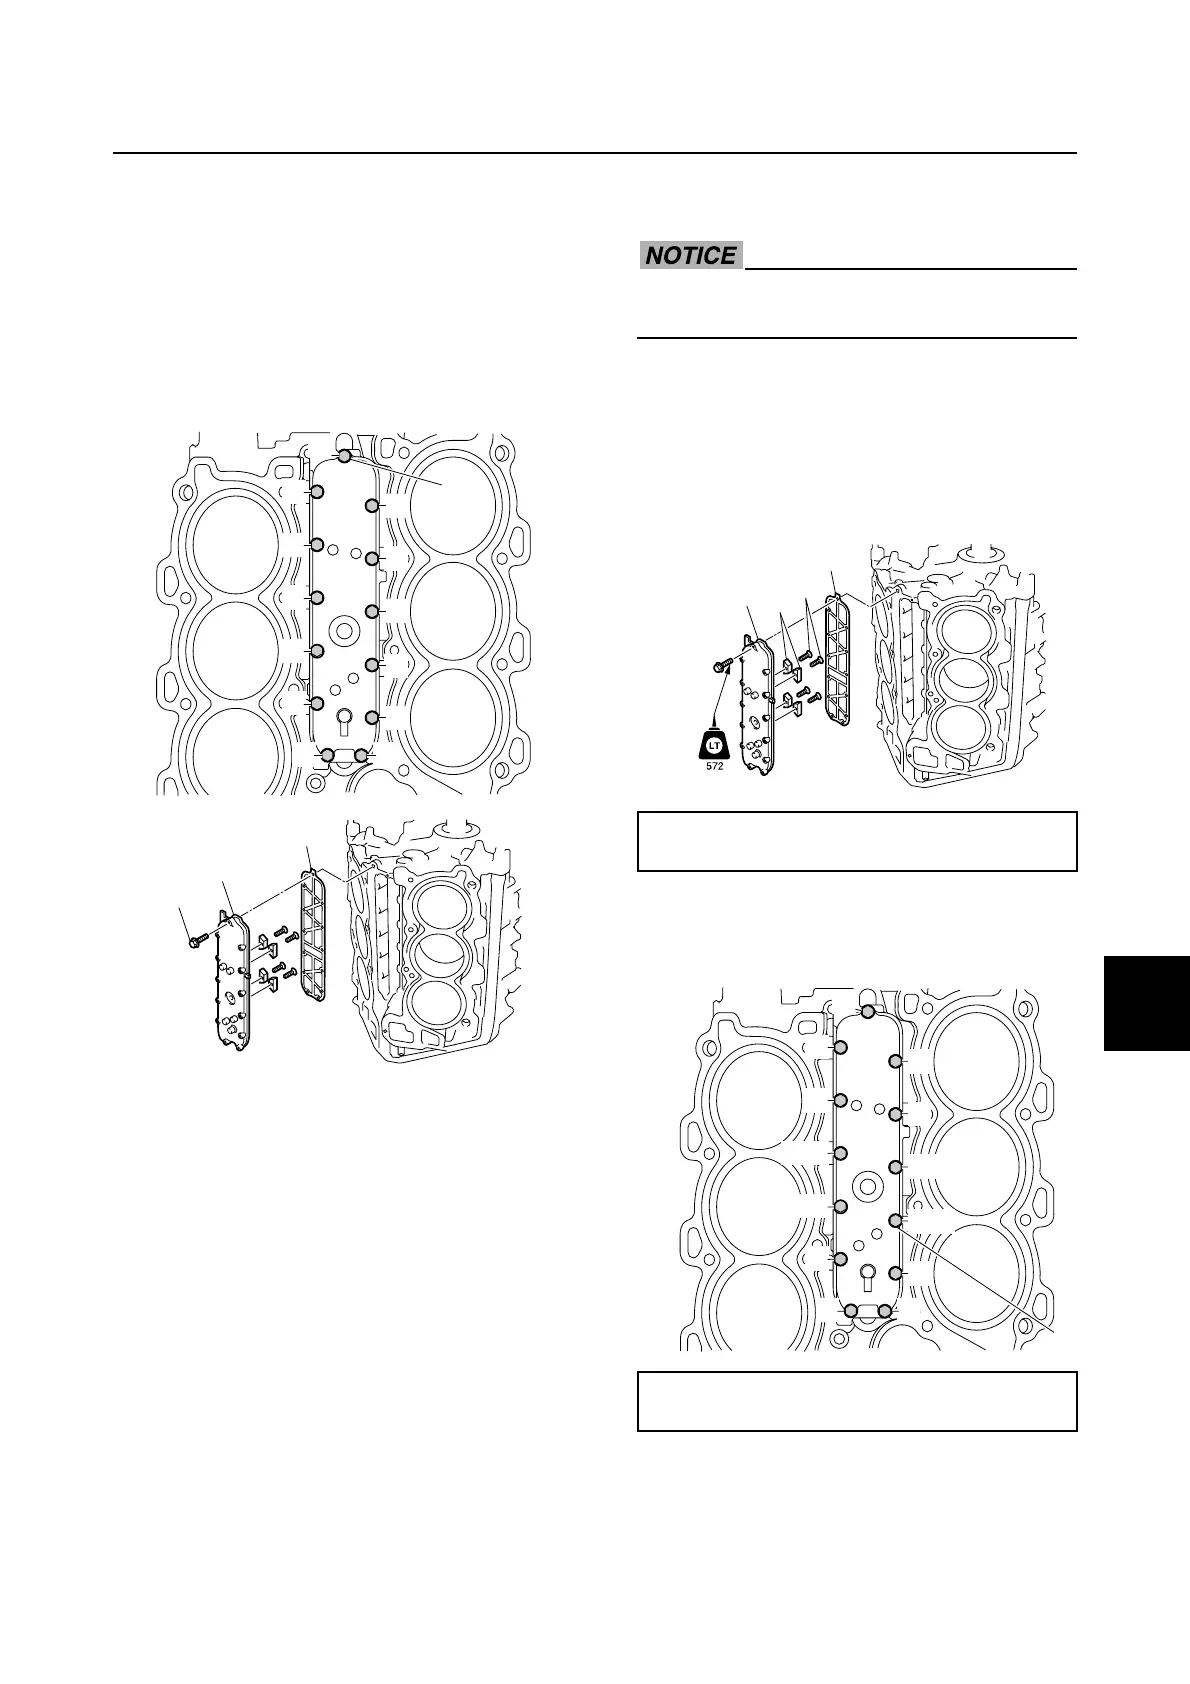
Removing the cooling water passage
cover
1. Remove the knock sensor, and then dis-
connect the flushing hose.
2. Loosen the cooling water passage cover
bolts 1 in the order 1, 2, and so on,
and then remove the cooling water pas-
sage cover 2 and gasket 3.
Checking the cooling water passage
cover anode
1. Check the anodes. Replace if eroded.
Clean if there is grease, oil, or scales.
NOTICE: Do not apply grease, oil, or
paint to the anodes.
Checking the knock sensor
1. Check the knock sensor. See “Checking
the knock sensor” (5-64).
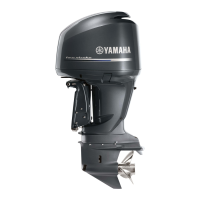
Installing the cooling water passage
cover
Do not reuse a gasket, always replace it
with a new one.
1. Install the anodes 1 to the cooling water
passage cover 2, and then tighten the
anode screws 3 to the specified torque.
2. Install a new gasket 4 and the cooling
water passage cover 2.
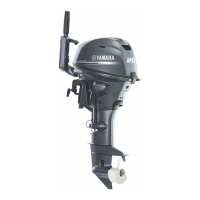
3. Tighten the cooling water passage cover
bolts 5 to the specified torque in the
order 1, 2, and so on.
4. Connect the flushing hose 6, and then
fasten it using the plastic tie 7.
12
3
4
5
6
7
8
9
0
A
B
C
1
3
2
1
Anode screw 3:
3 N·m (0.3 kgf·m, 2.2 ft·lb)
Cooling water passage cover bolt 5:
12 N·m (1.2 kgf·m, 8.9 ft·lb)
4
2
1
3
1
4
5
8
9
0
C
D
E
F
G
5
2
3
6
7
A
B
Cooling water passage cover