3-10
3
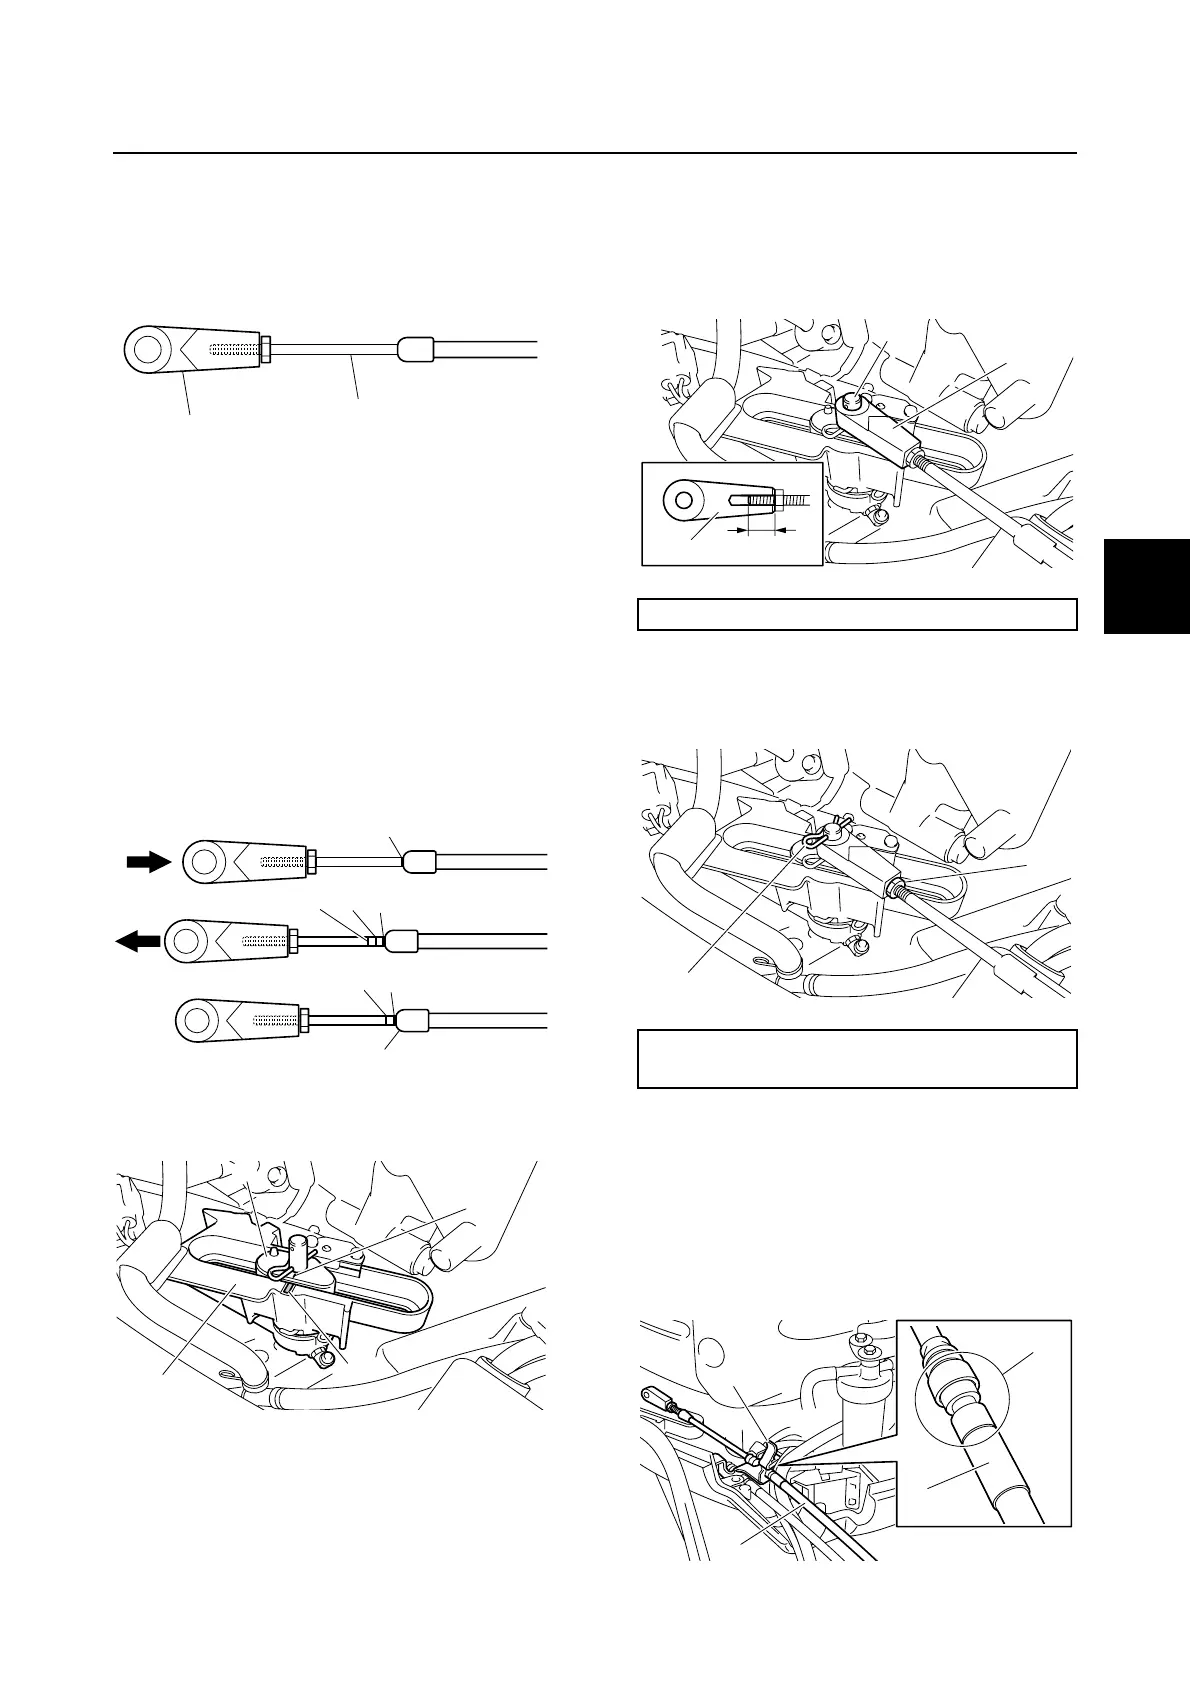
7. Fully screw in the shift cable joint 6 to
the shift cable 5.
8. Move the remote control lever to the N
position.
9. Make a mark b on the fully retracted
inner cable, and then make a mark c on
the fully extended inner cable.
10. Make a mark d in the middle point
between the marks b and c, and then
align the mark d with the outer cable
edge e.
11. Align the mark f on the bushing 7 with
the mark g on the shift bracket 8.
12. Adjust the shift cable joint 6, and then
install the shift cable joint 6 to the pin h.
WARNING! The shift cable joint must
be screwed in 8.0 mm (0.31 in) or
more.
13. Install the clip 9, and then tighten the
shift cable locknut 0 to the specified
torque.
14. Route the throttle cable A through the
bottom cowling.
15. Fasten the throttle cable A using the
cable holder 4 so that the cable holder
4 is fitted into the groove m in the throt-
tle cable A.
5
6
c
b
bd
bd
e
f
g
7
8
Dimension k: 8.0 mm (0.31 in) or more
Shift cable locknut 0:
4 N·m (0.4 kgf·m, 3.0 ft·lb)
6
k
h
6
0
9
m
A
4
A
Rigging grommet mounting