3-24
ADJUSTING THE FRONT BRAKE/
ADJUSTING THE REAR BRAKE
CHK
ADJ
a
b
WARNING
CAUTION:
EAS00108
CHASSIS
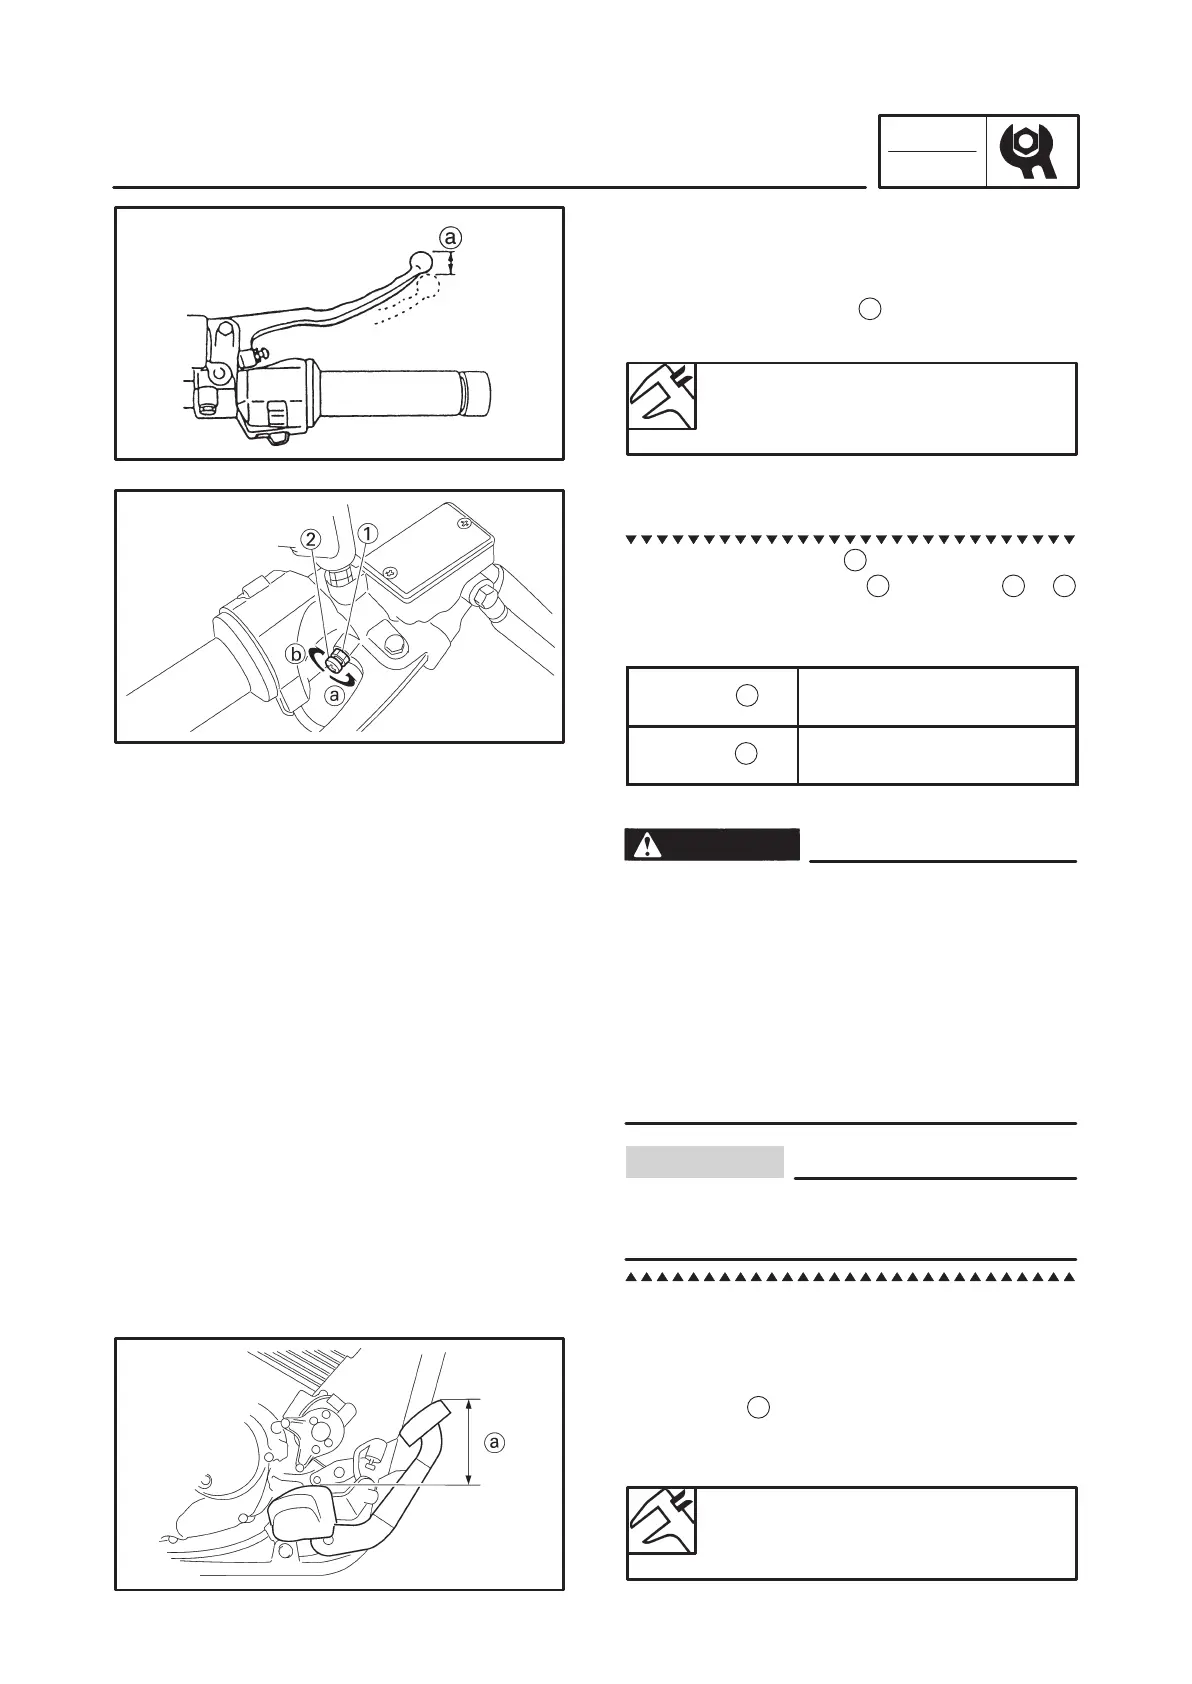
ADJUSTING THE FRONT BRAKE
1. Check:
S brake lever free play
a
Out of specification Adjust.
Brake lever free play (at the end
of the brake lever)
5 X 8 mm
2. Adjust:
S brake lever free play
a. Loosen the locknut
1
.
b. Turn the adjusting bolt
2
in direction
a
or
b
until the specified brake lever free play is ob-
tained.
Direction
Brake lever free play is
increased.
Direction
Brake lever free play is
decreased.
c. Tighten the locknut.
A soft or spongy feeling in the brake lever
can indicate the presence of air in the brake
system. Before the vehicle is operated, the
air must be removed by bleeding the brake
system. Air in the brake system will consid-
erably reduce braking performance and
could result in loss of control and possibly
an accident. Therefore, check and, if neces-
sary, bleed the brake system.
After adjusting the brake lever free play,
make sure that there is no brake drag.
EAS00112
ADJUSTING THE REAR BRAKE
1. Check:
S brake pedal position
(distance
a
from the top of the rider footrest
to the top of the brake pedal)
Out of specification Adjust.
Brake pedal position (above the
top of the rider footrest)
76.6 mm