Source
Setting the Pulse Signal Amplitude
6.
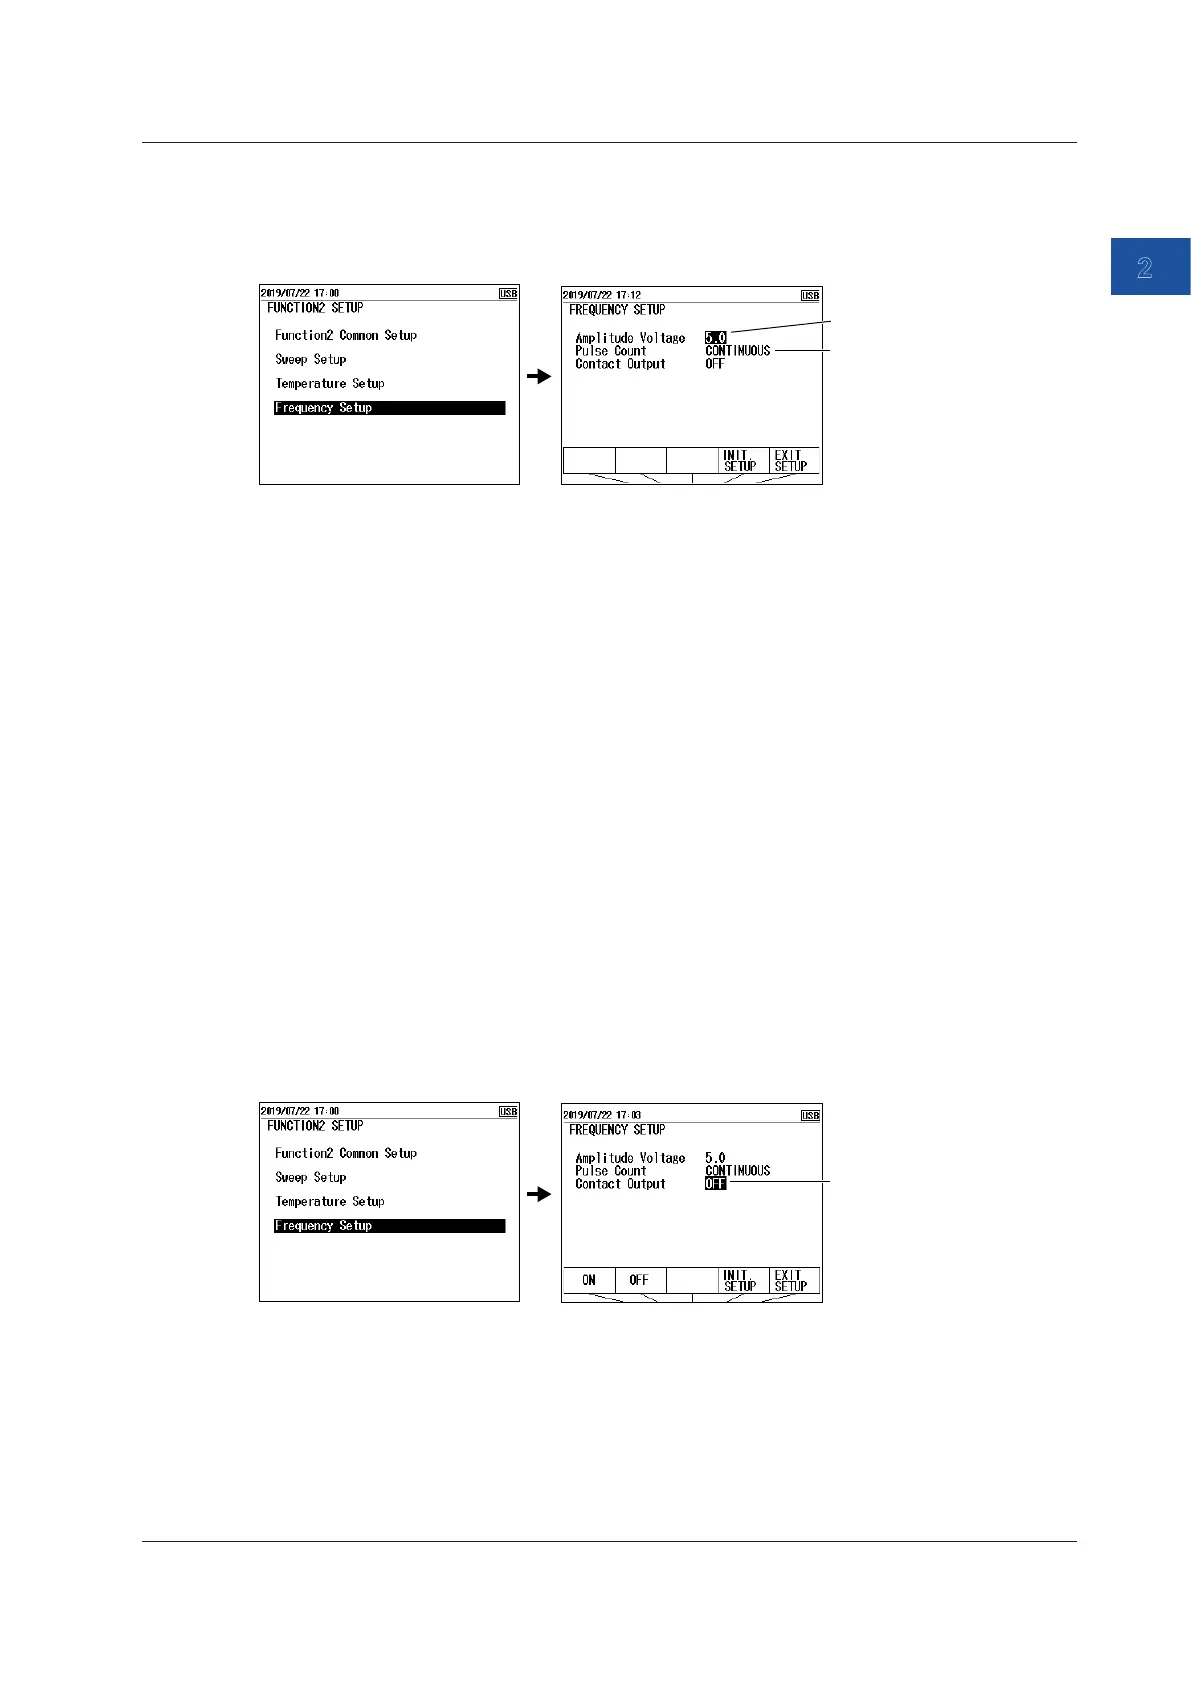
With the source value and measurement value displayed, press SETUP under Function 2.
7.
Select Frequency Setup, and press ENTER. A Frequency Setup setup screen appears.
Set the amplitude.
Set the pulse count.
8.
Select Amplitude Voltage, and press ENTER. The settings are displayed at the bottom of the
screen.
9.
Use the arrow keys to select the amplitude, and then press ENTER.
To finish entering the settings here, proceed to step 12.
Setting the Number of Pulses to Source
10.
Select Pulse Count, and press ENTER. The settings are displayed at the bottom of the screen.
11.
Use the arrow keys to select the number of pulses to source, and then press ENTER.
If you set the number to 0, Continue will be selected.
Setting the Amplitude and the Number of Pulses
12.
Press the arrow key corresponding to EXIT SETUP. The settings are confirmed, and the screen
reverts to show the source value and measurement value.
The cancel the settings, press ESC to return to the screen and step 6.
To initialize the settings, pressing the arrow key corresponding to INIT SETUP.
Turning the Contact Output On and Off
13.
With the source value and measurement value displayed, press SETUP under Function 2.
14.
Select Frequency Setup, and press ENTER. A Frequency Setup setup screen appears.
Turn the contact
output on or off.
15.
Select Contact Output. ON and OFF appear in the selection menu.
16.
Use the arrow keys to set the contact output to ON or OFF. To generate contact signals, select
ON.
2.6 Frequency and Pulse Source
2-13
IM CA500-01EN
2
 Loading...