EasyManua.ls Logo

YOKOGAWA CA150 - User Manual

YOKOGAWA CA150
134 pages
Print Icon
To Next Page IconTo Next Page
Loading...
User's
Manual
CA150
HANDY CAL
IM CA150E
7th Edition: Oct. 2017 (YMI)
IM CA150E

Table of Contents

Questions and Answers

  • S
    Stephen FosterJul 27, 2025
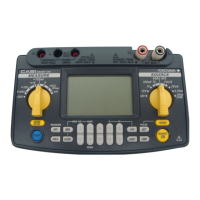
    Why source cannot be turned on with SOURCE ON (output) on YOKOGAWA CA150?
    • S
      Stephanie LoweJul 27, 2025
      If an abnormal voltage or current is applied to the output terminals of your YOKOGAWA Test Equipment, the built-in protection fuse may blow. The instrument needs to be repaired.
  • C
    cabrerapamelaAug 1, 2025
    How to fix the hold function if it does not work on YOKOGAWA CA150?
    • L
      Lisa PaulAug 1, 2025
      If the hold function for measurement on your YOKOGAWA Test Equipment isn't working, check if "Print" is set for communication in setting mode. The communication output state is indicated by the flashing of REMOTE.
  • R
    russogaryAug 6, 2025
    How to troubleshoot communication issues via the RS232 interface on YOKOGAWA CA150 Test Equipment?
    • A
      Adam VargasAug 6, 2025
      If your YOKOGAWA Test Equipment cannot be controlled by communication via the RS232 interface, ensure that the communication settings are configured properly.
  • L
    Lisa HudsonAug 11, 2025
    What to do if measurement values are not displayed on YOKOGAWA CA150 Test Equipment?
    • Z
      Zachary ChaneyAug 11, 2025
      If measurement values are not displayed on your YOKOGAWA Test Equipment, verify whether MEASURE ON/OFF is indicated as being in the OFF state.
  • R
    riosrichardAug 16, 2025
    What does Err 79 or Err 80 mean on YOKOGAWA Test Equipment?
    • C
      Casey RiceAug 16, 2025
      If Err 79 or Err 80 appears at power on of your YOKOGAWA Test Equipment, the instrument needs to be repaired.
  • K
    Karen BarnesAug 21, 2025
    How to troubleshoot if nothing appears on the LCD of YOKOGAWA Test Equipment?
    • M
      Mark LeeAug 21, 2025
      When running on batteries and nothing appears on the LCD of your YOKOGAWA Test Equipment: Ensure the batteries are attached properly and have power. If using an AC adapter, ensure it's reliably supplied with power and the plug of the AC adapter is inserted in the instrument but the AC adapter is connected to an AC power supply (outlet).

Summary

General Safety Precautions

Danger! Handle with Care Symbol Explanation

Explains the 'Danger' symbol and its importance for avoiding risks.

Explanation of Safety Symbols

Describes symbols indicating direct current (DC) and power source.

Safety Precautions and Warnings

WARNING Indicator Definition

Defines hazards leading to loss of life or serious injury if instructions are not followed.

CAUTION Indicator Definition

Defines hazards leading to injury or product damage if instructions are not followed.

Instrument Usage Safety Precautions

WARNING: Specific Usage Precautions

Outlines warnings for intended purpose, appearance, environment, and protection features.

AC Adapter and General Safety Precautions

WARNING: AC Adapter and Power Cord Safety

Details warnings for using the AC adapter and power cord supplied by YOKOGAWA.

3. Before Starting Operation

Safety Precautions Before Use

Re-iterates safety precautions, especially regarding casing and abnormalities.

3.2 Connecting Power Supply Options

3.2 Connecting AC Adapter

3.2 Using NiMH Battery Pack

3.2 NiMH Battery Installation and Charging

WARNING: NiMH Battery Charging Safety

Warns about charging the NiMH battery in specific temperature conditions.

3.2 Fuse Replacement and Battery Life

4. Source Functionality

WARNING: Source Output Safety

Warns about voltage limits and using supplied lead cables for safety.

4.1 Connecting Source Terminals

4.2 Sourcing DC Voltage (DCV) Signals

DC Voltage (DCV) Sourcing Procedure

Step-by-step instructions for sourcing DC voltage.

4.3 Sourcing DC Current (DCA) Signals

DC Current (DCA) Sourcing Procedure

Step-by-step instructions for sourcing DC current.

4.3 DC Current (DCA) Functions

4.3.2 4-20 mA Current Sourcing Function

Explains how to use the 4-20 mA current sourcing function.

4.3.3 20 mA SINK Current Function

Details the procedure and precautions for the 20 mA SINK function.

4.4 Sourcing Resistance (Ω) Signals

4.4 Resistance (Ω) Sourcing Procedure

4.5 Sourcing Thermocouple (TC) Signals

4.5.1 Thermocouple (TC) Signal Generation

Details the procedure for generating voltage signals corresponding to thermocouple types.

4.5 Thermocouple (TC) Signal Usage

4.5 Using the Built-in RJ Sensor

4.6 Sourcing RTD Signals

4.6 RTD Signal Settings

4.7 Sourcing Frequency and Pulse Signals

4.7 Frequency and Pulse Generation

4.7.1 Generating a Continuous Pulse Train

Step-by-step instructions for generating continuous pulse trains.

4.7.2 Generating a Pulse Cycle

Step-by-step instructions for generating pulse cycles.

4.8 Divided Output (n;m) Function

4.9 Sweep Output Functions Overview

4.9 Sweep Output Functions

4.9.1 Step Sweep Function Operation

Details how to set and generate a step sweep output.

4.9.2 Linear Sweep Function Operation

Details how to set and generate a linear sweep output.

4.9.3 Program Sweep Function Operation

Details how to output saved values in order for program sweep.

5. Measurement Capabilities

WARNING: Measurement Safety Precautions

Warns about connecting/disconnecting cables while powered and incorrect terminal connections.

5.1 Connecting Measurement Terminals

5.2 Measuring DC Voltage (DCV)

5.3 Measuring DC Current (DCA)

5.3.1 Measuring DC Current

Step-by-step instructions for measuring DC current.

5.3 DC Current Measurement

5.3.2 Measuring 24 V LOOP

Details how to perform transmitter loop tests using the 24V LOOP function.

5.4 Measuring Thermocouple (TC)

5.5 Measuring Resistance (Ω)

5.6 Measuring RTD Signals

5.7 Measuring Frequency and Pulse

5.7 Frequency and Pulse Measurement

7. Setting Mode Navigation

7.1 Source Settings

7.2 Measurement Settings

7.3 Configuration Settings

8. Communication Functionality

8.2 Communication Command List

8.3 Detailed Command Descriptions

10. Troubleshooting Guide

10.1 Troubleshooting Checklist

Lists problems and their corrective actions for instrument operation.

9. Calibration Mode Introduction

9.1 Source Function Calibration

9.2 Measurement Function Calibration

9.3 Verification After Calibration

9.4 Temperature Range Calibration

10. Troubleshooting Instrument Issues

10.1 Troubleshooting Checklist and Actions

Lists problems and their corrective actions for instrument operation.

YOKOGAWA CA150 Specifications

General IconGeneral
BrandYOKOGAWA
ModelCA150
CategoryTest Equipment
LanguageEnglish

Related product manuals