Getting Started 1 - 3
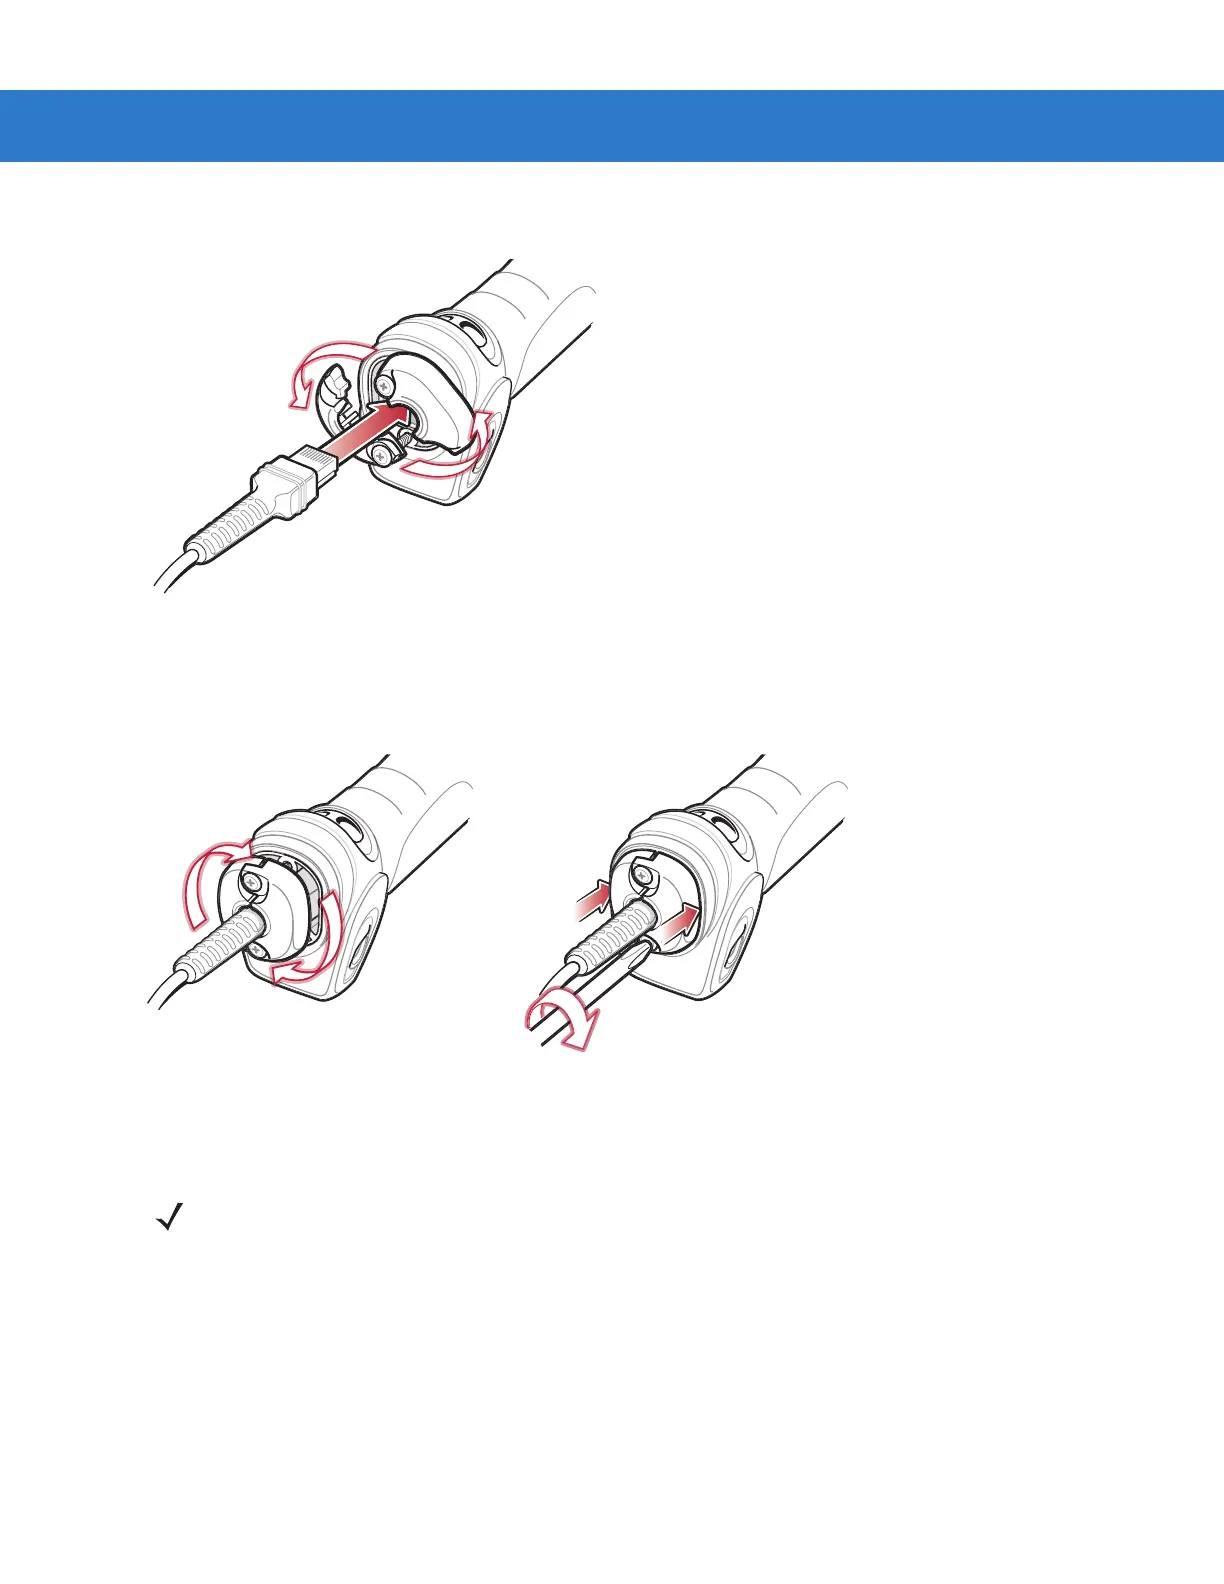
2. Open the clamp and plug the interface cable modular connector into the cable interface port on the bottom of
the digital scanner handle.
Figure 1-3
Connecting the Interface Cable
3. Gently tug the cable to ensure the connector is properly secured.
4. Close the clamp, push it back into place and tighten the screws on the clamp to secure the cable into the
bottom of the digital scanner.
Figure 1-4
Securing the Clamp
5. Connect the other end of the interface cable to the host (see the specific host chapter for information on host
connections).
Removing the Interface Cable
1. Loosen the two screws on the cable clamp at the bottom of the digital scanner and gently pull the clamp away
from the bottom of the digital scanner.
2. Open the clamp and unplug the interface cable modular connector from the cable interface port on the bottom
of the digital scanner handle. Carefully slide out the cable.
3. Follow the steps for Installing the Interface Cable on page 1-2 to connect a new cable.
NOTE Different hosts require different cables. The connectors illustrated in each host chapter are examples only.
The connectors may be different than those illustrated, but the steps to connect the digital scanner are the
same.
 Loading...
