OPERATION
ZEISS Illumination and contrast techniques Axio Observer
158 431004-7244-001 12/2016
(3) Setting reflected light brightfield according to KÖHLER
− The microscope has been started properly as described in section 4 INSTALLATION INSTRUCTIONS
AND FIRST-TIME SET-UP.
− The microscope has been switched on.
• Switch on the HAL 100 or microLED illuminator for reflected light using the RL button (Fig. 154/10) on
the microscope stand.
• Adjust the light intensity by turning the control wheel (Fig. 154/11) on the microscope stand.
• Place a high contrast reflected-light specimen on the microscope stage.
• Turn the nosepiece (Fig. 154/5) to swivel in the 10x objective (yellow ring, see also section 5.3).
• Use focus drive (Fig. 154/9) to focus on the specimen. In doing so, always focus away from the
specimen, if possible, to avoid any collision between objective and specimen.
• Move the aperture diaphragm slide MAT setting lever (Fig. 154/2 or Fig. 156/4) into the central
position (roughly half opened or closed).
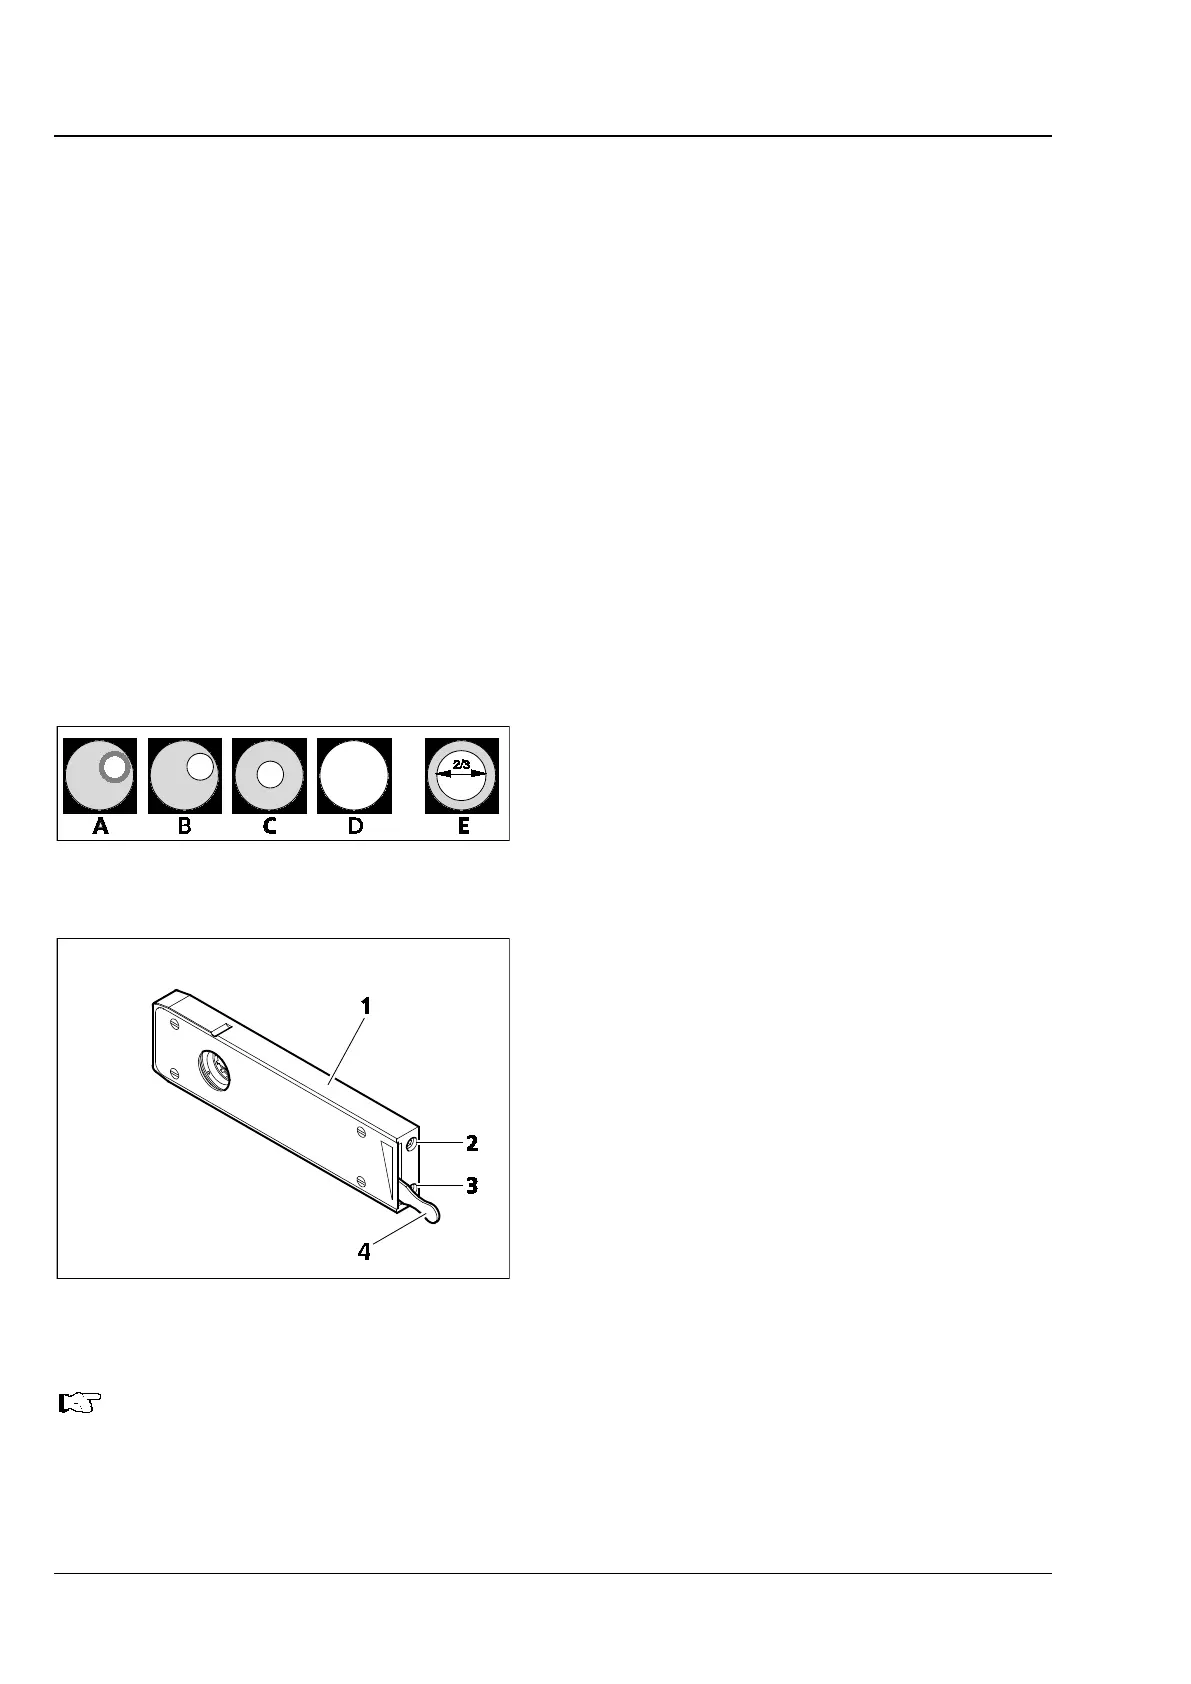
• Use the control lever (Fig. 156/4) of luminous-field diaphragm slider (Fig. 154/3) to narrow the
luminous-field diaphragm until it becomes visible in the field of view (Fig. 155/A).
• Turn the focus drive (Fig. 154/9) to refocus on the edge of the luminous-field diaphragm (Fig. 155/B)
and use the centering screws (Fig. 156/2, 3) to center the luminous-field diaphragm with the edge of
the field of view (Fig. 155/C).
• Then, open the luminous-field diaphragm
(Fig. 154/3) so that it just disappears from the
field of view (Fig. 155/D).
• To set the aperture diaphragm (image contrast),
remove one eyepiece (Fig. 154/15) from the
binocular tube and look into the tube with your
naked eye or insert the auxiliary microscope in
place of the eyepiece.
• Center the aperture diaphragm with the
centering screws on the aperture diaphragm
slider MAT (Fig. 154/2); for specimens with
medium contrast, set the control lever to about
2/3 to 4/5 of the exit pupil diameter of the
objective (Fig. 155/E).
In most applications, this aperture diaphragm
setting provides optimum contrast at almost ideal
resolution, and is therefore the best compromise
for the human eye.
• Finally, reinsert the eyepiece, refocus with the
focus drive (Fig. 154/9) and adapt the image
brightness with control wheel (Fig. 154/11) to
the reflected light specimen.
Never use the aperture diaphragm to adjust image brightness. Use the illumination intensity
control wheel (Fig. 154/11) for this purpose!
Fig. 155 Diaphragm settings in reflected
light brightfield acc. to KÖHLER
Fig. 156 Iris diaphragm slider for reflected
light