Maintenance and Safety
Adjust Drive Belt 10-3
10
NOTICE: Rotating the tire in the reverse
direction will give a false adjustment. Failing to
follow this instruction could cause damage to
the drive belt.
NOTICE: Rotating the tire two full revolutions
isn’t enough to normalize the belt on the two
sprockets, so be sure to rotate the belt two full
revolutions by counting the number of times
the printing on the belt passes by the rear
outer fender arm. Failing to follow this
instruction could cause damage to the drive
belt.
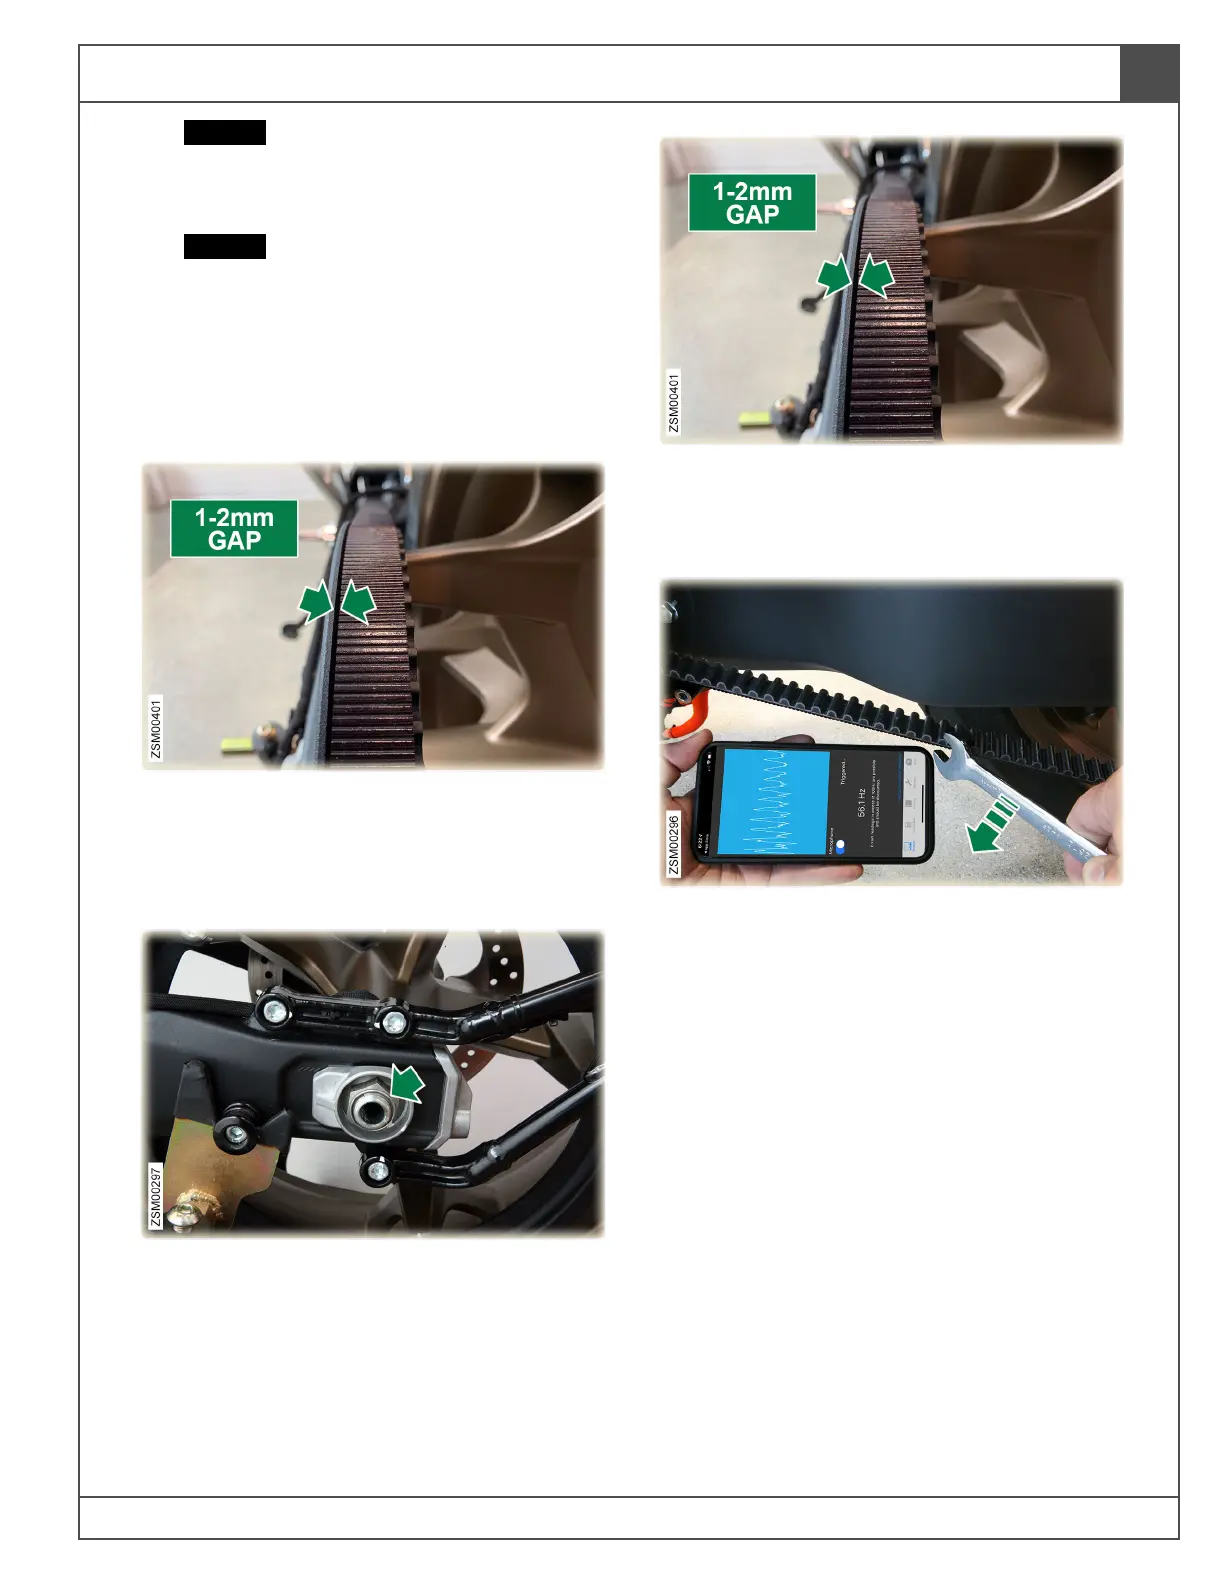
7. After rotating the drive belt two revolutions
and the adjustment bolts are adjusted
properly, the belt should have a 1-2mm gap
between the belt-side face of the rear sprocket
and the drive belt.
8. Tighten the rear axle nut. Torque 75 lb·ft
(102 Nm). Tool: 27mm socket
9. After the axle is torqued properly, rotate the
belt two full turns and confirm that the belt still
has a 1-2mm gap between the belt-side face of
the rear sprocket and the drive belt.
10. Using the Gates® Carbon Drive™ application
on a Smartphone, confirm the microphone is
ON and hold the phone so that the
microphone is as close to the drive belt as
possible (without touching the belt). Test the
belt as close to the center between the front
and rear sprocket for best readings. Pluck the
belt with your thumb or with a wrench so that
the belt vibrates like a guitar string. Check the
belt tension range and readjust the belt, if
necessary. Recommended belt tension range:
62 Hz to 82 Hz
11. Test ride motorcycle.