Body
Body 60-27
60
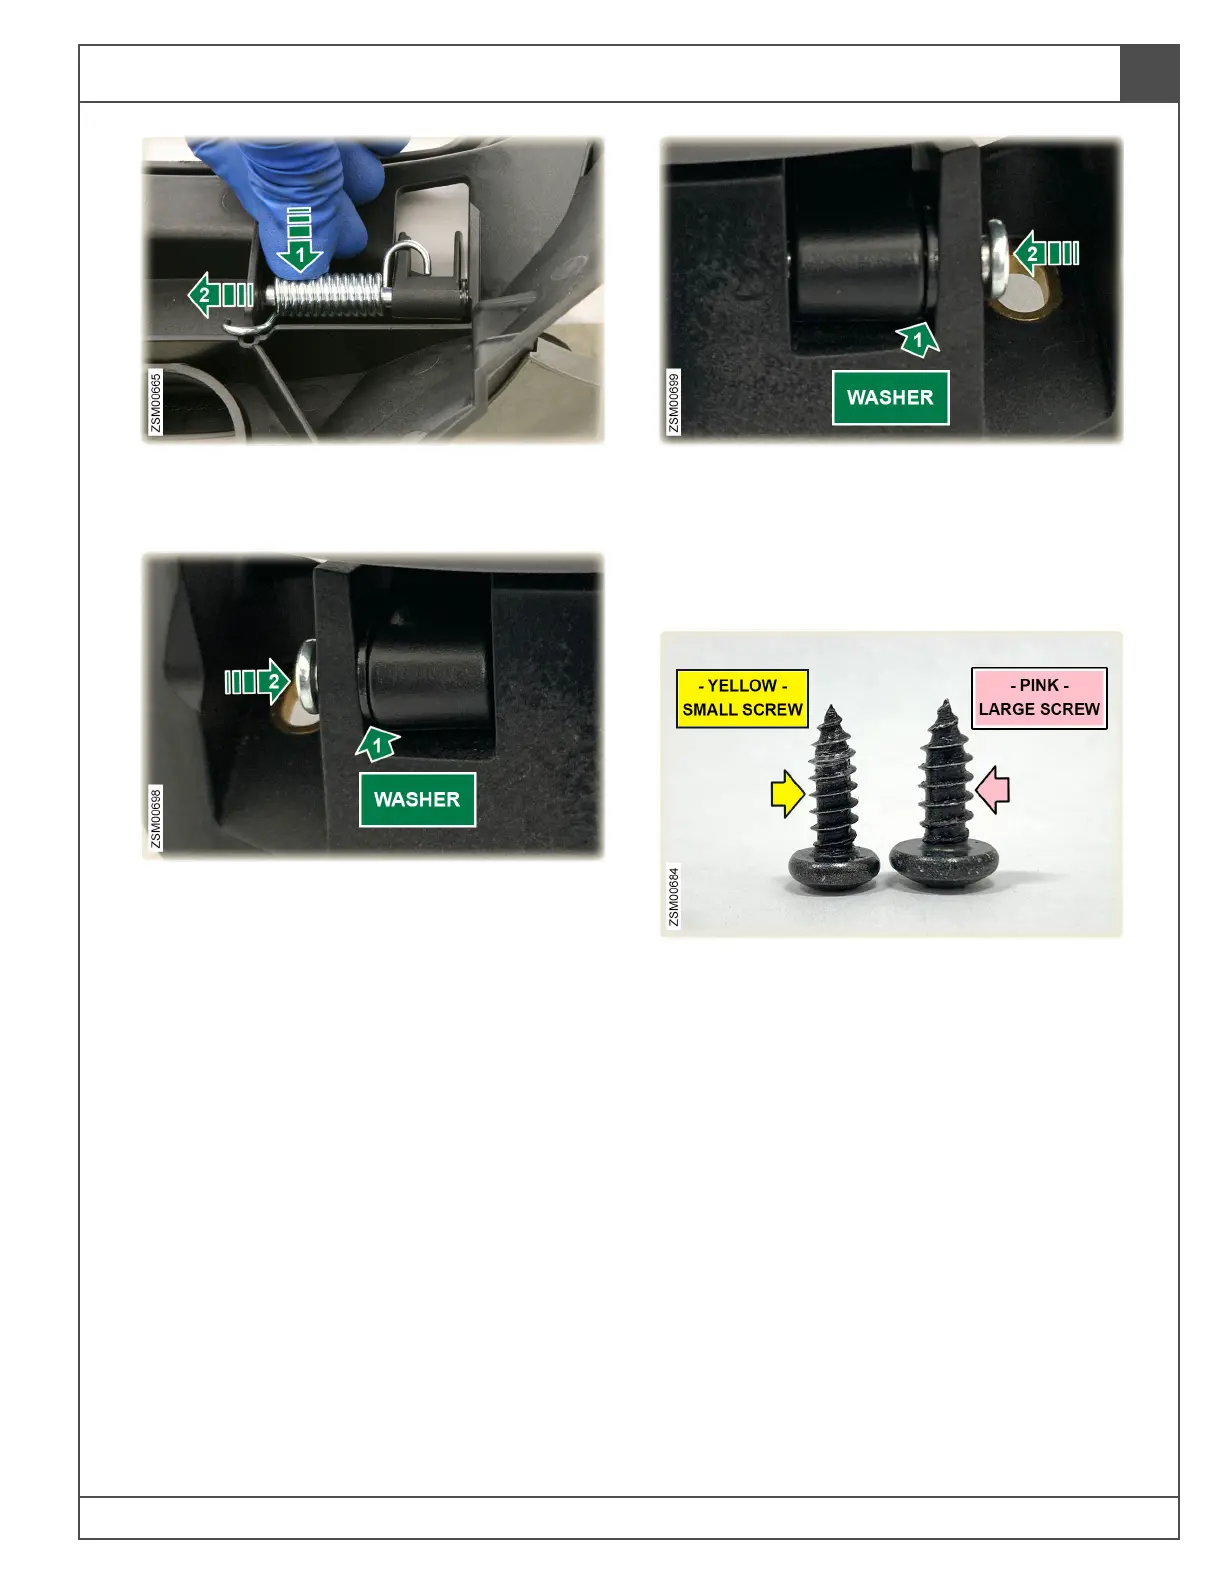
7. Apply pressure to the right tank lid spring
(arrow #1) while pressing hinge pin (arrow #2)
through hole in tank collar.
8. While installing the charge inlet lid, place
washer (arrow #1) between the charge inlet lid
hinge and the tank collar, while pressing hinge
pin (arrow #2) through hole in tank collar. Slide
the pin (arrow #2) far enough that the hinge
pin head seats against the tank collar.
9. While installing the charge inlet lid, place
washer (arrow #1) between the charge inlet lid
hinge and the tank collar, while pressing hinge
pin (arrow #2) through hole in tank collar. Slide
the pin (arrow #2) far enough that the hinge
pin head seats against the tank collar.
10. For this procedure, there will be references to
screws securing body panels, that are 2
different sized screws.
Small screws: designated on photos with
yellow arrows.
Large screws: designated on photos with
pink arrows.