Quick Tour
ZOOM HD8/HD16
29
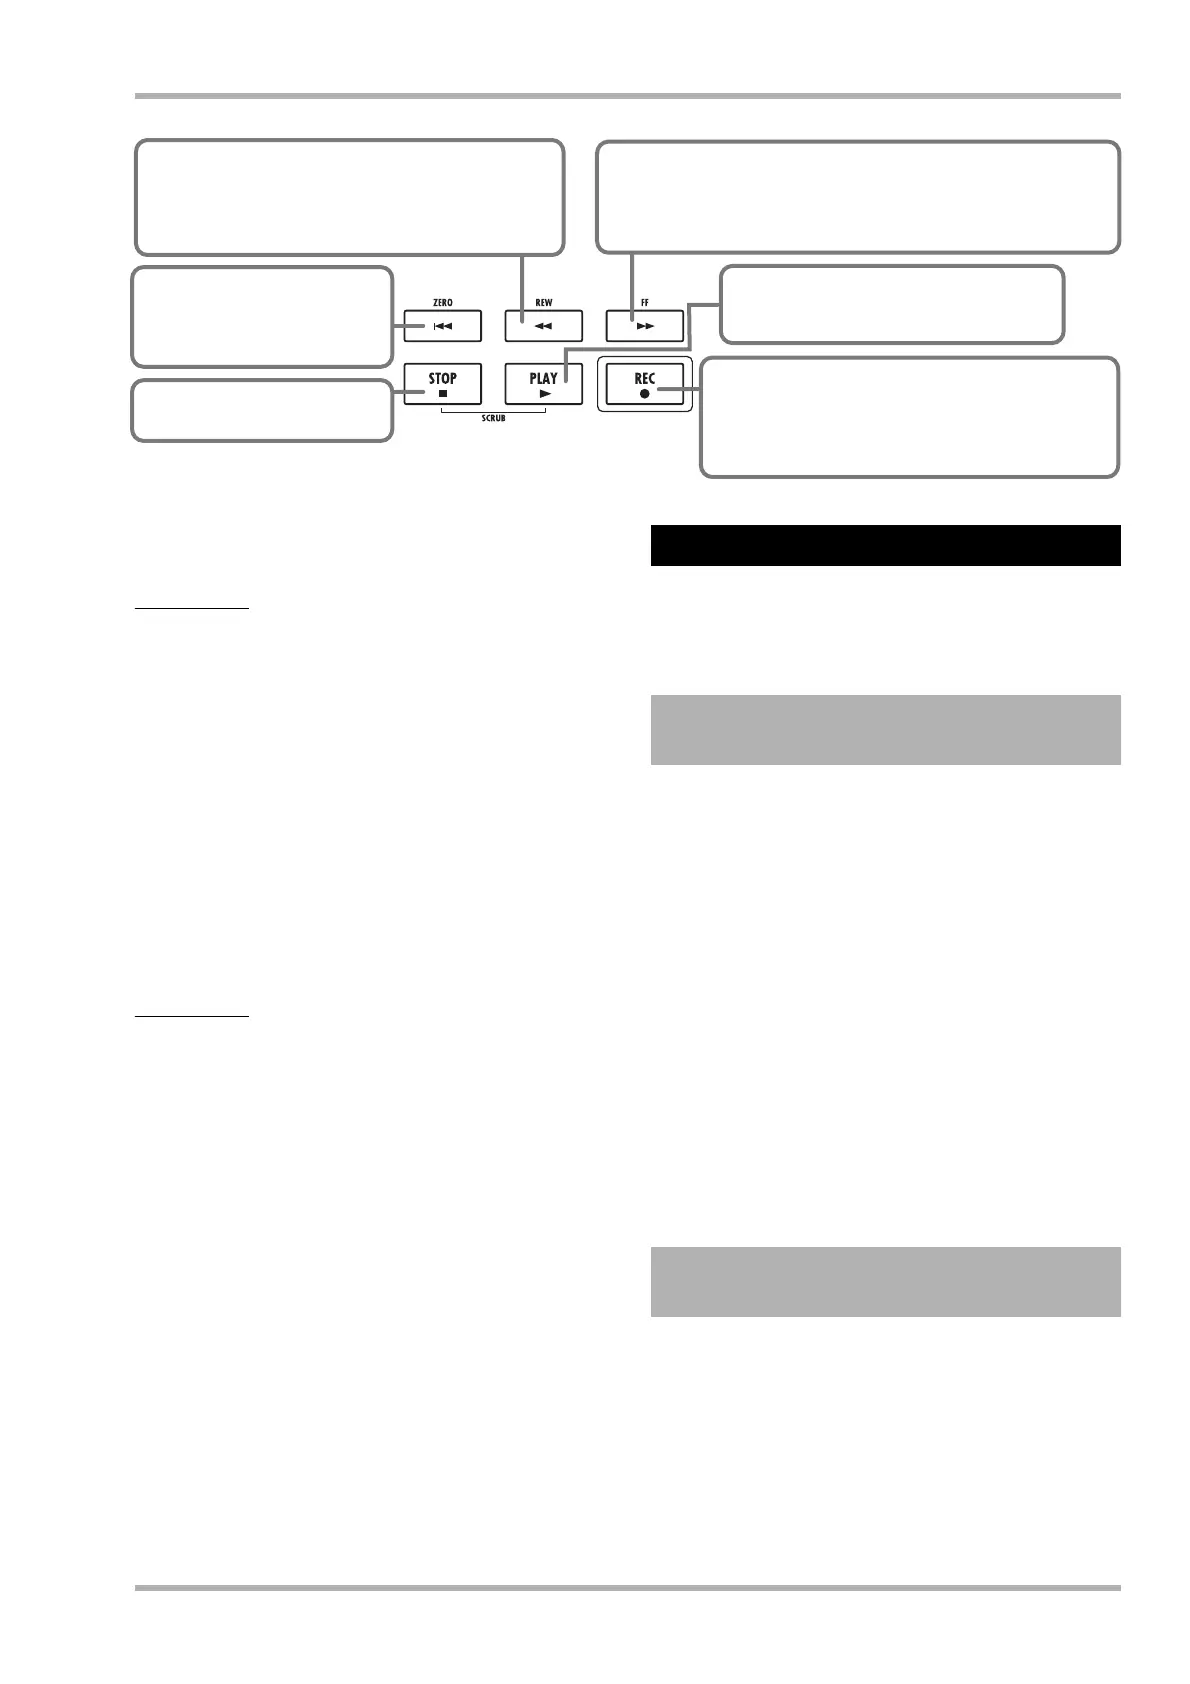
ZERO [U] key
Returns the recorder to the
start position (counter zero
position).
STOP [P] key
Stops the recorder.
FF [Y] key
Moves the current position forward in 1-second steps. Movement
speed can be increased by holding down the FF [Y] key and
pressing the REW [T] key.
REW [T] key
Moves the current position back in 1-second steps.
Movement speed can be increased by holding down
the REW [T] key and pressing the FF [Y] key.
REC [O] key
If you press this key while holding down the PLAY
[R] key, recording starts. Pressing the key during
playback causes punch-in and pressing the key
during recording causes punch-out.
PLAY [R] key
Starts recorder playback from the current
position.
Basic operation of transport keys
The track will be played back together with the selected guide
rhythm from the rhythm section.
HINT
•You can specify a position in hours/minutes/seconds/
milliseconds or in measures/beats/ticks and move directly to
that point (→ p. 39).
• By setting marks within the recording, you can quickly jump to
these points (→ p. 47).
7. To stop playback, press the STOP [P] key.
To redo the recording, repeat steps 3 – 5.
8. When you are satisfied with the recorded
content, press status key 1 until it is lit in
green.
The recording standby condition of track 1 is canceled.
HINT
• Recorded content can be copied, deleted, or edited (→ p. 50).
• By switching to another V-take for the track, you can record
again on the track without erasing the current recording (→ p.
61).
In this step, you will learn how to record another instrument on
track 2, while listening to the content you recorded in step 2.
Adding parts in this way is called “overdubbing”.
As in step 2, adjust input sensitivity and recording level, and
make settings for the insert effect.
1. Connect the next instrument you want to
record, and press the [ON/OFF] key so that it
is lit in red.
2. Adjust input sensitivity and recording level in
the same way as in step 2.1.
3. To use the insert effect for recording, select
the algorithm and patch in the same way as
in step 2.2.
4. When the setting is complete, press the
[EXIT] key to return to the main screen.
Now you’re ready to record the second instrument on track 2,
while playing the content of track 1 and the guide rhythm.
1. Repeatedly press status key 2 until the key is
lit in red.
Track 2 is now in the recording standby condition. Verify that
the status key 1 is lit in green and the [RHYTHM] status key is
lit in green or red.
Step 3: Overdubbing
3.1
Making settings for input
sensitivity and insert effect
3.2 Selecting a track and
recording