To correct the Print Pad Level in this instance, turn the front print pad adjuster knob counter-clockwise
(left) 1-step. Reprint the file and verify that all four corner calibration points are correct.
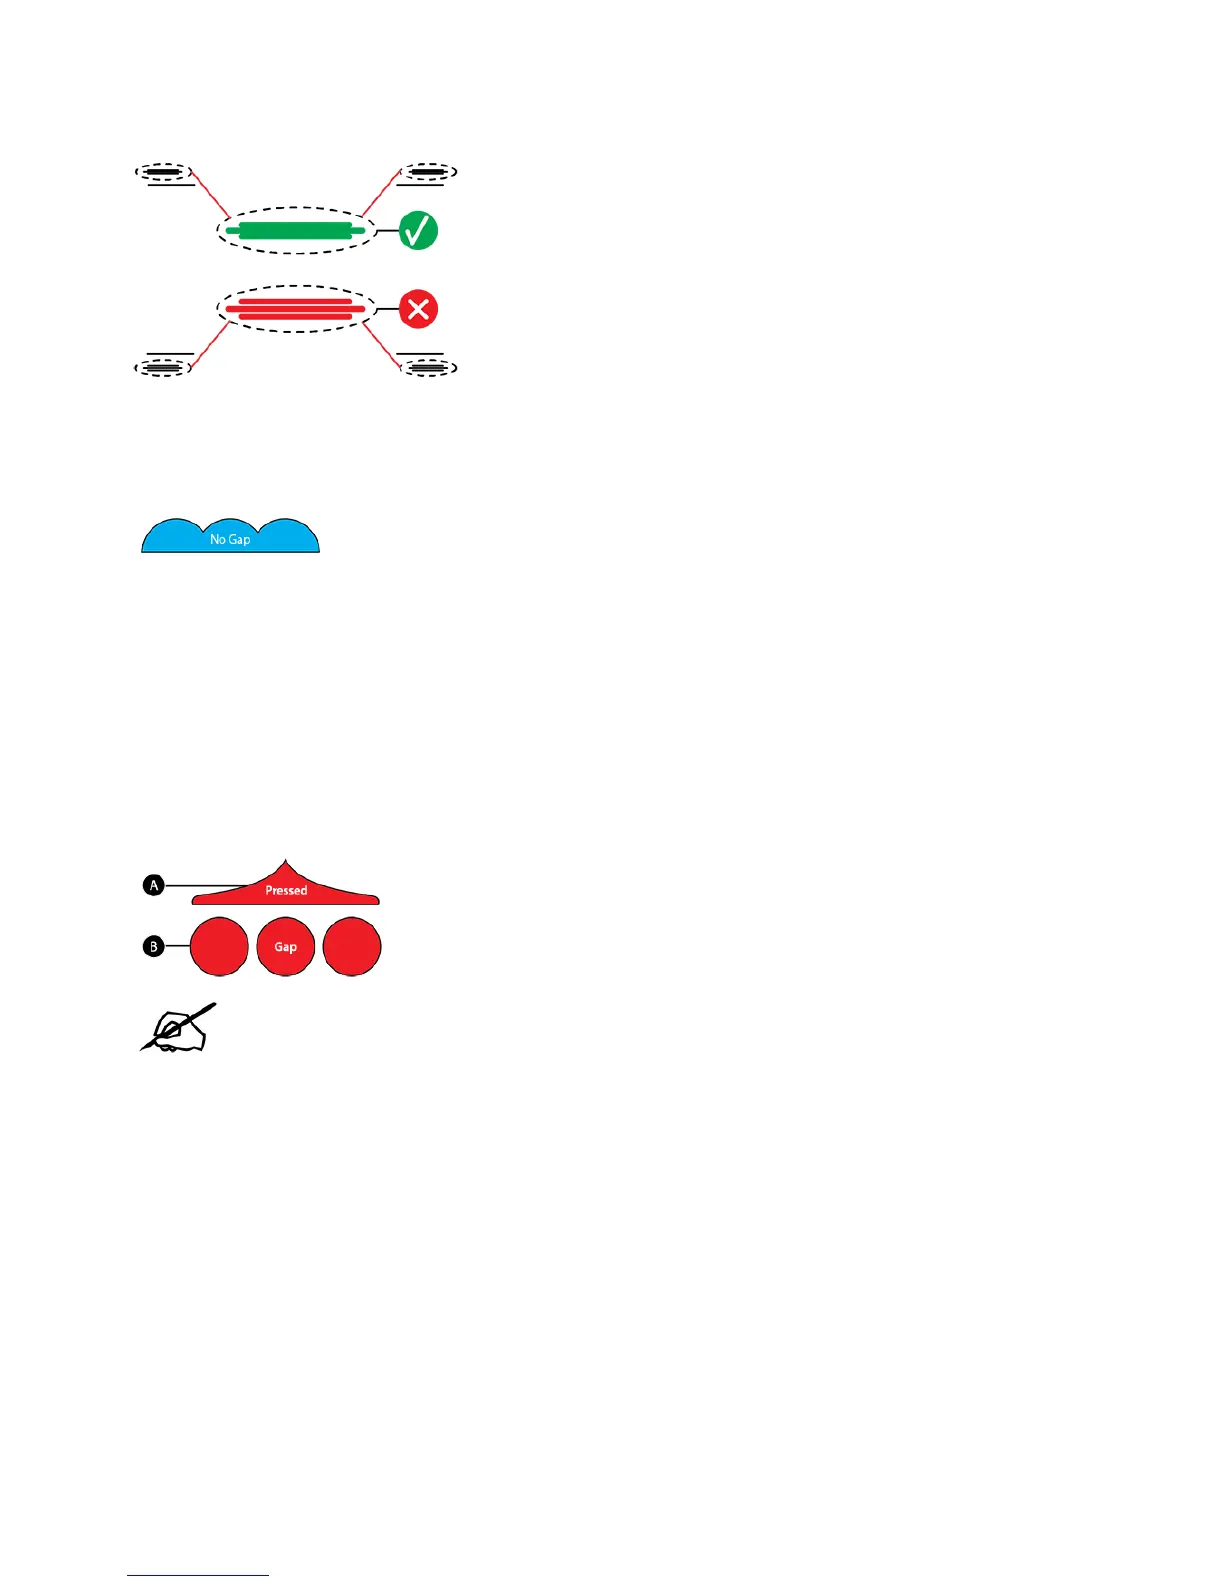
Acceptable Print Pattern
The Print Pad Level calibration file should print with no gap between the Print Pad Level calibration lines
and the baselines. The illustration indicates an acceptable print pattern from a profile view.
Unacceptable Print Patterns
If the gap between the print pad and the print jet nozzles is too small, the Print Pad Level calibration lines
will press in and scrape the baseline. If all four corner calibration points appear like the pressed profile
illustration (A), turn the three (3) print pad adjuster knobs clockwise (right) 1-step to increase the gap.
Reprint the Print Pad Level calibration print again.
If there is a gap between the Print Pad Level calibration lines and the baselines like the illustration (B), turn
the three (3) print pad adjuster knobs counter-clockwise (left) 1-step to decrease the gap. Reprint the
Level Gap calibration print.
NOTE: Once all four corner Print Pad Level calibration points are correct, verify the Z-
Gap to ensure that it is still correct.