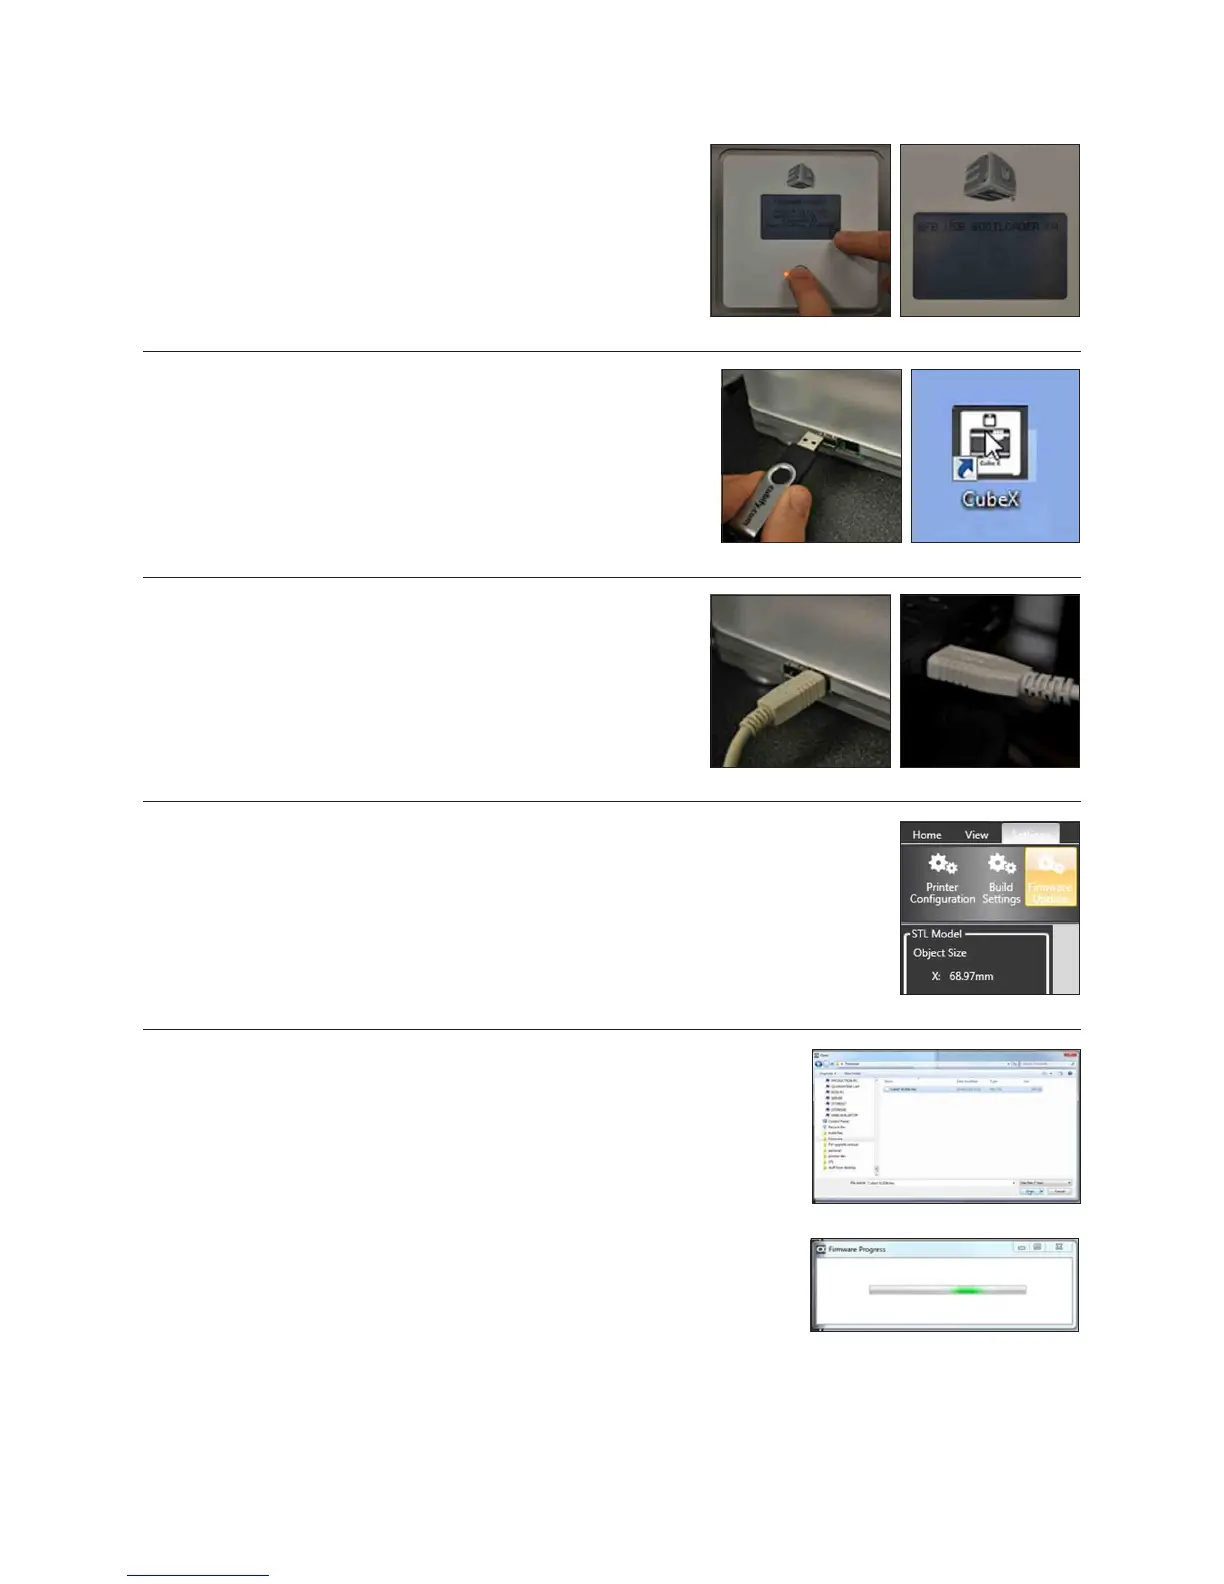
12. The CubeX software will then open windows explorer. Navigate to the
rmware you wish to install and open it. (Fig. 119)
13. The CubeX software will now install the rmware onto the CubeX printer. (Fig.
120)
14. Once the rmware is installed unplug the printer from the main power for
30 seconds and unplug the USB from the computer. (If you are upgrading
from rmware version 1.01, please skip to the section RESTORING THE
SETTINGS TO YOUR CUBEX 3D PRINTER FIRMWARE FROM V1.01)
33
Fig. 119
Fig. 120
Fig. 114
Fig. 116 Fig. 117
Fig. 118
Fig. 115
Fig. 112 Fig. 113
7. Press the tick on the screen to put the CubeX 3D Printer into boot
loader mode. (Fig. 112 & 113). Release the function button after
“Setting saved” message disappears. Your printer is now in rmware
mode.
8. Remove the USB stick from the CubeX 3D Printer. (Fig. 114)
9. Open the CubeX software on your computer. (Fig. 115)
10. Plug your CubeX into the computer using the PC connection USB
port. (Fig. 116 & 117)
11. Navigate to the settings tab to the CubeX software and press the Firmware update button.
(Fig. 118)