Configuration
29
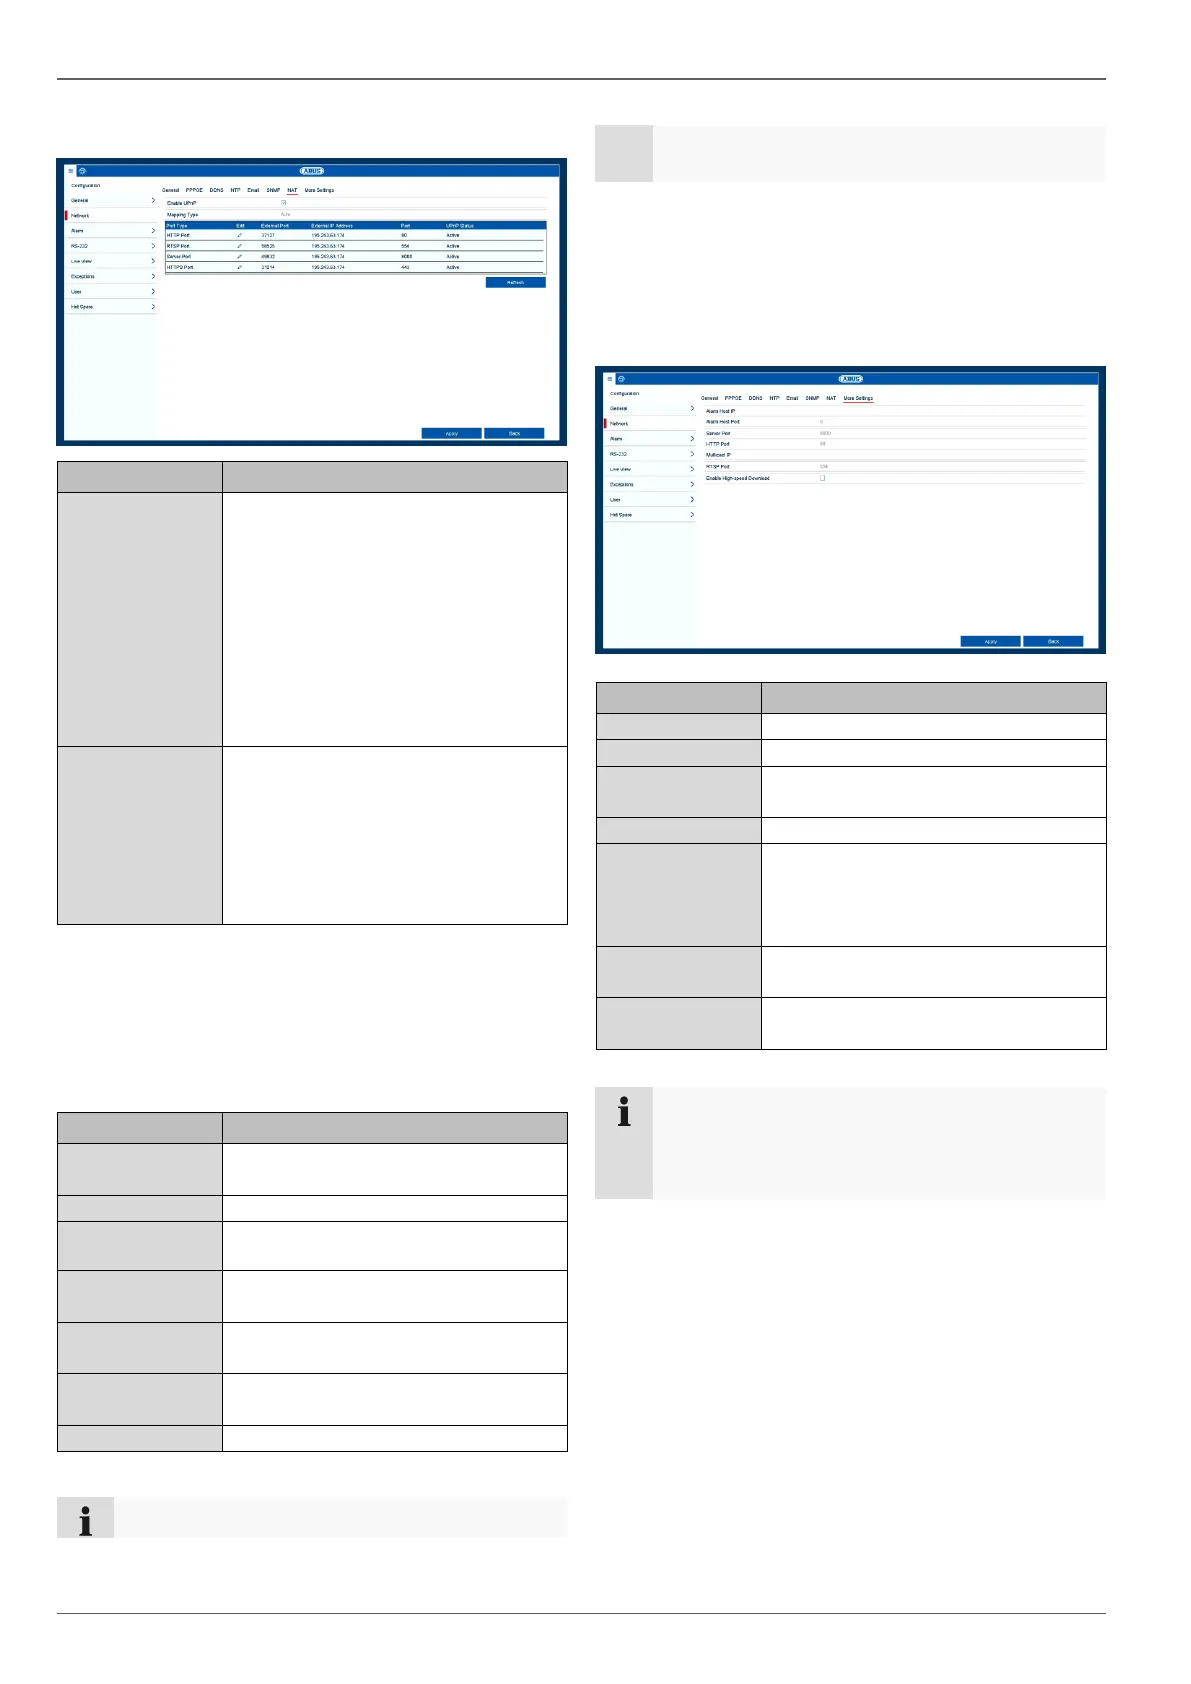
NAT tab
Tick the box to enable visibility on an
IP network. When this function is acti-
vated, port forwarding is automati-
cally entered in the router for all net-
work ports (provided that UPnP is en-
abled in the router).
If UPnP is enabled, the network ports
configured by UPnP are transferred
to the ABUS server (provided that
ABUS DDNS is enabled).
For "manual" settings, the network
ports can be manually defined using
the "Edit" button.
For "auto" settings, the recorder
checks for free network ports on the
router and defines the port numbers
in a random pattern.
Confirm the settings by clicking on Apply and exit the
menu by clicking on Back.
SNMP tab
Select the checkbox to create a con-
nection to SNMP software
The version of the SNMP system
Enter the "Key" according to the set-
tings of your SNMP software.
Enter the "Key" according to the set-
tings of your SNMP software.
Enter the IP address for the SNMP
manager
Enter the trap port (default: 162)
SNMP is used for monitoring the device status.
For this you need suitable SNMP software.
Confirm the settings by clicking on Apply and exit the
menu by clicking on Back.
More Settings tab
Network address of the CMS station
Port for your CMS station
Port for data communication (default:
8000)
Port for the web server (default: 80)
You can enter the multicast IP here
too in order to minimise traffic. The IP
address must correspond to the one
in the video surveillance software.
Enter the RTSP port
(Default: 554).
Enable high-
speed download
Tick the box to enable high-speed
download
Server port 8000 and HTTP port 80 are the stand-
ard ports for remote clients and remote internet
browser access.