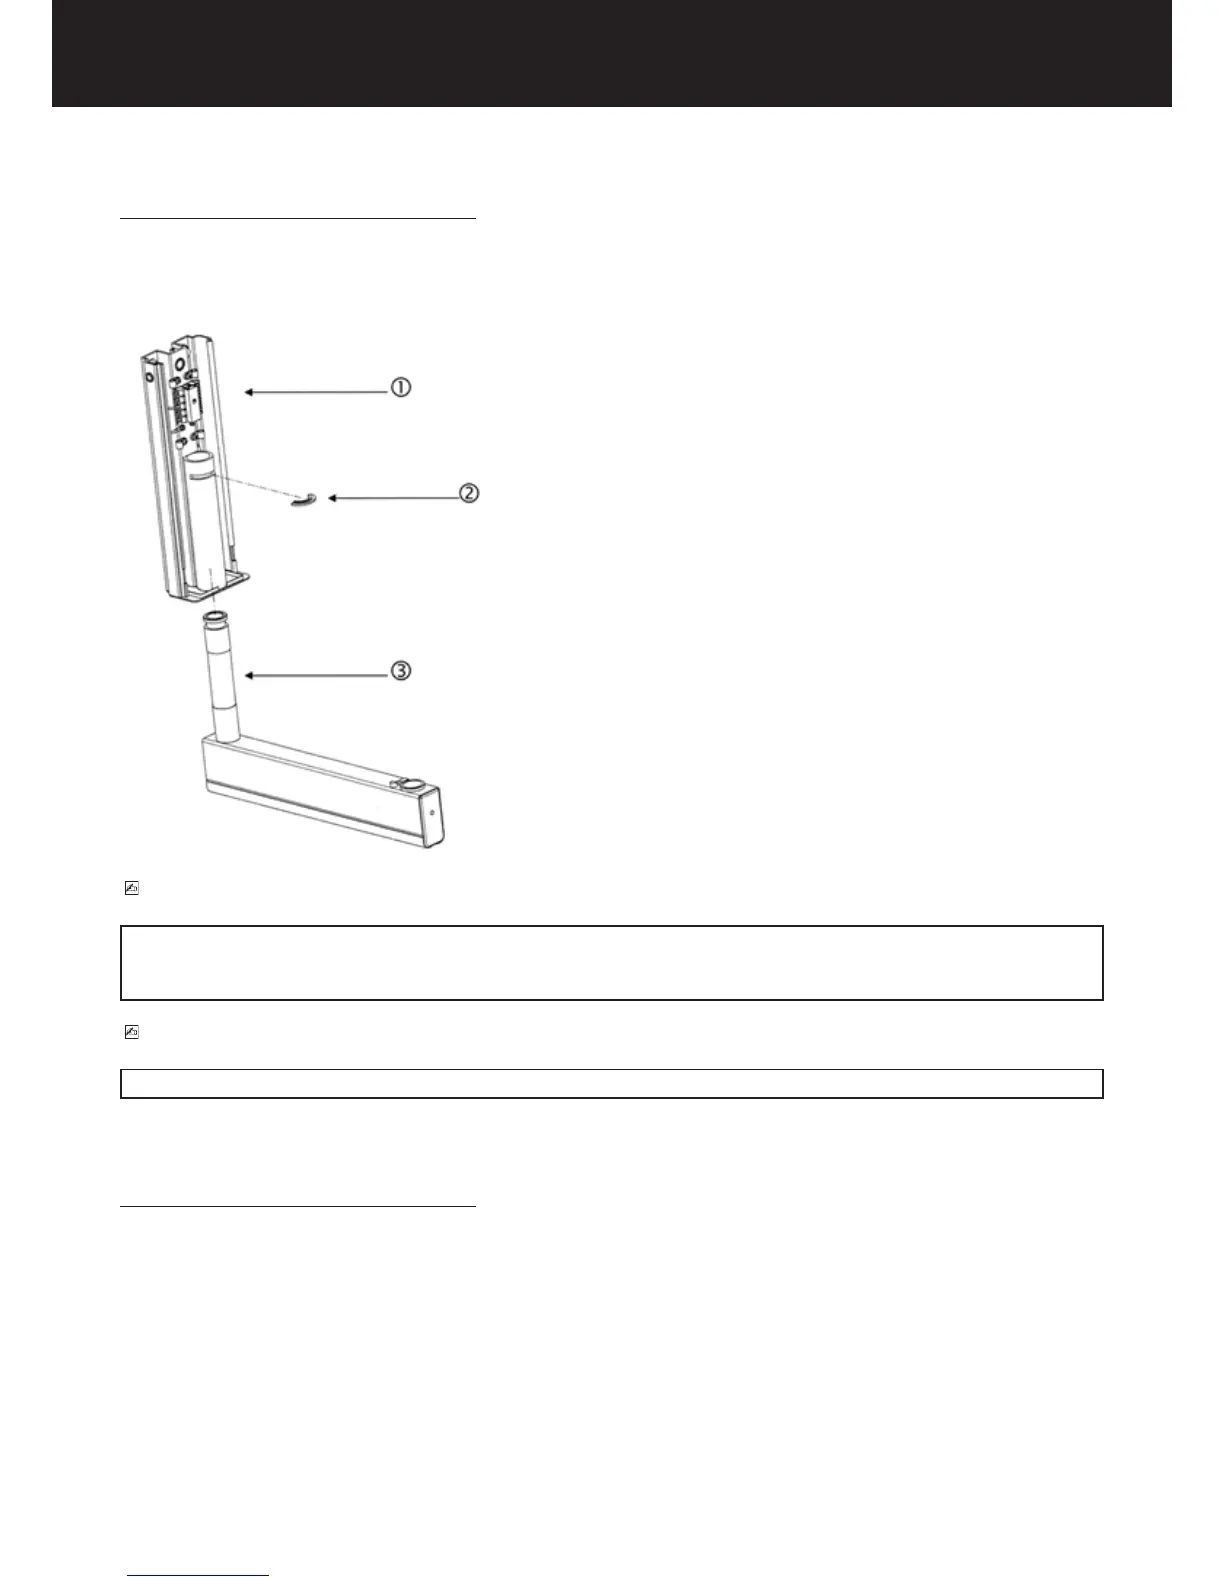
ASSEMBLY INSTRUCTION (refer to Fig. 8)
1. Take out the bracket from the packaging.
2. Insert the bracket pin 3 into the wall plate 1 (upwards).
3. Insert the supporting rest 2.
PLEASE NOTE
Prevent all foreign matters (ground, dust, cement, etc.) from settling on the pin seat.
The pin must slide freely in its seat.
If required, thoroughly clean and lubricate with grease Molikote D.
PLEASE NOTE
Check accurately with a line level instrument, the exact concurrency between the bracket and the ground oor.
4.5. ASSEMBLING THE PANTOGRAPH ARM
ASSEMBLY INSTRUCTION (refer to Fig. 9)
1. Take out the pantograph arm from the packaging.
2. Remove the bracket plug 1 by unscrewing the xing screw 2.
3. Slide the bracket guard slat 3.
4. Insert the pantograph group cable 5 into the bushing 4 and then the pantograph pin 6.
5. If required, clean the pin and the bushing and lubricate with grease Molikote D.
6. Insert the electric cable into the bracket housing 7.
7. Assemble the guard slat.
8. Insert the cable into the bracket and push it until reaches the pin outlet near the supply terminal board.
Fig. 8