18
INSTALLATIONCONFIGURATIONOPERATION
FURTHER
INFORMATION
INDEX
6 Enter the details for this transmitter, including two separate passwords:
• The Admin Password is required to administer the conguration details only,
• The Access Password allows you to restrict who is allowed to connect to this
transmitter. When the Access Password is set, a user will be prompted to enter it
when rst attempting to add this transmitter node to their receiver node’s channels
list; if the Access Password is left blank, there will be no access restrictions.
Note:TheNameandDescriptioneldsforeachentrycannotbeleftblank.
7 The basic conguration for this node is now complete but it still needs to be
registered within the XDIP network. If the new node is not already physically linked
into your XDIP installation, connect it now (see page 11).
8 Using the console peripherals connected to a receiver node within the installation,
enter the receiver’s OSD: Press CTRL + ALT + C *
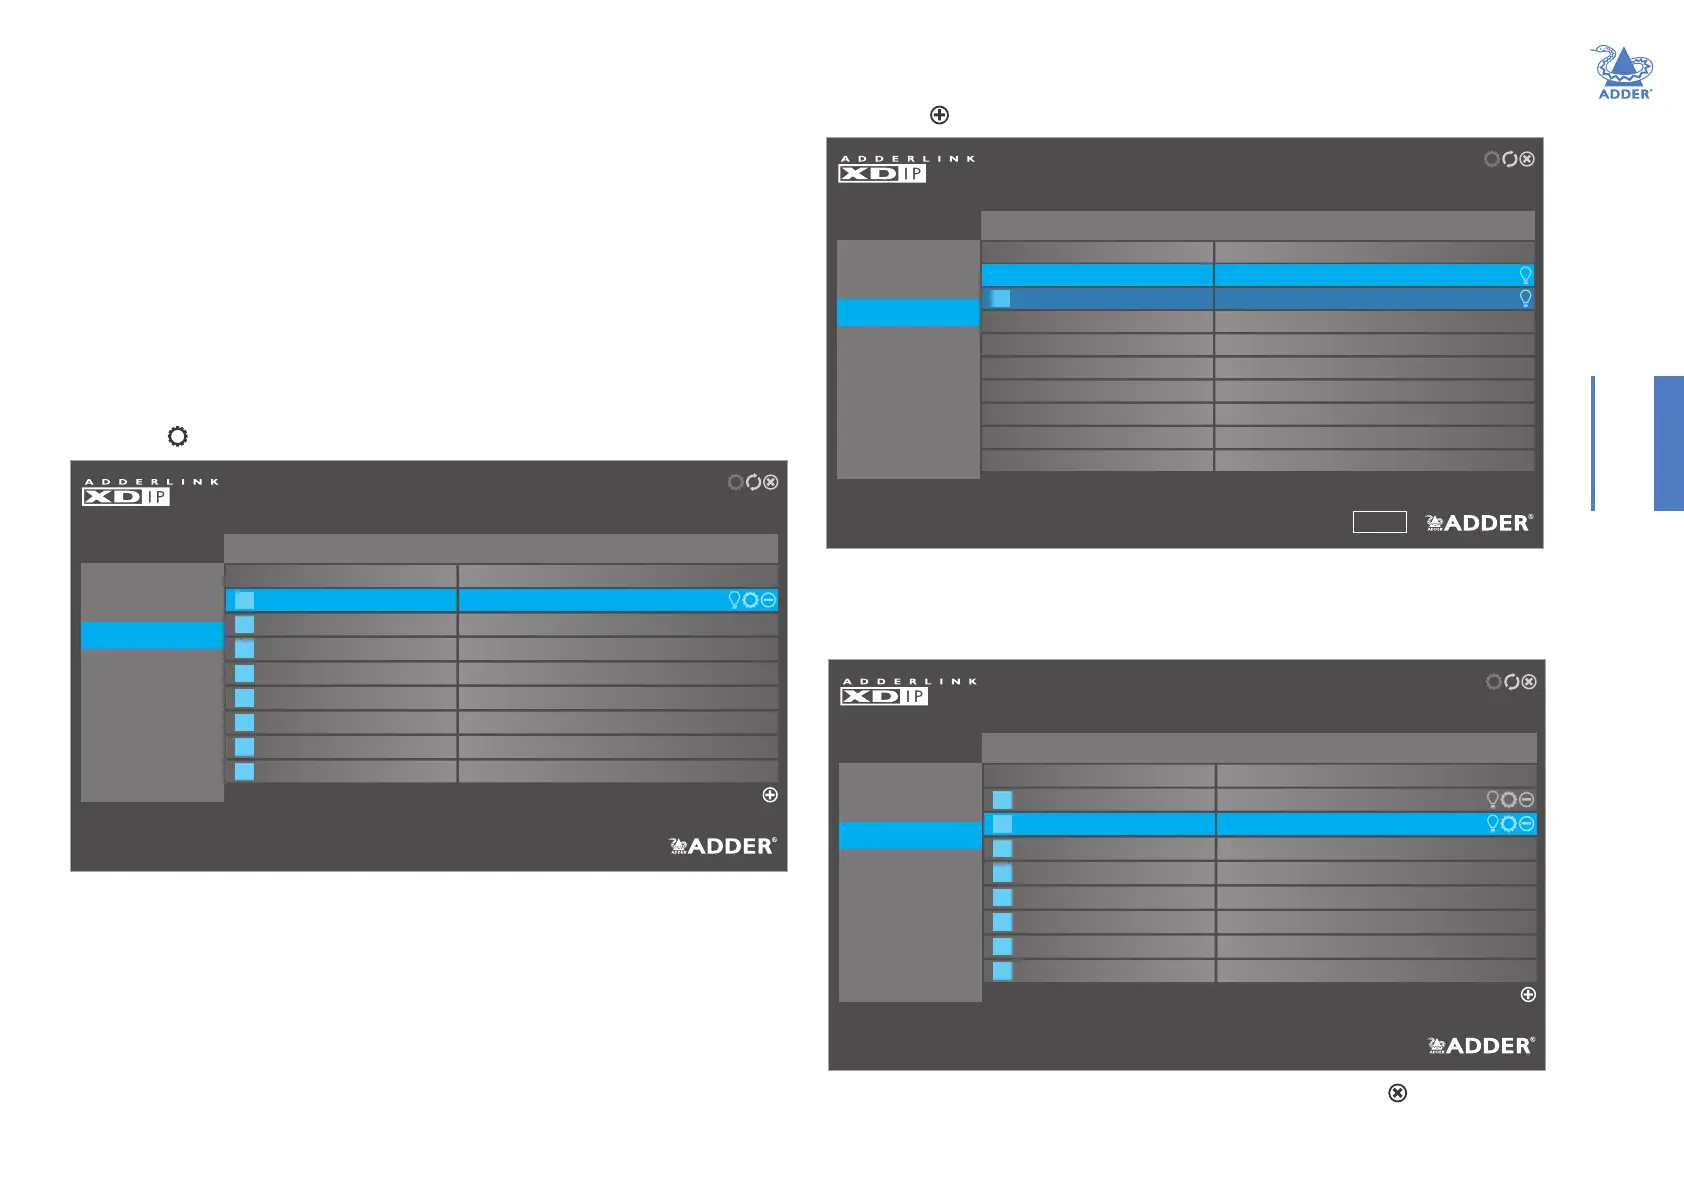
9 Click the icon in the top right corner and then choose the Setup Channels page:
INITIAL CONFIGURATION (continued)
3
4
5
6
7
8
Add Channels
OSD Settings
Setup Channels
Manage Ports
Advanced
Software Upgrade
ADMIN - Channel List
Receiver 1
Administer the Selected Channels
General
#
1
Name
Transmitter 1
Description
Description
RECEIVER
Drag and drop the channels or use the return and arrow keys to reorder the list. Identify,configure
or delete the selected channels or add other transmitters to the channels list.
2
10 Click the icon in the lower right corner to list all available transmitter (and SoL) nodes:
ADMIN - Channel Selection
Receiver 1
Select which nodes to add as channels
General
# Name
Transmitter 1
Description
Description
Description
OSD Settings
Setup Channels
Manage Ports
Advanced
Software Upgrade
RECEIVER
Select which nodes to add as channels.‘SoL’marks nodes that are yet to be configured and ‘TX’
denotes available transmitters.
Back
1
Transmitter 2
TX
11 Move the highlight to your new node and select it so that the TX prex becomes a
channel number (the shade of the highlight will also change). Repeat this step for any
other new nodes that need to be included.
12 Click the Back button to return to the Channel List:
* Note: The standard hotkey combinations can be changed. See page 21.
3
4
5
6
7
8
Add Channels
OSD Settings
Setup Channels
Manage Ports
Advanced
Software Upgrade
ADMIN - Channel List
Receiver 1
Administer the Selected Channels
General
#
1
Name
Transmitter 1
Description
Description
RECEIVER
Drag and drop the channels or use the return and arrow keys to reorder the list. Identify, configure
or delete the selected channels or add other transmitters to the channels list.
2
Transmitter 2Description
Your new node is now integrated and ready to be selected. Click the icon in the top
right corner to exit from the Admin menu. See page 30 for details about Operation.