17
INSTALLATIONCONFIGURATIONOPERATION
FURTHER
INFORMATION
INDEX
INITIAL CONFIGURATION (continued)
To add a new transmitter
Use this procedure to congure a new Start of Life node into a transmitter for inclusion
within an existing installation:
1 Connect your console devices (video monitor, USB keyboard and/or mouse) plus
power input to the new Start of Life node (as discussed in the Installation section).
For this procedure the new node can be congured either in isolation or fully linked
into your XDIP installation, as required.
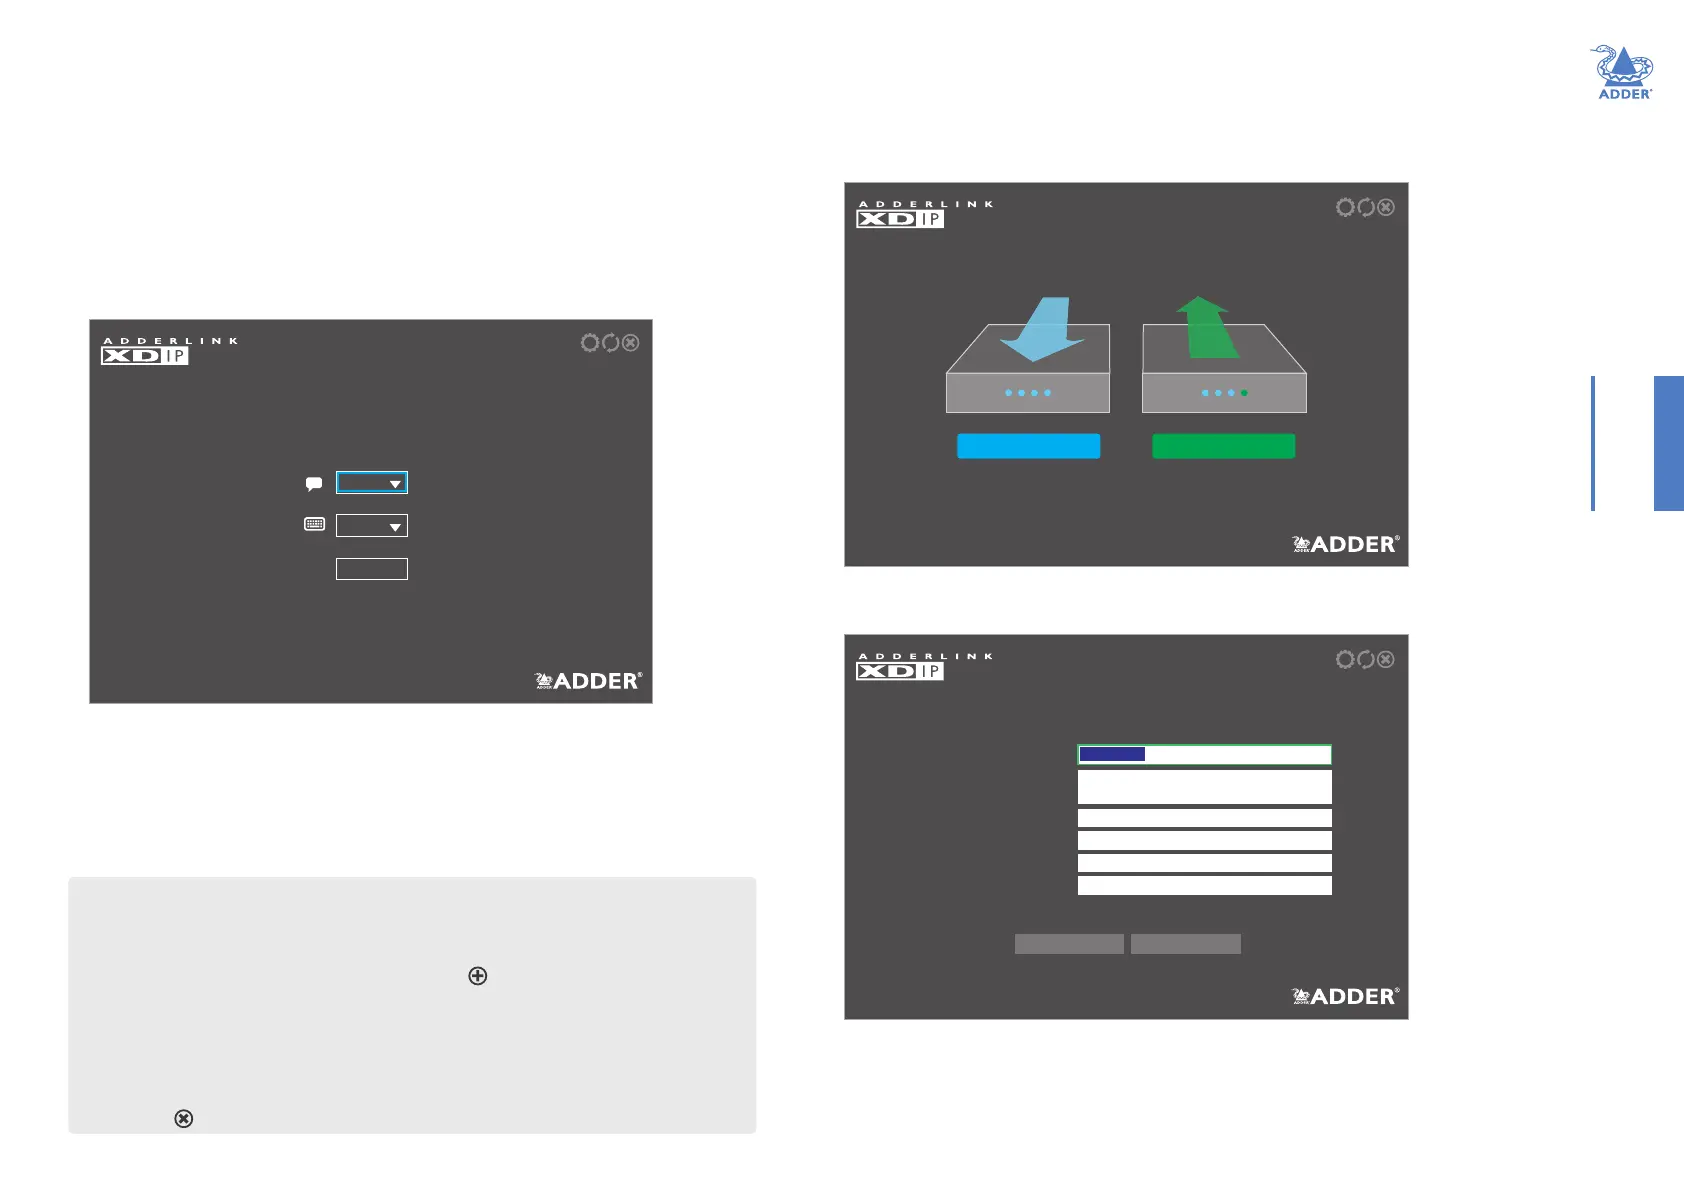
2 You should see the following opening page:
English
Welcome
Please choose your language and keyboard layout.
00:0F:58:02:DF:3B C1.00.00|
gb
OK
RECEIVER
TRANSMITTER
SETUP - Receiver or Transmitter?
Is this node a receiver or transmitter? After restoring to defaults
you can change this in the future.
3 If necessary, change the language and keyboard layout.
Note: The node’s PWR indicator should be red at this stage. If not, restore the node to its
default settings (see page 19).
4 Click OK to continue.
You will now be given a choice of turning this Start of Life node into either a receiver
or a transmitter:
5 Click the TRANSMITTER option. You can now enter the details for the node to which
your console peripherals are currently connected:
SETUP - Basic Information
Enter the name,description, and admin and access password for
this transmitter.
Transmitter Name
Transmitter Description
New Admin Password
NewAccess Password
Confirm Admin Password
Confirm Access Password
Description
Password for Node Configuration
Password for User Access
Password for Node Configuration
Password for User Access
Transmitter 2
Cancel OK
continued
Alternative shortcut for adding a new transmitter
1 Connect your new node fully into the XDIP installation.
2 From a receiver, enter the OSD and then enter the Admin menu.
3 Choose the Setup Channels page and click the icon in the lower right corner.
4 Click the new SoL entry in the list.
5 Congure the necessary transmitter details and click OK.
6 Click the Back button to return to the Channels List and, if necessary, adjust the
position of the new transmitter within the list.
7 Click the icon to exit to the OSD channel list.