Chapter 1 Installation and setup
18
Osmo1® Single-Sample Micro-Osmometer User Guide
4. Gently close the printer door with the unrolled paper
end outside the printer slot (Figure 3). The door
snaps closed.
NOTE: After the paper roll is installed, always use the
paper-advance button indicated in Figure 3 to
feed the paper through the printer rollers.
Pulling on the paper can damage the printer.
The instrument must be powered on for the
paper-advance button to work. (See
section1.6, “Powering up the instrument,” on
page19.)
Paper-advance button
Figure 3: Printer paper loaded, door closed
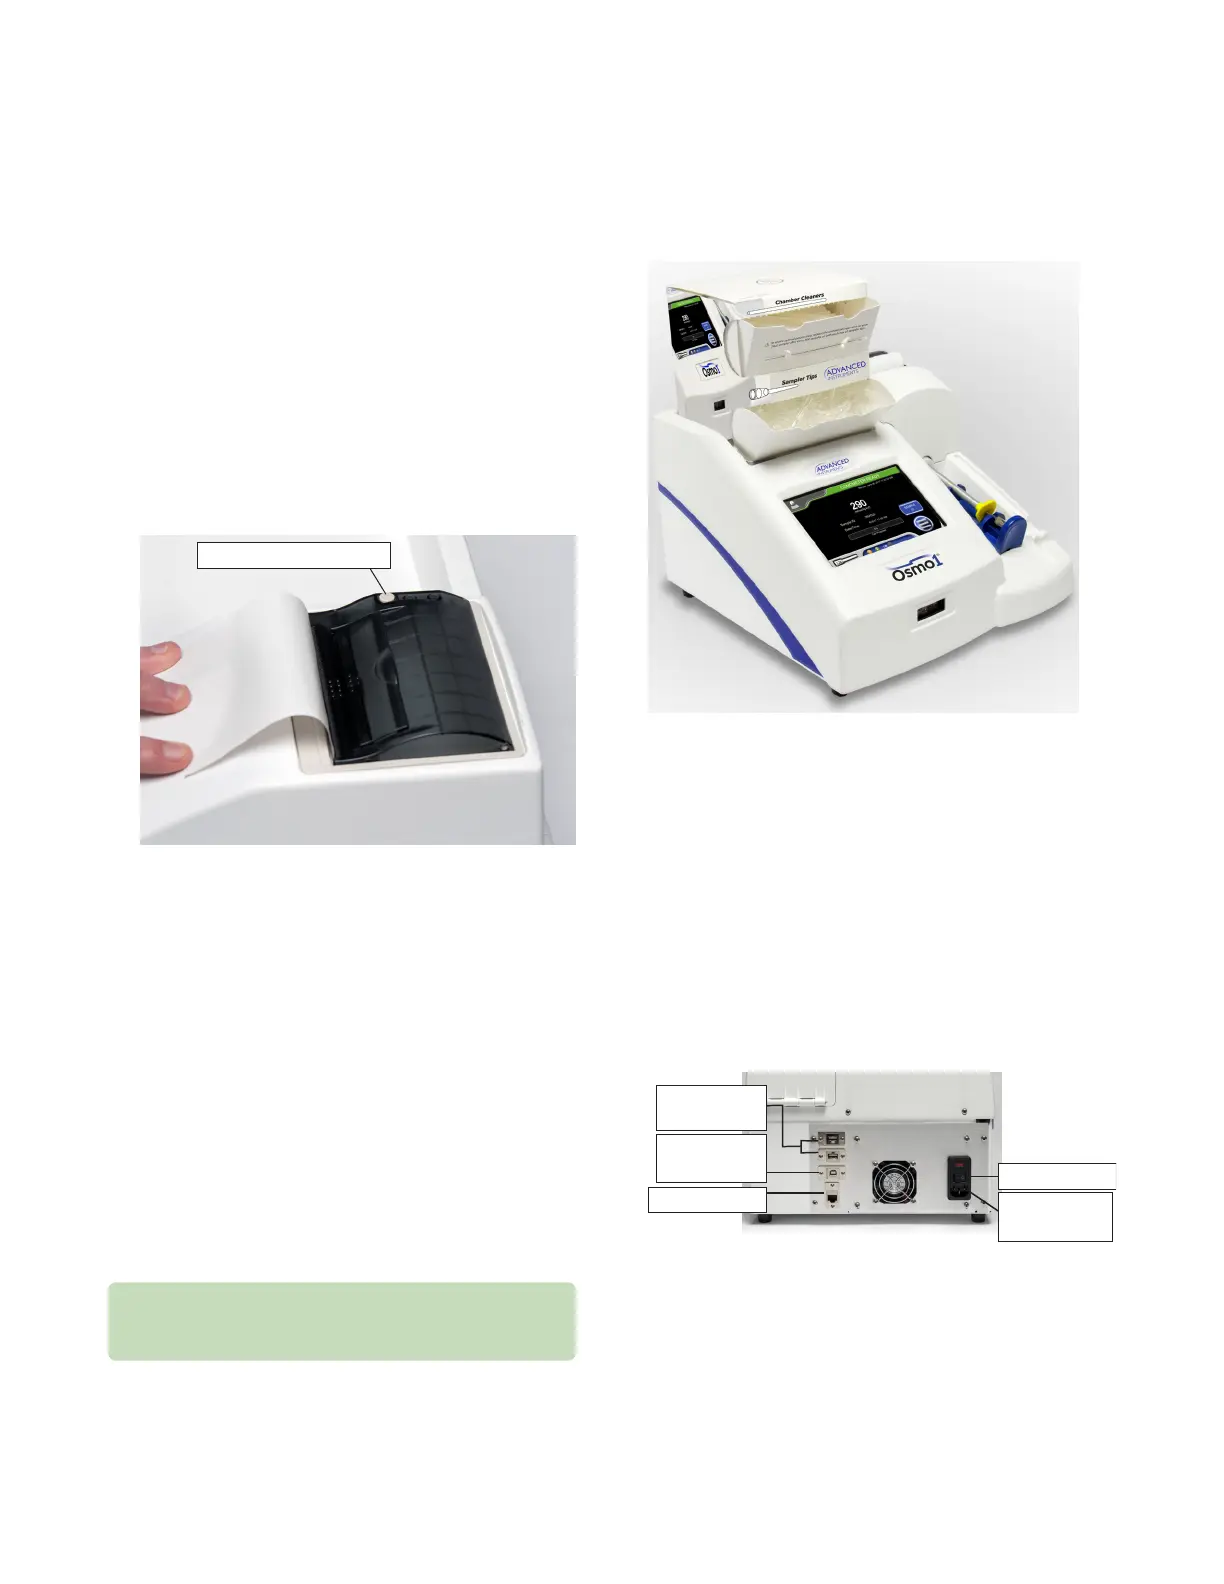
1.4 Placing the Micro-Sample Test Kit on the
instrument
The Micro-Sample Test Kit contains a supply of
consumables required for testing: 500 chamber cleaners,
500 sampler tips, and one plunger wire.
A Micro-Sample Test Kit must be in place on the top left
of the instrument before testing can begin. As shown in
Figure 4, the box must be oriented so that:
• The photo of the instrument and the box label are
toward the back.
• The dispensing flaps for the chamber cleaners and
sampling tips are toward the front.
If a Micro-Sample Test Kit is not in place on the
instrument when you attempt to run a test, you will
receive the error, “AI consumable box not detected.”
Figure 4: Micro-Sample Test Kit in correct position to begin testing
1.5 Connecting to a network (optional)
To connect the Osmo1 to a laboratory information
system (LIS) and/or to a local area network (LAN), plug
an Ethernet cable that connects to your network into the
Ethernet port on the back of the Osmo1 unit (Figure 5).
NOTE: You must also configure the communication
settings in the Osmo1 software. For more
information, see “Setting up LIS communication”
on page43 and “Configuring a LAN
connection” on page45.
Power switch
USB 2.0
Type B port
Ethernet port
Plug for
power cord
USB 2.0
Type A port
Figure 5: Ethernet and USB ports