Chapter 6 Settings
46
Osmo1® Single-Sample Micro-Osmometer User Guide
7. Power o the Osmo1 and wait 10 seconds; then
power on the instrument.
NOTE: This step is required for the system update to
take aect.
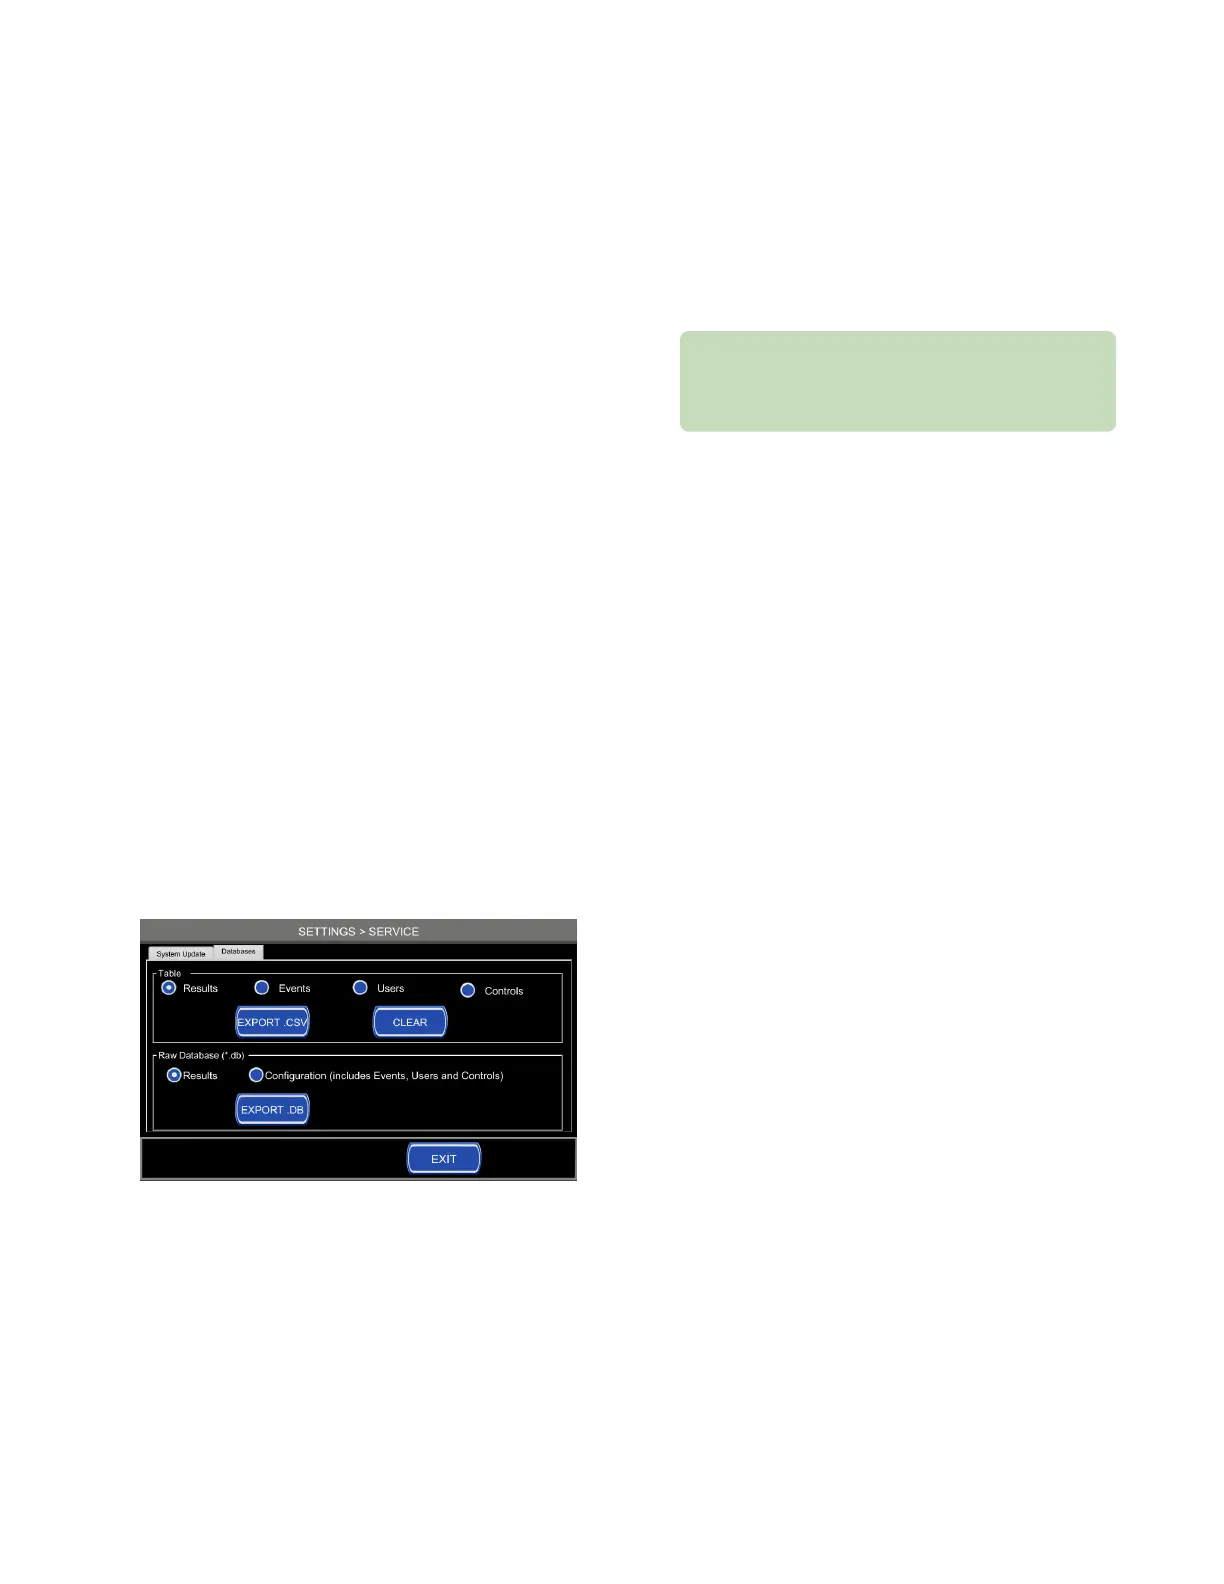
Exporting Osmo1 data
You can export tables from the Results, Events, Users,
and Controls databases in .csv format or in the raw
database (.db) format. You can also choose to clear the
databases.
To export data:
1. From the Settings menu, tap Service.
The system prompts you to log in.
2. Select the appropriate username from the list and
enter the corresponding password.
NOTE: If individual user accounts are not configured,
log in under the Admin account (see “Default
user accounts” on page36).
The Service screen displays, with the System Update
tab in front (Figure 62).
3. Select the Databases tab to bring it to the front
(Figure 63).
Figure 63: Databases tab of the Service screen
4. Use the radio buttons to select the option you want
to export; then insert a thumb drive into the USB
port on the back of the Osmo1 and tap Export.
5. If you want to clear the tables after exporting, select
the table (Results, Events, Users, or Controls); then
tap Clear.
CAUTION: Clearing databases deletes the data and
it cannot be recovered. Be sure that you want to do
this before tapping Clear. For more information, see
“Clearing Osmo1 data” on page49.
6. When you are finished, tap Exit to return to the
Settings menu.
6.14 Assigning restrictions
A user with supervisor-level access can define whether
operator-level users are allowed to perform the following
functions:
• Change language
• Change LIS/LAN configuration
• Change date/time
• Change hardware options
• Change probe resistance
• Calibrate the instrument
NOTE: All users at the operator level have the same
restrictions. You can set up operator level
restrictions before or after adding users to the
Osmo1.
A supervisor can also perform the following tasks via the
Restrictions screen:
• Define password expiration frequency
• Define how many points are used for calibration
• Configure the instrument to require User ID and/or
Sample ID for testing
To define operator-level restrictions or perform other
tasks available from the Restrictions screen:
1. From the Settings menu, tap Restrictions.
The system prompts you to log in.
2. Select the appropriate username from the list and
enter the corresponding password.
NOTE: If individual user accounts are not configured,
log in under the Admin account (see “Default
user accounts” on page36).
The Restrictions screen opens with the Restrictions
tab in front (Figure 64).