Chapter 6 Settings
42
Osmo1® Single-Sample Micro-Osmometer User Guide
5. If necessary: Enter the nominal value for this control.
NOTE: The system populates this value automatically
for Advanced Instruments controls and
reference solutions. If you are not using
Advanced Instruments products, you must
enter the value manually.
NOTE: To enter the value manually, tap the keyboard
icon beside the Nominal Value field to open a
keypad; then type the appropriate value and
tap Enter.
6. If necessary: Enter the lower and upper limits for the
standard deviation range.
NOTE: The system populates these values
automatically for Advanced Instruments
controls and reference solutions. If you are not
using Advanced Instruments products, you
must enter the values manually.
NOTE: To enter a value manually, tap the keyboard
icon beside each respective field (Lower and
Upper) to open a keypad; then type the
appropriate value and tap Enter.
7. When each field on the Add/Edit Control screen
contains an appropriate value, tap Save.
NOTE: All fields must be filled out to add a new
control.
8. Tap Exit to return to the Controls screen.
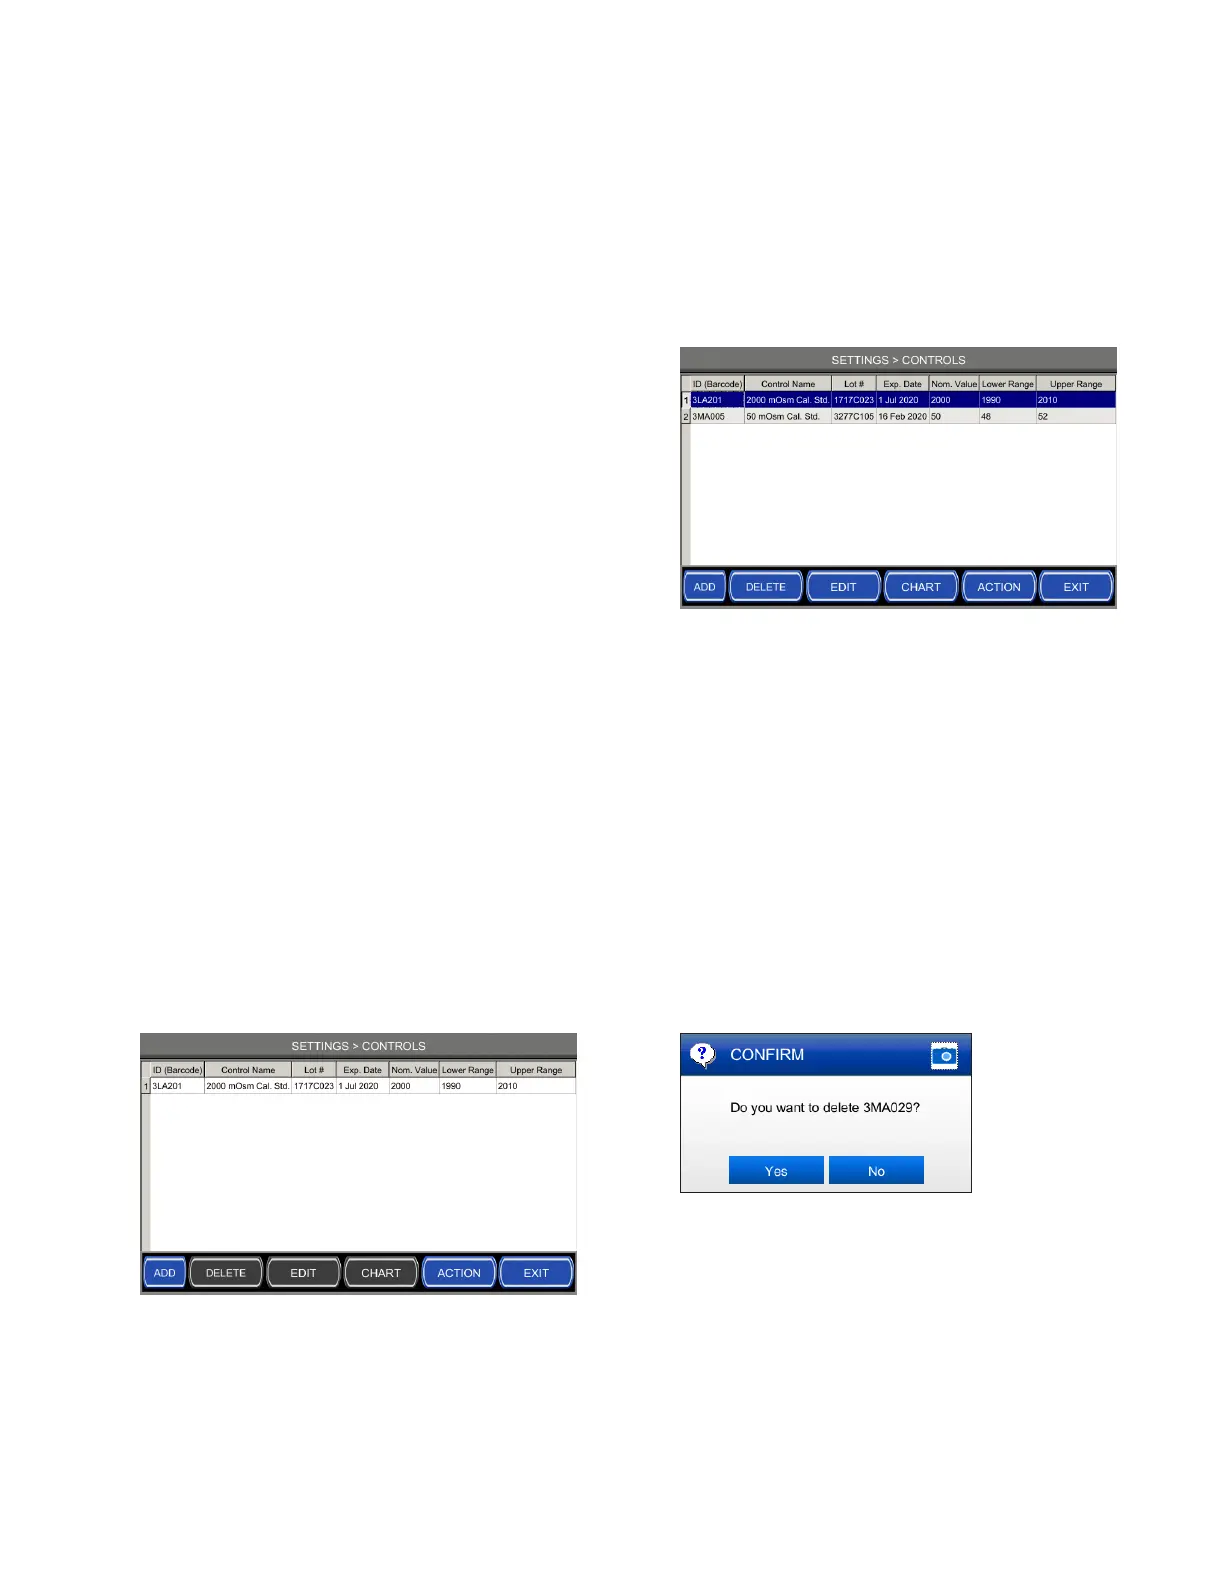
The new control you added now appears in the list
(Figure 53).
Figure 53: New control appears in list
Editing a control
1. From the Controls screen, tap the control you want
to edit so that it is highlighted (Figure 54).
Figure 54: Selecting an existing control
2. Tap Edit.
The Add/Edit Control screen displays (Figure 52 on
page41), with the existing parameters for this
control already populated.
3. Make the appropriate changes; then tap Save.
4. Tap Exit to return to the Controls screen.
Deleting a control
1. From the Controls screen, select the control you
want to delete and tap Delete.
A confirmation prompt displays (Figure 56).
Figure 55: Delete-control confirmation
2. At the confirmation prompt, tap Yes to delete, or No
to cancel the delete action.