50
Osmo1® Single-Sample Micro-Osmometer User Guide
Chapter 7
Diagnostics
This chapter describes basic diagnostic procedures that
you can perform.
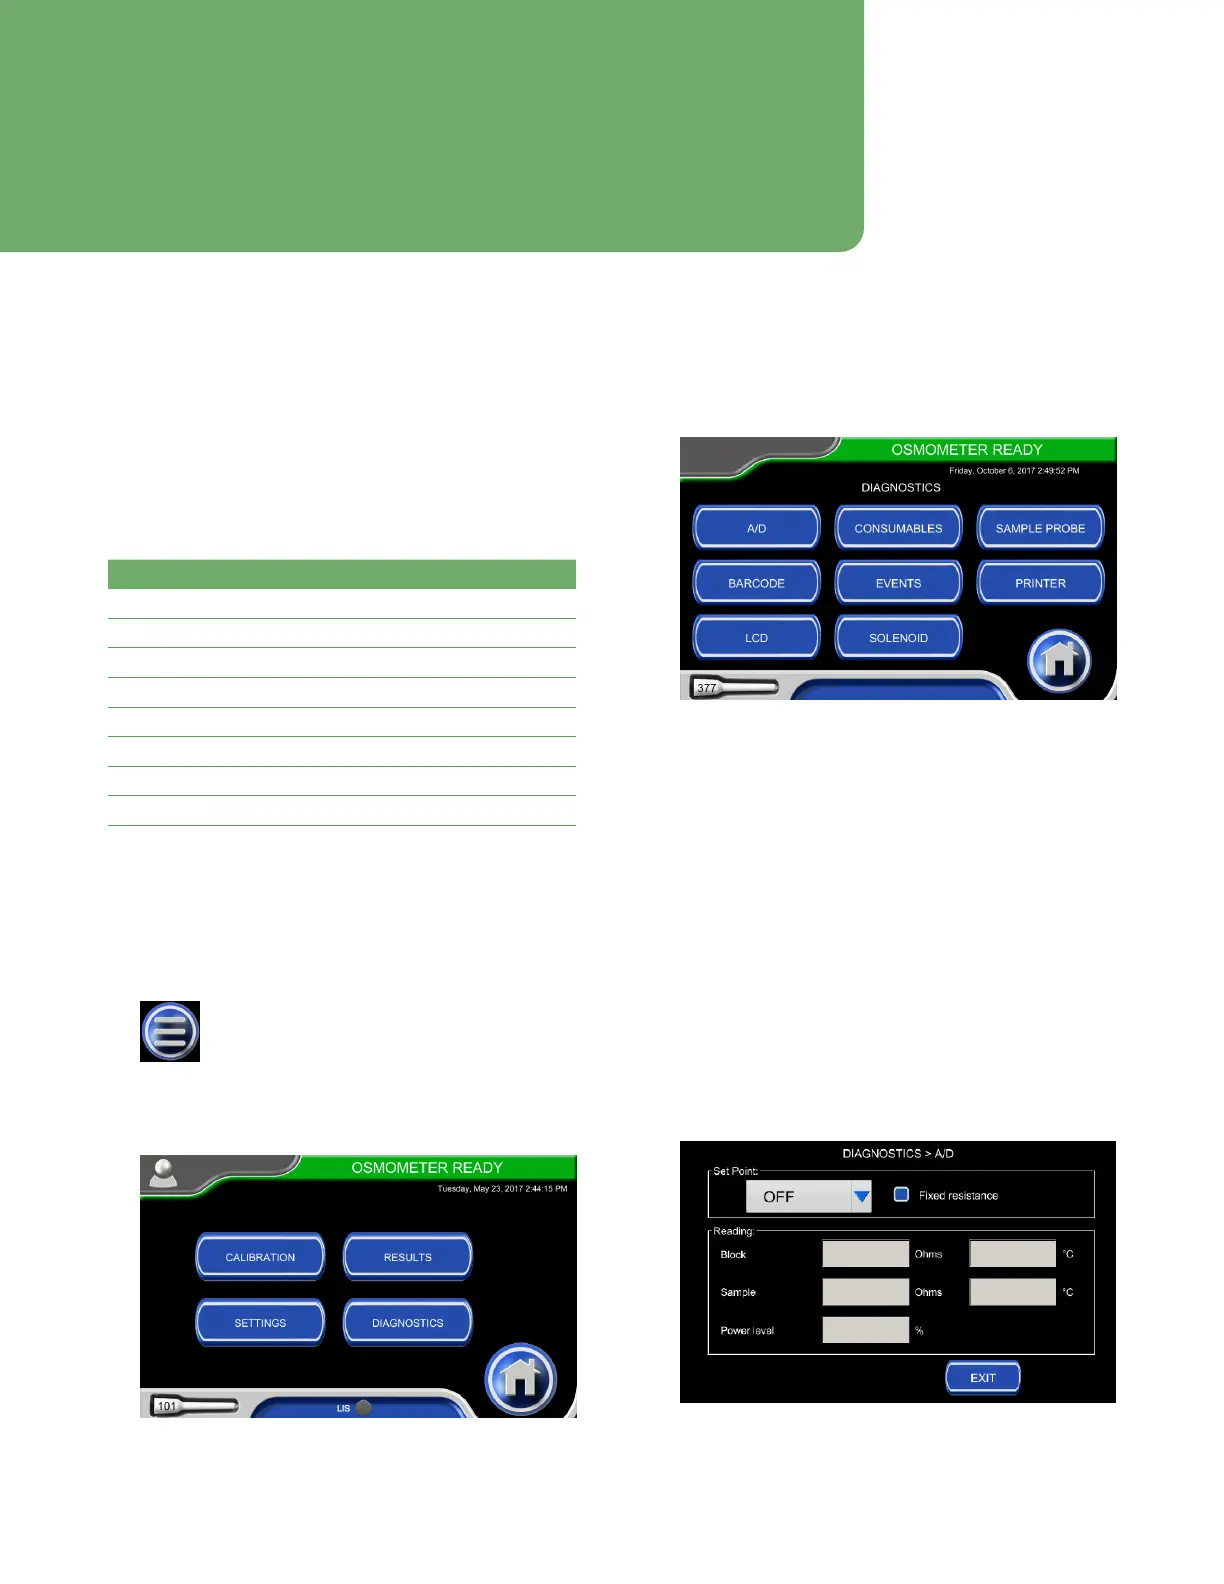
7.1 Accessing the Diagnostics menu
The Diagnostics menu (Figure 73) provides access to the
functions listed in Table 9.
Function Description/Use
A/D Analog to digital circuit testing
Consumables Micro-Sample Test Kit reader test
Sample Probe Measure the sample probe resistance
Barcode Test the barcode scanner
Events View/export system events log
Printer Test the internal printer
LCD Inspect screen for dead pixels
Solenoid Executes multiple impacts
Table 9: Diagnostics menu buttons
To access the Diagnostics menu:
1. From the Home screen, tap the menu icon
(Figure 71).
Figure 71: Menu icon
The Main menu displays (Figure 72).
Figure 72: Osmo1 Main menu
2. From the Main menu, tap Diagnostics.
The Diagnostics menu displays (Figure 73).
Figure 73: Diagnostics menu
From the Diagnostics menu, you can tap a button to
select a function, (described in the following sections),
or you can tap the Home button to return to the Home
screen.
7.2 A/D
The A/D function tests the performance of the analog to
digital converter (A/D), sample probe, block probe,
cooling assembly, and the eciency of heat transfer
between the components of the cooling assembly.
Results are presented as resistance (ohms), temperature
(°C), and power level %.
1. From the Diagnostics menu, select A/D to open the
A/D Diagnostics screen (Figure 74).
Figure 74: A/D screen